Making a simple programming language on a micro:bit

I’ve been exploring writing a very, very simple text-based language for the micro:bit, in Python. I think it could be an educational project in two ways:

  • A task for older students to design and create their own language.
  • Make a text-based language for younger students that’s simpler than Python, simpler even than BASIC or TinyBASIC.

I made a few rules for myself, the main one being that no quotation marks will be used. This poses a few challenges, but I wanted users to be able to code it using just words and numbers and maybe a few operators like =, +, -, <, >

It should also be so relaxed about variable types it makes even Python look uptight.

This is still very much a work in progress, but I think it’s got potential. Its main differences from BASIC are:

  • Commands you enter aren’t executed, they get added to the program listing
  • Line numbers are assigned automatically and run from 0 in steps of 1
  • You can delete and amend lines but you can’t, currently, insert lines. I should probably fix this.

Here’s how it works.

You’ll need a BBC micro:bit and a computer. You type your program on the computer in a serial console (which can just be a web page), and the micro:bit will output to the console, its LED display and sound on pin 0 (or the built-in speaker if you have a V2 micro:bit).

Flash the Python program file to a BBC micro:bit and connect a serial console to it. You can use the Chrome browser and either the micro:bit Python editor or an online console like the Chromelabs one. If you use the Python editor, click ‘Connect’ and then ‘Open serial.’

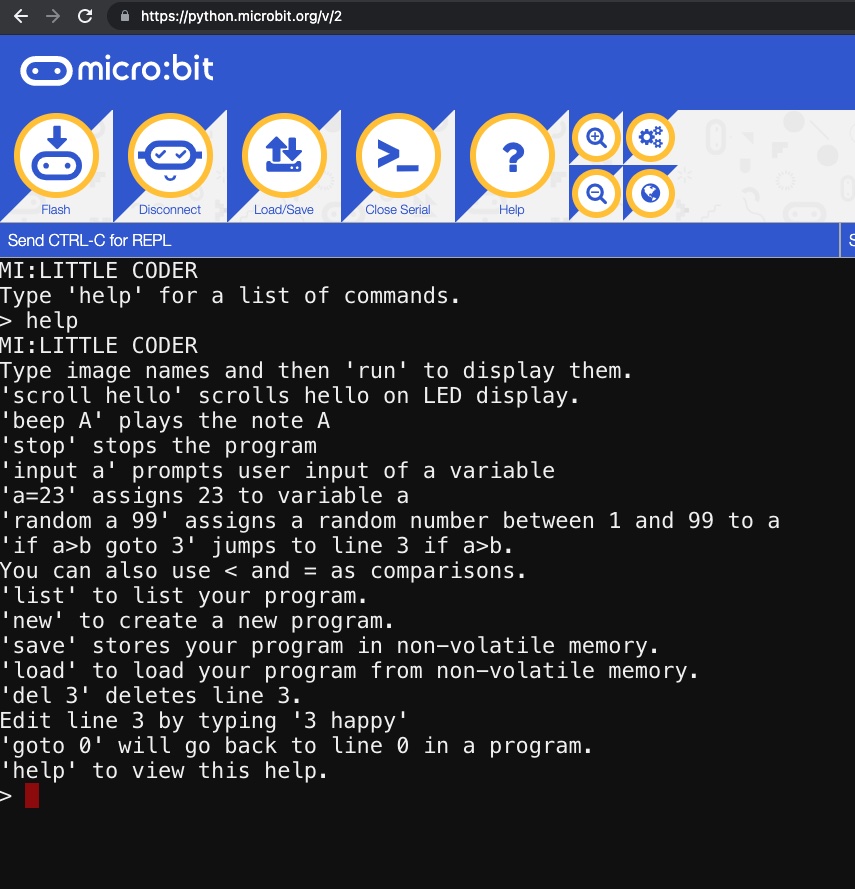
You should now be in ‘Mi:Little Coder’, or ‘smolBASIC’ as I’m now calling it, because it’s smaller than TinyBASIC.

Screenshot of Mi Little Coder

If you enter
> heart
> pacman
> ghost
> run

you should see three icons display on the micro:bit.

Type list and you’ll see your program listed:
0 heart
1 pacman
2 ghost

If you want to get rid of the ghost, type del 2 to delete that line.

You can replace lines by typing a new instruction starting with the line number:
0 rabbit

You can scroll words on the display. Type ‘scroll hello world’ and list your program again:
0 heart
1 pacman
2 scroll hello world

Start a fresh program by typing new

You can play notes and tunes with
play B
play E
play F

You can save and load your program with save and load. You can only save one program at a time, but it’s stored in non-volatile memory, so if you unplug the micro:bit, then plug it back in you can type load to get your last program back. I think this is pretty neat.

I’m not sure this language is ‘Turing complete’ but it must be close: it also has the ability for the user to enter data, store it in variables, test it and branch according to the results.

Here’s a program that asks how old you are and gives different responses in the console:

0 print enter your age
1 input a
2 b=17
3 if a>b goto 6
4 print you are too young to vote
5 stop
6 print you can vote

Have a play with it, and see what you think. It was created on a whim, I know my Python code is terrible, it can be made more compact and should probably work more like BASIC to run commands whether run from a listing or typed direct. Or should it? What do you think?

I’ll also be doing some more reading about the roots of Tiny BASIC – I’ve been enjoying reading ancient copies of the People’s Computer Company from 1975, it’s fascinating to see the concerns and ideas of some of the pioneers of home computing, including those who wanted to create a simple, text-based language that fitted in very little memory on cheap systems and that was given away for free… unlike Microsoft BASIC, you didn’t have to steal or buy Tiny BASIC, it was ‘copy left’ and free.

Posted in computers, microbit | Tagged , , , | Leave a comment

Cheap KIM-1 clone

I’ve written before about how the KIM-1 (my brother’s) was the first computer I ever used, and how the very first programming I did as a child was 6502 assembler rather than BASIC. This led to me to make little machine code machines with micro:bits, and build my own 6502 breadboard computer, based on Ben Eater’s design but adding a hex keypad not a typewriter keyboard.

I was very strict when building my 6502 computer just to use tech that is roughly era-appropriate, eschewing microcontrollers for example. This puritanism is all well and good but caused me to neglect this very neat KIM-1 emulator for the Arduino Pro Mini: the KIM Uno.

You can download the PCB files and get it made yourself, it’s a very simple build and the components are very cheap, really just an Arduino, a couple of 7-segment LED displays, 24 buttons and a few resistors. I was reading the documentation when I got to the line ‘Actually, the software will run on any Arduino.’

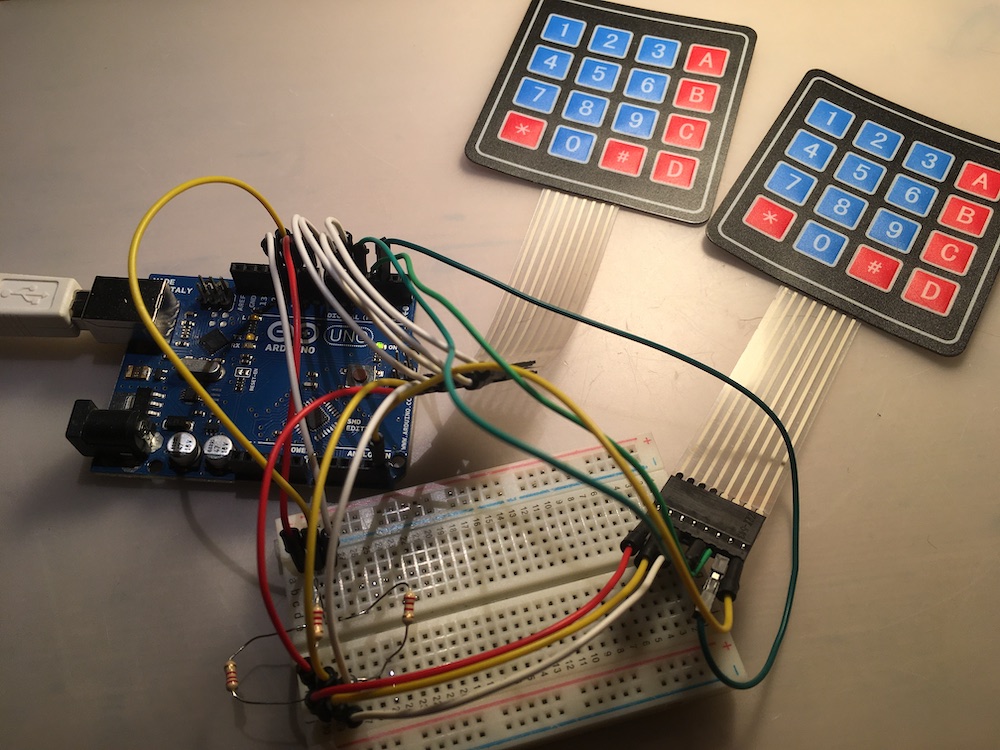
Kim1 clone made from an Arduino Uno

That got me thinking. Maybe I have all the bits I needed to build one of these lying around, assuming I used a breadboard instead of getting a PCB made. I certainly have millions of those little buttons, an Arduino Uno, piles of resistors, some 4×4 membrane keypads that would be easier to wire than individual buttons and some LED displays.

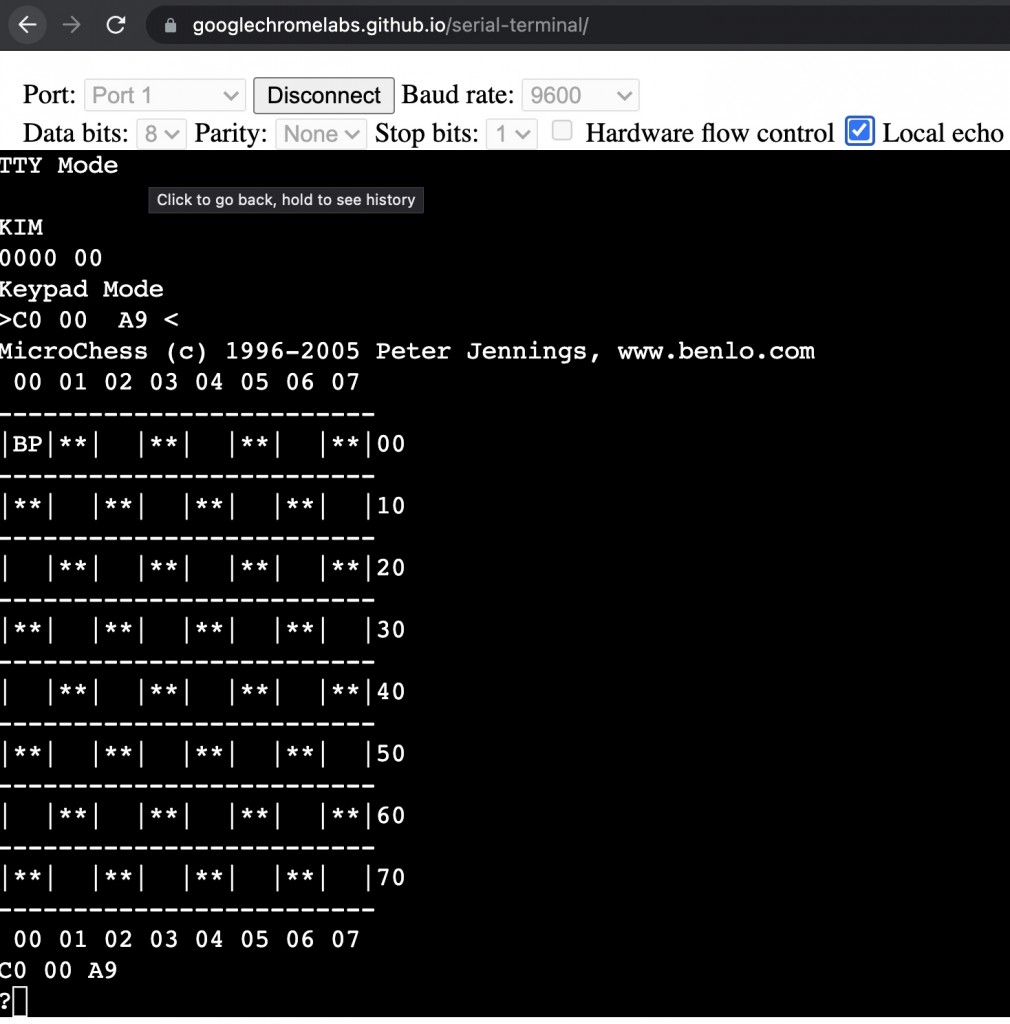
I compiled the code onto my Arduino Uno, and using a serial connection over usb connected to it from my laptop at 9600 baud using the awesome Chromelabs in-browser serial terminal. And it worked! You can switch between ‘normal’ mode and ‘luxury’ terminal mode by pressing the tab key. They call it ‘luxury’ mode because back in 1976 you’d have to have been seriously minted to be able to afford a teletype machine to connect to your KIM-1. Most people used the keypad and the 7-segment LED displays.

chess in the terminal

It’s a great emulator, with some useful utilities built in, as well as Peter Jennings’ Microchess: a working chess program in ~1K of machine code. You should read up on its creation, it’s an interesting story about a genius piece of coding.

I love programming. It is almost impossible to explain the joy of writing software to someone who has not experienced it.

First and foremost, it is an act of creation. From a simple thought, and the arrangement of a few words and symbols, a reality is created that did not exist before.

No other activity can keep you in the moment the way that writing software can. At each step, one hundred percent of your concentration is applied to the solving of the current problem. Time disappears.

Peter Jennings

So having proved the concept, I set about trying to build a KIM-1 clone using the KIM Uno’s software and schematics, and the bits and bobs I had lying around.

Snag 1: no breadboards.
Solution: rip apart another project and hope I documented it somewhere.

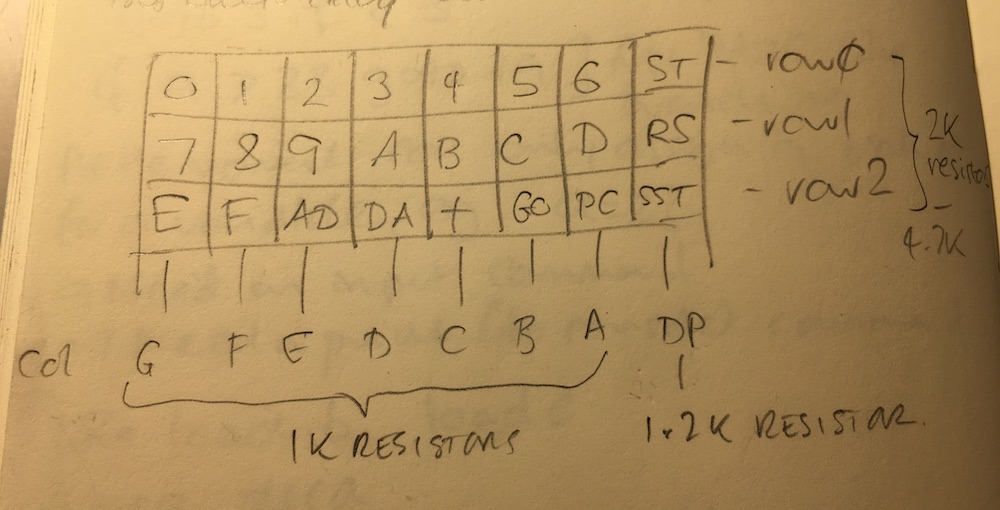
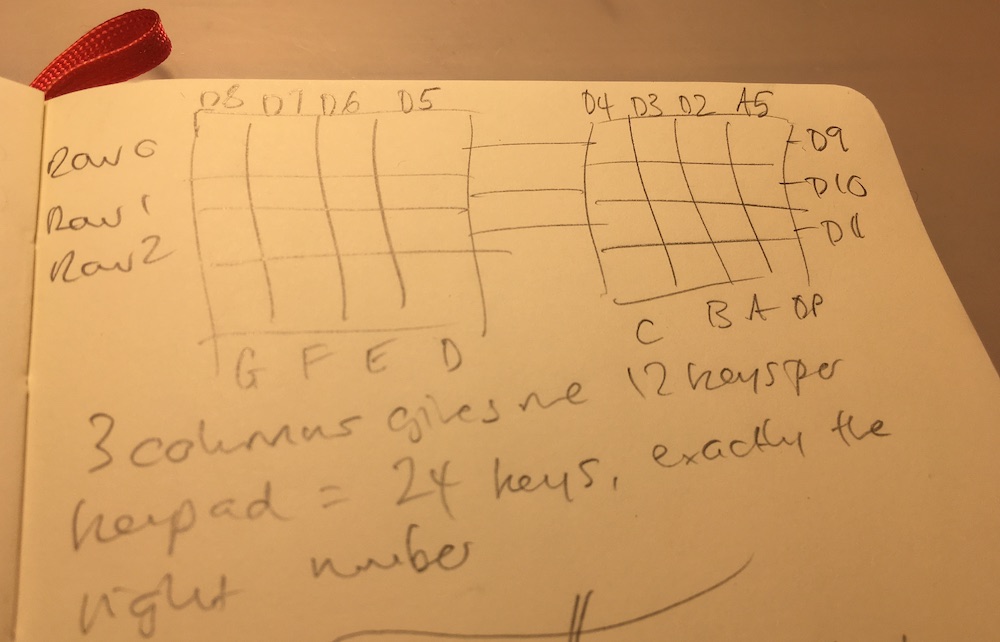
Snag 2: the keyboard layout is nuts. I mean really nuts.
The original KIM-1 had 24 keys arranged in 6 rows of 4. Indeed so does the KIM Uno.

But that’s not how they’re wired. No, siree. It’s wired in a matrix of 3 rows of 8 buttons.

keypad matrix layout

It’s actually very clever. I did wonder when adding my keypad to my own 6502 computer how the designers of the KIM-1 didn’t run out of GPIO pins. The answer was they actually shared the pins between the keypad and the display segments and switched them very, very quickly.

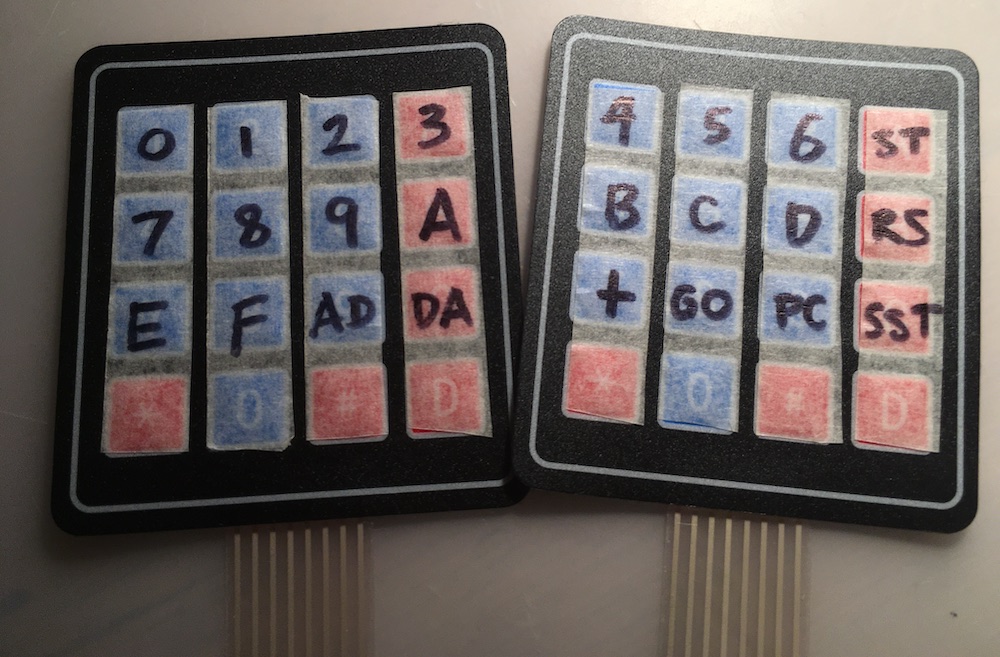
I’ve wired up individual buttons to make keypads on breadboards before, and it’s a real pain, so I decided to stick with my plan to use two 4×4 membrane keypads and not use the bottom row. I need to relabel the buttons, but it works!

Here’s how to wire it up. With the membrane keypads, I’ve numbered the pins looking from the front, so pins 1-4 are the rows and pins 5-8 are the columns. You need to join the rows together to make 1 very wide keypad. So, connect row 1 on keypad A to row 1 on keypad B. Do the same for rows 2 and 3. These become rows 0, 1 and 2 on the KIM keyboard. Connect rows 0, 1 and 2 via a ~2K ohm resistors to pins D9, D10 and D11 respectively on the Arduino.

Now wire up the columns.
Keypad A pin 5 / column G -> Arduino pin D8
Keypad A pin 6 / column F -> Arduino pin D7
Keypad A pin 7 / column E -> Arduino pin D6
Keypad A pin 8 / column D -> Arduino pin D5

Keypad B pin 5 / column C -> Arduino pin D4
Keypad B pin 6 / column B -> Arduino pin D3
Keypad B pin 7 / column A -> Arduino pin D2
Keypad B pin 8 / column DP -> Arduino pin A5

keypad-matrix

Snag 3 – the displays
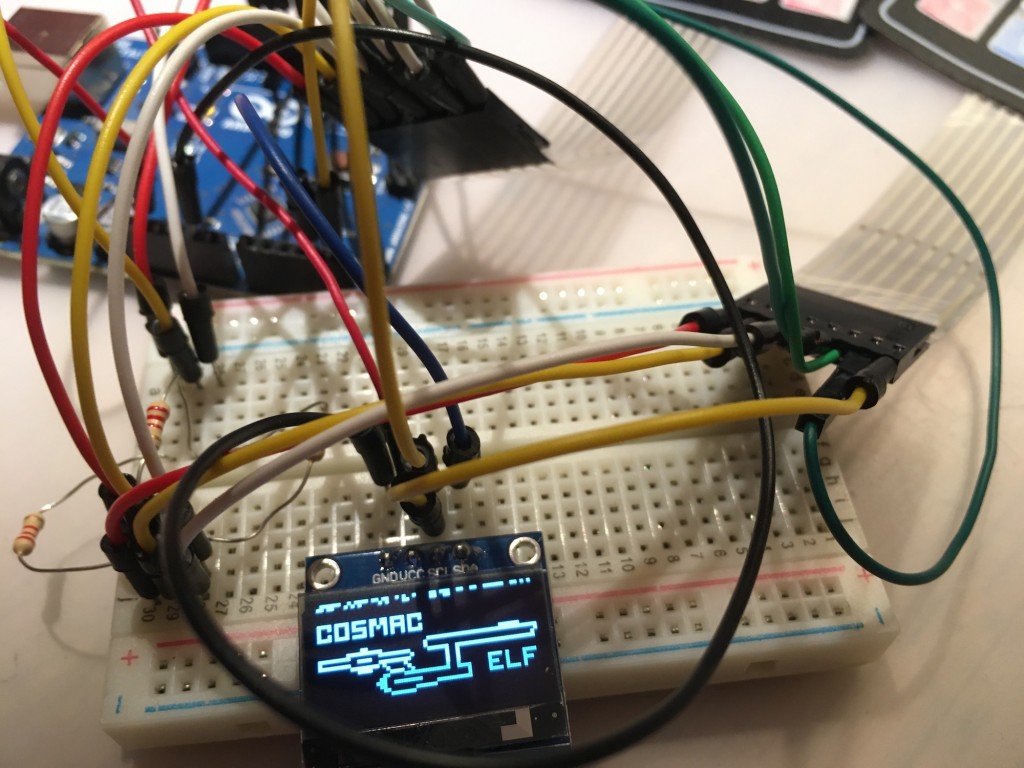
It turns out that my lucky bag of random 7-segment LED displays wasn’t so lucky. They’re all common cathode, when the design for the Kim Uno needs two common anode displays. They’re very cheap to buy, but while I wait for one to arrive, I noticed that you can also attach an OLED display to it, if you uncomment a line in the config file and connect the display’s data pin to A4 on the Arduino and the display’s clock to Arduino pin A4.

Cosmac Elf display on OLED display

The sketch will only compile for a Uno if you remove almost all the sample code, and you get this intriguing display which doesn’t make a whole lot of sense (there is separate firmware to turn your KIM Uno into a Cosmac Elf) – I was expecting to see the LED display mirrored on the OELD!

I’ll have to order a couple of common anode LED displays and maybe an Arduino Pro Mini and report back. Oh, and I’m probably going to need a bigger breadboard.

keypad relabelled

The keypads relabelled with masking tape and Sharpies. The layout is a bit crazy, but hey the original KIM-1 keypad layout doesn’t make a lot of sense to me either, and this saved a metric tonne of fiddly button breadboard wiring.

We’re going to need a bigger breadboard

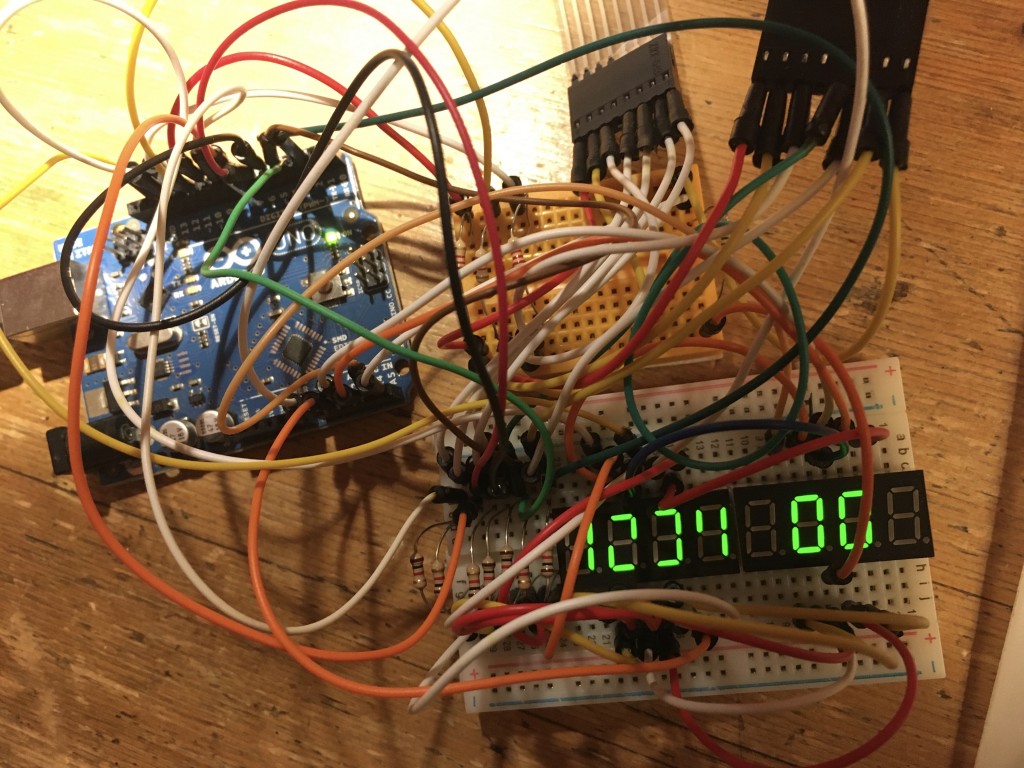
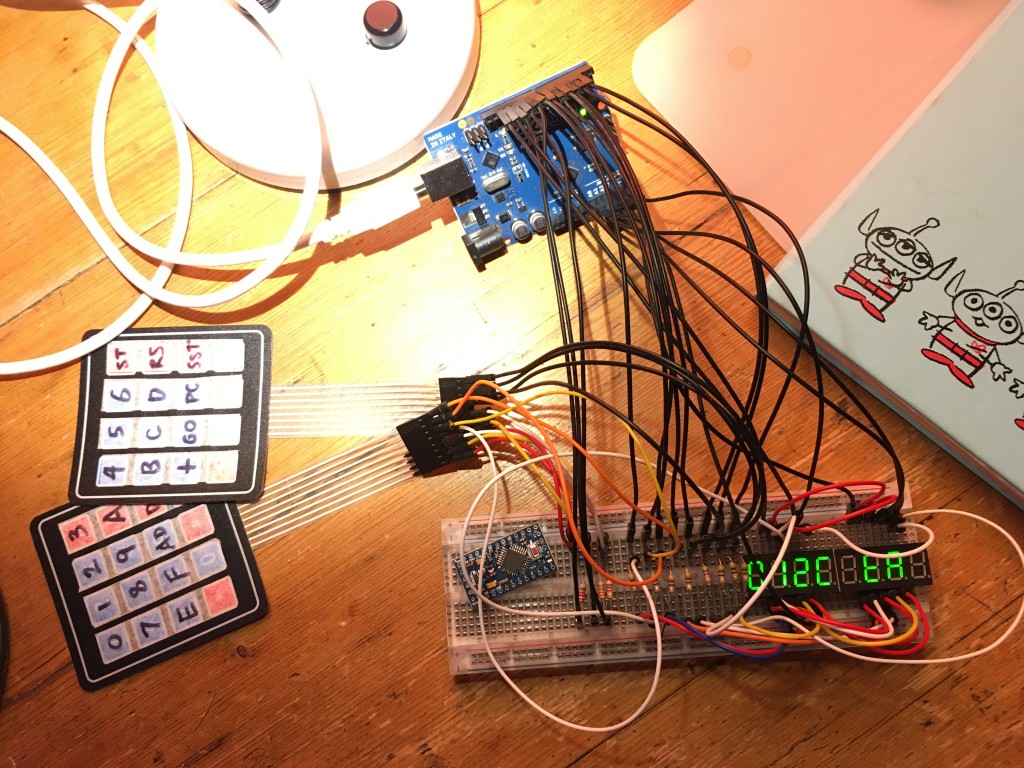
I got some common anode LEDs and made this. It worked. Almost. One segment of the LED display didn’t light and I couldn’t figure out why:
Kim Uno breadboard - attempt 1
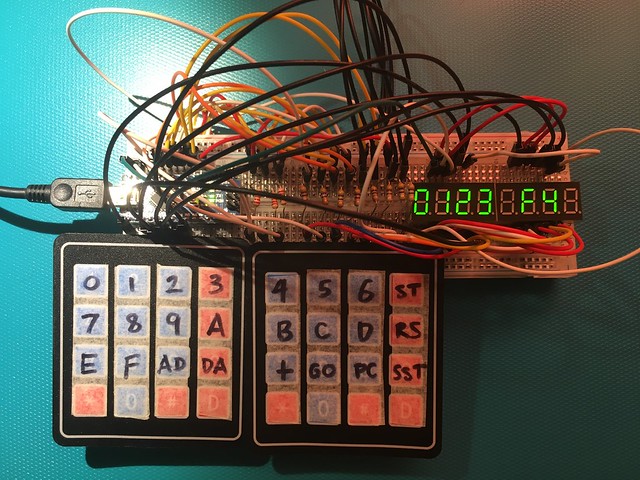
So I got a bigger breadboard and wired it all up from scratch, spacing everything out a bit more. I missed one jumper out and one was in the wrong hole, but once I’d fixed that, I have a working self-contained Kim-1 clone / simulator! You can use the keypads and LEDs and the serial port on a computer as well, living the 1976 computing dream!
Kim Uno breadboard version 2

Next step will be to put it in some kind of box that supports the keypads, and then to replace the Arduino Uno with the Arduino Pro Mini – pictured at a jaunty angle on the breadboard. I just realised that as it has pins running all the way round it, it’s not going to work on a breadboard. Doh! I guess I could get another small Arduino that does, or use male to female jumper wires and let it float.

Arduino Nano update

I made a more compact version using a cheap Arduino Nano clone that fits on the same breadboard as the LEDs and the resistors. I bought a pre-soldered one to save time and swearing.

Kim-1 clone

A couple of things to note:

  • It was hard to get the pins of the Arduino into the breadboard. In the end I had to work a jumper wire down each row prior to insertion to loosen the holes up a bit.
  • At first the sketch wouldn’t flash on to the Arduino. I got the error message ‘stk500_getsync() attempt 1 of 10: not in sync: resp=0×00′. Turns out this was because I needed to select old firmware in the Arduino IDE. Go to Tools > Processor > ATMega328P (Old Bootloader) before flashing the Kim UNO code to a cheap Nano clone.
  • I successfully powered this off a PP3 / 9v battery, making it completely self-contained. Unplug the Arduino from any other power source like USB, connect the +ve battery terminal to the Arduino’s Vin pin, and the battery -ve terminal to GND on the Arduino.
Posted in Arduino, computers, nostalgia | Tagged , , , | Leave a comment

The Tower of Babel

The Tower of Babel

Back in the 1990s, the BBC World Service had a newsroom computer system called EDiT. This was the World Service version of a system called BASYS which had a bit of an interesting past. It was widely used in TV and radio newsrooms all over the world, used by domestic BBC TV and radio as well as CNN and ITN and I think maybe the ABC in Australia as well. Indeed, ITN actually owned BASYS / Newsfury. [See ITN staff magazine The Lens, issue 7, January 1994, page 7, 'ITN steps in to buy share of 'Newsfury' potential] As I recall this was because they’d invested heavily in BASYS equipment and the company got into financial difficulty and they bought it out to protect their investment. This new technology was controversial at the time, as this article from 2013 by Rory Cellan-Jones attests, but journalists and PAs would regard it with nostalgia when it was later replaced by ENPS, the Associated Press’s ‘Electronic News Production System’ or ‘Every News Programme Suffers’ as it was briefly known.
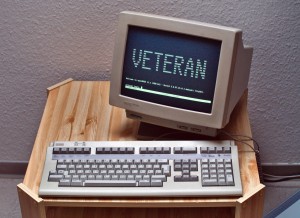
DEC VT420 terminal, by Jacek Rużyczka - Self-photographed, CC BY-SA 3.0, https://commons.wikimedia.org/w/index.php?curid=6762692


It’s very hard to find anything about BASYS on the internet, not helped by the fact that the name is now used by an FPGA board and most BASYS systems were probably taken out of service before the world wide web became popular. I’ve asked on Twitter if any old BBC or ITN hacks still have any training manuals for it, but to no avail. Part of me would love to rescue the system software and get it running on an emulator.

As I recall it ran on a mainframe, or maybe a VAX mini-computer, and the users had dumb serial terminals on their newsroom desks. In Bush House we had lovely DEC terminals, possibly VT-420s with paper white CRT monitors. I recall a sneaky trick was to type SCREEN and press enter and run away. This scrolled the current script in huge letters in an autocue style. Another hack was to gain access to the training system with CONNECT TRAIN, though I think that was disabled once it was realised this was getting abused.

To encourage people to get to know this new-fangled technology, the enlightened engineers set up an area called bush.graffiti – a kind of bulletin board where users could type anything pretty much anonymously. This was well before social media had been invented or anyone had any kind of internet access on BBC computers, so it proved very popular. Indeed I met my wife in bush.graffiti before an announcer by the name of Neil Sleat introduced us in real life by the fish tank in the Bush House Club. The file would show the user name and time of the last edit, which may or may not be the last person to comment in a document. My user name was boo1opr – first 3 letters of my surname, a number, then department code, opr for ‘operational resources’, the studio managers’ department. How we laughed at our Portuguese colleague whose username was pis1por. Many graffiti users adopted pseudonyms like Cottonmouth, United by Yucca and Yeboah’s Witness.

bush.graffiti had two long-running threads that stuck in my mind. One was ‘Strange Fridges’, a long Derek and Clive style riff on surreal objects and people that the authors claimed to have discovered at the backs of their fridges.

bush.graffiti

Another was The Tower of Babel. Bush House, broadcast in 42 languages, geddit? In this thread, people imagined that this building that was strange and labyrinthine enough in real life, was the basis of a text-based computer adventure game.
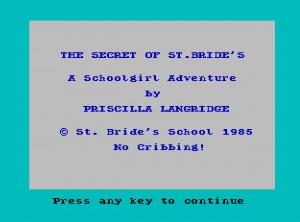
the ZX Spectrum Secret of St Bride's game

In lockdown, I got a bit obsessed with a couple of real adventure games. I’ve never got on with them in the past, always getting stuck and losing patience with, say, The Hobbit on the ZX Spectrum and the Hitch-Hiker’s Guide to the Galaxy PC game. Even now I gave up on the original Colossal Cave Adventure when I tried mapping it and realised that the geography was inconsistent and even changes during the game, which seems just maddeningly unfair. I went down a rabbit hole researching the, frankly quite astonishing, story of The Secret of St Bride’s and the enigmatic Games Mistresses who were behind it. They made well-regarded computer games but also ran a ‘school’ in Ireland which you could visit and stay at, where the staff all stayed in character, and yes that was probably every bit as weird and dodgy as it sounds. The main public face of the group may have been played by different people at different times, and any attempts to discover the truth about them seem to end in failure, madness or both. You can read more about the game and the people behind it here, but I warn you now, it won’t end well for you.
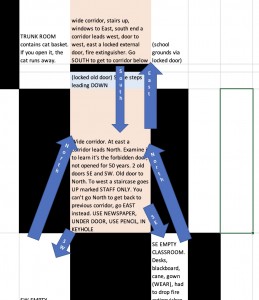
my map of St Bride's

I tried mapping out the world of St Bride’s School in a spreadsheet, and even here was exasperated that going east from one space to another doesn’t necessarily mean you can return by going west. There’s also an infuriating point I would never have been able to get past back in the 80s without the internet’s help: assuming you know what to do and have gathered the right objects, you have to use precisely the right phrases USE NEWSPAPER, UNDER DOOR, USE PENCIL, IN KEYHOLE to progress. 1985 me would have given up in frustration at that point.

So, a mere thirty years after contributing to bush.graffiti, I decided to right those wrongs and make The Tower of Babel into a real text-based adventure, or ‘interactive fiction’ as I think they’re now called. You can play it online here, read a short intro here and the cribsheet may be useful.

Your character is a trainee SM (studio manager) doing a nightshift in the year 1991. You’re woken in the dorm (yes Bush House used to have a dormitory) at 4am and have until 5am to get to a studio to put a programme on air. I’ve taken some liberties with geography, but it’s broadly as I remember it. Move around with n, s, e, w, use ‘get’ or ‘take’ to pick things up, ‘i’ for listing your inventory and examining things may be useful. You can even examine yourself, if that’s your bag. You’ll need to find a studio key as you’ve left yours at home and some rooms have gatekeepers who may be prone to bribery.

B-type studio

The game isn’t finished yet, but you can regard getting into the studio before the PTT (pre-transmission test) alarm goes off a success. I’ll add some stuff about getting the show on air next so you can actually use some of the things I’ve packed into the studio’s control cubicle.

I was going to create it as an old-school, authentic ZX Spectrum game using the Quill software many 1980s games were written in, but instead I decided to write it using Inform which means you can also download the game to play in the IF platform of your choice as well as playing in your web browser. Learning Inform has been almost as frustrating as playing an adventure game in its own right, and I warn you if you’re tempted to follow suit: it will MESS WITH YOUR MIND. If you decide to drink the drink and eat the mushroom, don’t come running to me for sympathy. Actually you can. I’ll even provide the tea.
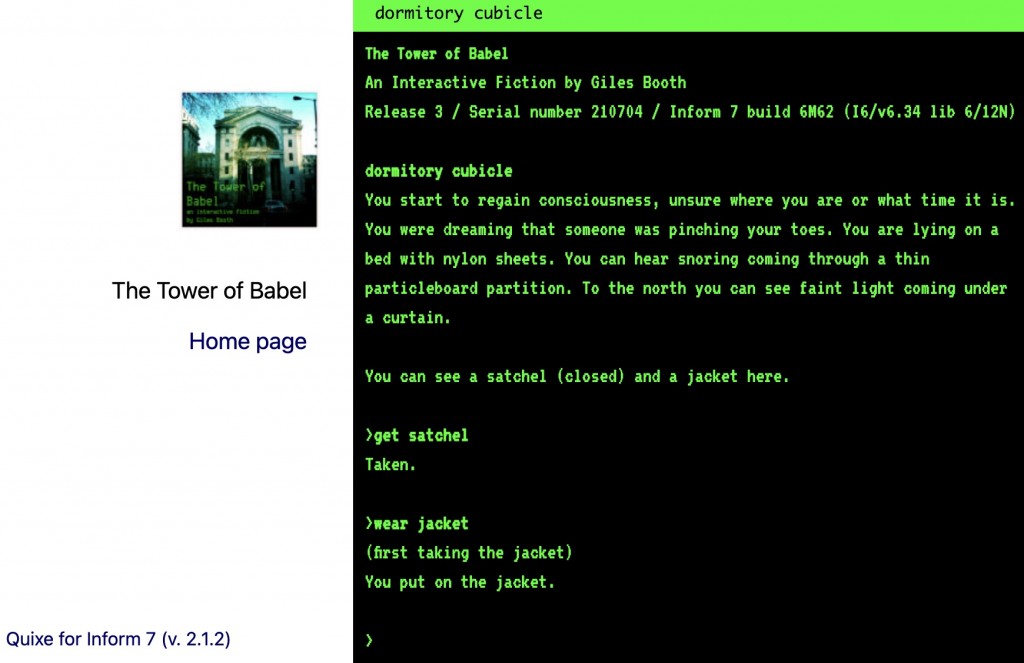
screenshot of The Tower of Babel game

I think the game is playable as far as it goes if you know nothing about working in Bush House in the BBC World Service era, but if you were there you’ll find some in-jokes and you may be able to find some familiar parts of the building.

Whilst I appreciate this is incredibly niche to make an adventure game, sorry interactive fiction, about a job I did 30 years ago in a building the BBC doesn’t even occupy any more, it was a fun, if maddening, experience. I now have more respect for the authors of adventure games and understand some of the reasons for design decisions they made that seemed odd to me as a player. Though I do think my geography is consistent and I hope the game is playable without too much convoluted, unguessable syntax. Getting past the canteen is a pig, I admit, but I have left some clues.

If you’re an old BASYS sysadmin or trainer and have some documentation or, heaven forbid, some actual software, get in touch.

If you worked in Bush, or even of you didn’t, let me know if you like the game or where you get stuck. I may be bribable.

Postscript

In October 2022, BBC Northern Ireland produced a radio series called Assume Nothing which covered the real story behind St Bride’s. Warning: it’s much darker than I was expecting and not an easy listen, but essential if your interest has at any time been piqued by the Games Mistresses: https://www.bbc.co.uk/sounds/brand/m001dd9t


You can browse some, but by no means all, of my photos of Bush House by clicking on the photo below:
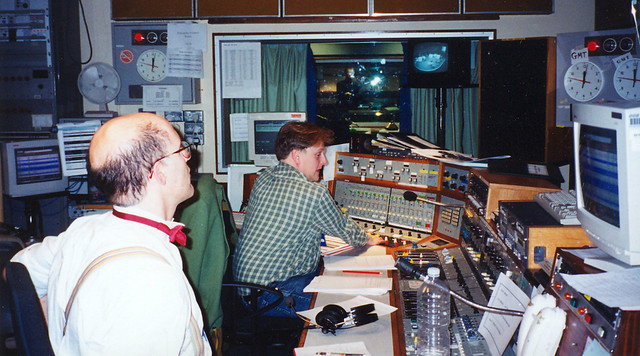
Bush House

Posted in BBC, gaming, nostalgia, radio | Tagged , , , , , | Leave a comment

Video from a BBC micro:bit with IchigonQuest

Back in 2017 I played with projects to get composite video from an Arduino – huge fun and very satisfying in a retro way. After trying TinyBASIC on a BBC micro:bit, I fell down a bit of an internet search rabbit hole and discovered the world of IchigonJam (strawberry jam!), a Japanese computer the size of a Raspberry Pi that you program in BASIC. It uses a PS/2 keyboard and produces low-resolution composite video to be viewed on a TV with an AV input. A very cute and intriguing machine.

It had been bugging me for years that it must be possible to get composite video out of a BBC micro:bit the same way as on the Arduino and IchigonJam. And it is, and someone has already done it. Welcome, IchigonQuest! It’s a very quirky, very Japanese way of coding microcontrollers in something a bit like BASIC. There’s a whole ecosystem around it, and as they’re not shipping to the UK at the moment I put it out of my mind.

Then I found there’s a micro:bit port of it. And I got it working. I have no idea what I’m doing, but it works! The micro:bit becomes a self-contained computer with its own keyboard and screen that you can program on its own.

Here’s what I used:

- A V1 BBC micro:bit
- A micro:bit breakout board
- Various jumper wires
- A small breadboard
- A 100 ohm and a 470 ohm resistor
- An RCA / phono plug to get video into the TV
- A TV set. I used a cheap fairly modern Chinese one, bought in the UK but still apparently happy to display NTSC video
- A PS/2 keyboard. (Found on the street with the plug helpfully already chopped off – as used in my previous micro:bit PS/2 keyboard projects).
- Downloaded microDakeOS.20180925.zip from https://p.na-s.jp/, extracted ichigonquest.ubit.dj.en.hex and flashed it to the micro:bit

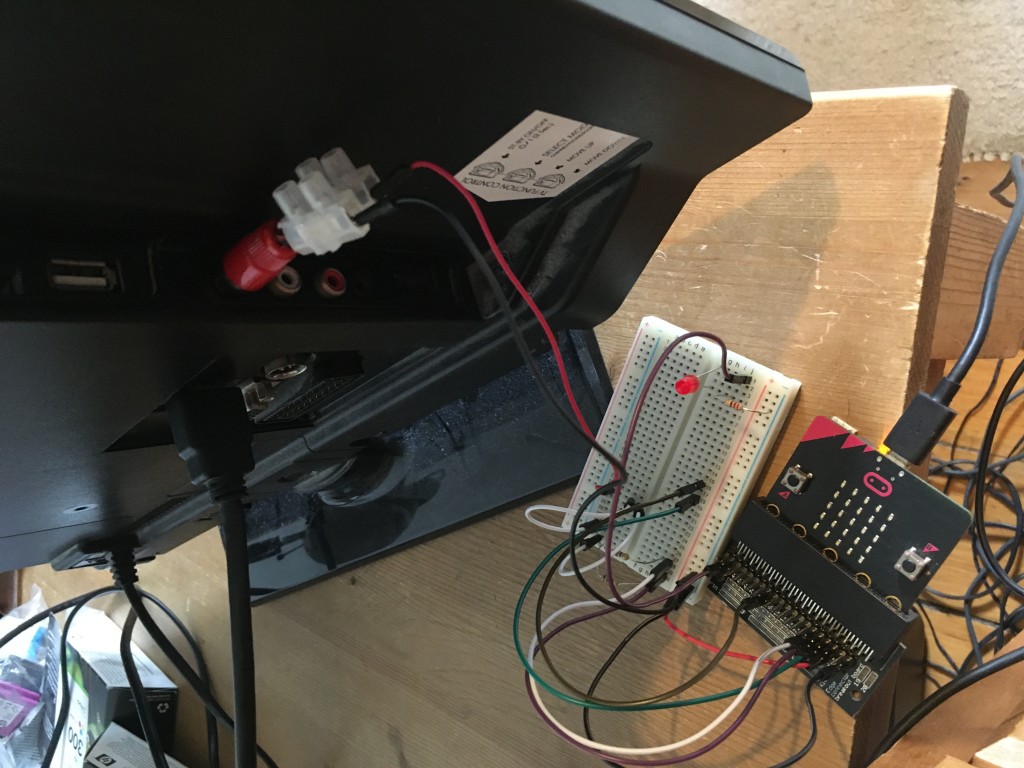
Here’s how I wired it up:

micro:bit pin connect to
15 100 ohm resistor to video out phono inner PIN
14 470 ohm resistor to video out (same as above)
GND video GND (outer ring of RCA / phono plug)
16 PS/2 keyboard clock wire
8 PS/2 keyboard data wire
3v PS/2 keyboard 5v power in wire
GND PS/2 keyboard ground wire

wiring micro:bit into TV

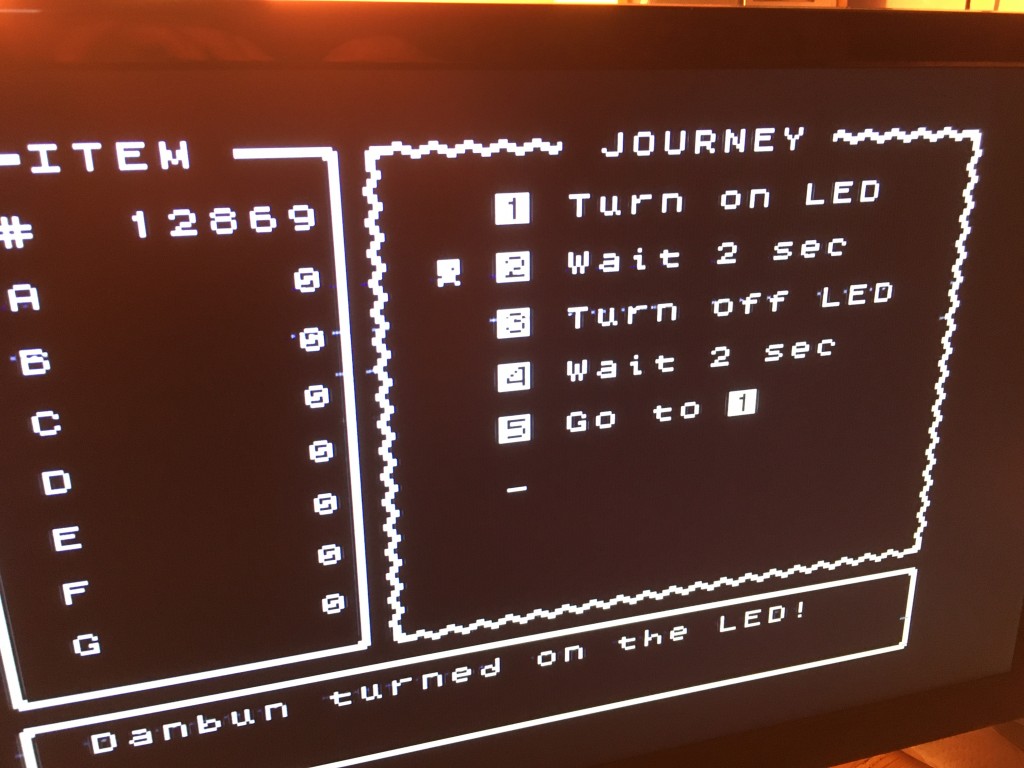
I very much was not expecting to see anything. I’d bodged together these wires from web pages in Japanese I barely understood even with Google Translate, and filled in some gaps from my own experience connecting PS/2 keyboards to micro:bits. I connected it all up, turned the TV on, switched it to the AV input… and a picture appeared!

I’m still puzzling out how it all works, but I managed to draw my own icons on the micro:bit display and even wrote my first proper program!

IchigonQuest program running on BBC micro:bit

And here’s a bit of a longer walkthrough of how it works:

Sound update

I’ve now figured out that the piezo speaker goes on micro:bit pin 12! Alas it only beeps, you can’t seem to play tunes on it. But it’s a nice addition.

And yes, that’s forbidden pin 12, reserved for accessibility. So if you want to hook up a buzzer, you’ll need a breakout board that allows access to this pin. The Kitronik one I have does, but the Pimoroni pin:bit doesn’t. (Not a criticism of Pimoroni, you’re really not supposed to use pin 12 for anything!)

New video update

Here’s another video talking about how much coding IchigonQuest is like assembly language. And I demonstrate my inability to remember its name:

Button update

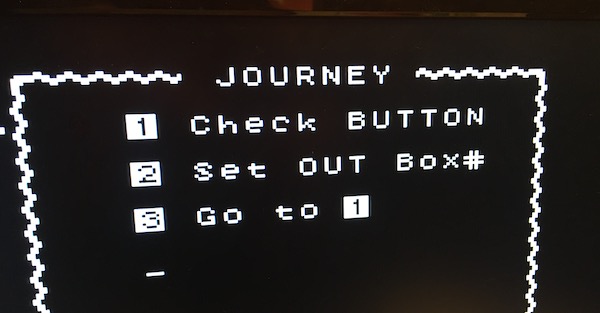
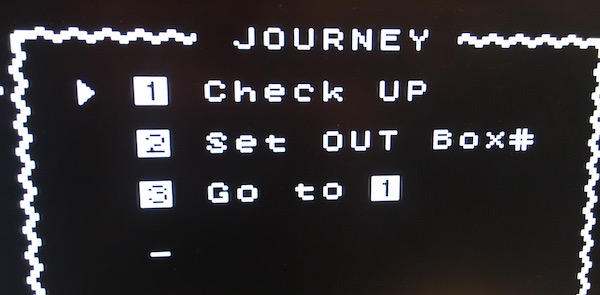
These two programs make things happen when you push a button – so you could use this to start making a game by moving a character round the screen in different directions depending on the arrow key pressed.

program to scan micro:bit button

The code above checks to see if a micro:bit button has been pressed, either A or B, and if it has, it sends a signal out on pin 0 (connected to an LED in my set-up).

polling the PS/2 keyboard

This program checks the PS/2 keyboard to see if the up arrow / cursor key has been pressed. If it has, it also sends a signal out on pin 0, lighting my LED. You can check all 4 arrows, and enter.

Posted in computers, microbit | Tagged , , , | 2 Comments

Run BASIC on a BBC micro:bit

It was recently BASIC’s 57th birthday, the programming language many of us first used to do any computer programming on computers from the 1970s and 1980s like the Commodore PET, Sinclair ZX Spectrum or Apple 2. Worth remembering too that part of the team that created BASIC was Sister Mary Kenneth Keller, the first woman and one of the first people in the US to get a PhD in computer science.

I’d known for a while that there was a Japanese port of TinyBASIC for the BBC micro:bit. To be honest I thought it was a bit of a novelty as you need a computer to connect to it that will be more powerful than the micro:bit and able itself to run proper BASIC, but it’s actually very, very clever. It will allow you to access features of the micro:bit itself, like the LED display, the buttons, GPIO pins and so on, meaning you can do real physical computing with the micro:bit in BASIC. You don’t need any special hardware, just a micro:bit and some sort of serial terminal on a computer connected to the micro:bit by USB.

To get it running go to https://github.com/Tamakichi/ttbasic_microbit – I used Google translate to help me navigate the page. Download the ZIP file and unpack the hex file and flash it to a V1 micro:bit. (It looks like it’s not yet been updated to work on the newer micro:bit with sound).

You can use terminal software to communicate with it, but it’s simpler to use Chrome and a web-based alternative. You can use the online micro:bit Python editor, but this is probably better as it handles scrolling well: https://googlechromelabs.github.io/serial-terminal/. The video at the top of this page shows how to set it up.

A very cool feature is that you can save files to flash memory, just as you’d save programs to cassette or disk on an 8-bit computer like the ZX Spectrum. There are 16 slots for programs, accessed with the SAVE and LOAD commands. FILES lists everything in the file system.

The program in slot 0 can be made to run automatically at start up – press button B at reset or, if on batteries, Press and hold Button A and Button B for 5 seconds, then release only Button A

You can play music out of piezo speaker attached to pin 8. It also supports NeoPixel 8×8 matrix displays, for example for displaying Japanese characters.

It also has a real time clock, though it’ll lose its time when you power off. Use
SETDATE Year, month, day, hour, minute, second
eg
SETDATE 2021,5,3,12,0,0

There’s a lot more you can do with TinyBASIC on the micro:bit. There’s a comprehensive PDF manual in Japanese which you can translate using Google Translate to discover more.

Here are some sample programs featured in the video:

Blinking LED

1 'blink
5 MATRIX OFF
10 GPIO 3,OUTPUT
20 OUT 3,LOW
30 GPIO 26,OUTPUT
35 "@loop"
40 OUT 26,HIGH
50 WAIT 300
60 OUT 26,LOW
70 WAIT 300
80 GOTO "@loop"

Button input

10 CLS
20 IF !IN(BTNA) ?"Button A"
30 IF !IN(BTNB) ?"Button B"
40 WAIT 200
50 GOTO 20

Fill all the LEDs

10 CLS 1
20 D=1
30 FOR Y=0 TO 4
40 FOR X=0 TO 4
50 PSET X,Y,D
60 WAIT 100
70 NEXT X
80 NEXT Y
90 IF D D=0 ELSE D=1
100 GOTO 30

LED matrix message display

10 CLS 1
20 MSG LEFT,200,"Hello world! "
30 FOR I=O TO 30
40 MSG DOWN,50,I/10
50 WAIT 50
60 MSG LEFT,100,I%10
70 NEXT I
80 WAIT 500
90 GOTO 20
Posted in computers | Tagged , , | 2 Comments