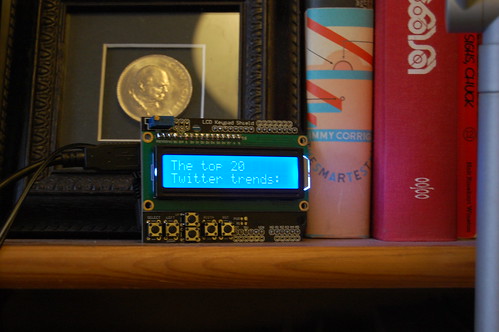
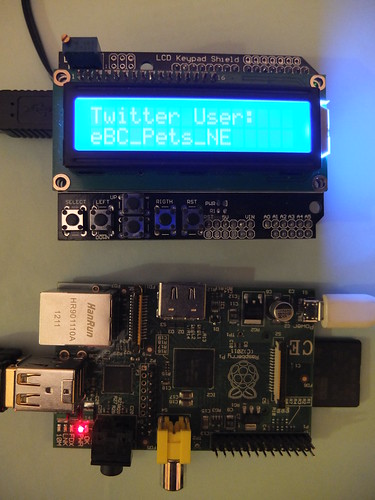
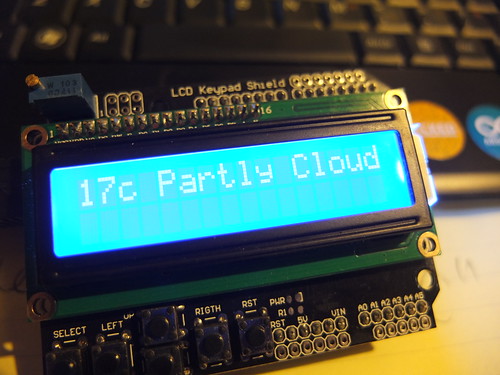
Here’s a quick recap on the main steps I took in making a self-contained gizmo which displays London weather, global random tweets and Twitter trends on an LCD display. No soldering was involved. It’s really rather hypnotic watching utterly random tweets scroll by on a cool blue LCD display…
Ingredients:
- RaspberryPi with normal, default bog-standard Raspbian OS – I used a model B with ethernet, but an A would do as I was also using…
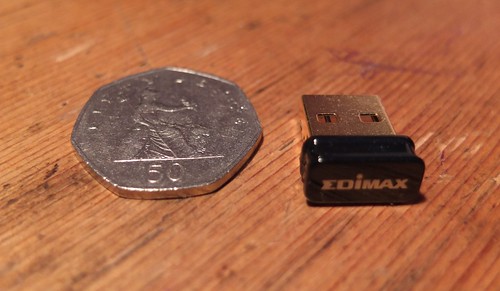
- Edimax USB wifi dongle.
- Arduino Uno microcontroller.
- LCD keypad shield for Arduino – though I’ve not used the buttons yet, and any Arduino-friendly display would do.
- Kindle power supply for Raspberry Pi.
- Some random old power supply for the Arduino.
- A USB lead. A really, really short A-B lead or adapter would be better than the one I have.
Method:
- My basis was this project: http://www.midnightcheese.com/2011/10/displaying-twitter-and-weather-on-your-arduino-lcd-screen/
This uses a Mac to send weather and tweets to an Arduino with a different LCD display. - I tweaked the Arduino code for my display etc.
- I got my Raspberry Pi connected to the internet over wifi.
- I installed the Apache web server and PHP on the Raspberry Pi.
- I tweaked the PHP script to show weather in London in centigrade, rather than Nashville in Fahrenheit.
- I added a horrible kludge to the bash script that calls the PHP script in order to keep open the serial communication between the Pi and the Arduino.
- I got the RaspberryPi to run the script automatically when I turned it on. This was harder than I expected but I got there.
To do list:
- get the display to scroll twitter trends or split over two lines – at the moment trends are truncated
- display UK twitter trends rather than global trends
- weather forecast, not current weather
- my display can’t cope with accented characters – strip out, replace with equivalent normal ASCII ones or work out how to get display to do it.
- display the time of my next train into town – this is going to be difficult as our local train data isn’t freely syndicated – well, why would you want to encourage people to use public transport when you can charge people to breathe the air around them? (Little bit of politics, there).
- get the buttons to do something – switch between tweets, weather, train info?
- build it into a box and stick it to the fridge or put it on a bookcase, bedside table
- add a clock?
- possible heresy: remove the Arduino and get the Raspberry Pi to address the LCD display directly. This must be eminently do-able, but I like my Arduino and the way the LCD shield just plugs into it. I’m not good at soldering.
Source Code
Here’s the code I uploaded to the Arduino, very slightly tweaked from Midnight Cheese: http://www.midnightcheese.com/2011/10/displaying-twitter-and-weather-on-your-arduino-lcd-screen/
#include <LiquidCrystal.h>
#include <WString.h>

LiquidCrystal lcd(8, 9, 4, 5, 6, 7);
// these figures copied from sample sketch that came with my LCD shield

void setup() {
//  analogWrite(5, 100);    // Set LCD contrast level (0-255) - removed for my LCD shield
  lcd.begin(16, 2);       // Set the LCD's number of rows and columns
  Serial.begin(9600);     // Initialize communication with serial(USB) port.
  lcd.print("FridgeGizmo v1.1");    // Print welcome message to LCD.
  lcd.setCursor(0, 1);              // move cursor to start of 2nd line of display
  lcd.print(">>>fetching data");    // Print 'please wait' message to LCD.
}

int bufferArray[250];     // Our array to store characters arriving from serial port.
int output = 0;
int i = 0;

void loop() {
  int count = Serial.available();

  if (Serial.available() > -1) {
    delay(1000);
    for (i=0; i<count ; i++) {
     bufferArray[i] = Serial.read();          // Put into array
     output = 1;                              // Show new data has been recieved
    }
  }

  if (output != 0) {                          // If new bytes have been recieved
    int position = 0;
    if (bufferArray[0] == '!') {              // Print on first line if message begins with '!'
      lcd.clear();
      lcd.setCursor(0,0);
      position = 1;
    } else if (bufferArray[0] == '@') {       // Print on second line if message begins with '@'
      lcd.setCursor(0,1);
      position = 1;
    } else if (bufferArray[0] == '^') {       // Clear screen if message begins with '^'
      lcd.clear();
      lcd.setCursor(0,0);
      position = 1;
    } else {
      lcd.clear();
      lcd.setCursor(0,0);
    }
    int j;
    for (j = position; j < count; j++) {
      lcd.write(bufferArray[j]);
    }
    output = 0;                               // Don't print on next iteration
    memset(bufferArray, 0, count);
    count = 0;
  }
}
This is the tweetwx.sh bash script on the RaspberryPi that runs the tweetwx.php script with the ‘screen’ command kludge at startup:
#!/bin/bash

screen -d -m /dev/ttyACM0 9600

sudo php /var/www/tweetwx.php
This is the PHP code tweetwx.php that fetches weather & twitter data from the internet and formats it and sends it to the Arduino and display:
<?php
// Include the PHP Serial class.
include "php_serial.class.php";
//Define the serial port to use
define('SERIALPORT','/dev/ttyACM0');

// Weather
$zipcode = "UKXX0085";
$title = "London UK WX.";
// $unit = "c"; - will add unit switch later

// Setup the serial connection
$serial = new phpSerial;
$serial->deviceSet(SERIALPORT);
$serial->confBaudRate(9600);

// Time
$lastTime = date('D M j H:i:s Y');
$lastTime = strtotime($lastTime);

// Scroll text up LCD screen
function scrollChunks($message) {
  global $serial;
  $serial->deviceOpen();
  for ($i=0; $i<count ($message); $i++) {
    if ($i==0) {
      $serial->sendMessage($message[$i]);
    } else if ($i&1 && $i!=0) { // If $i is odd and not zero
      $serial->sendMessage($message[$i]);
      sleep(1);
      $message[$i] = substr_replace($message[$i], "!", 0, 1); // Print on top line !
      $serial->sendMessage($message[$i]);
    } else if (!($i&1) && $i!=0) { // If $i is even and not zero
      $message[$i] = substr_replace($message[$i], "@", 0, 1); // Print on top line @
      $serial->sendMessage($message[$i]);
      sleep(1);
      $message[$i] = substr_replace($message[$i], "!", 0, 1); // Print on top line !
      $serial->sendMessage($message[$i]);
    }
    echo $message[$i]."\n";
    sleep(1);
  }
  sleep(1);
  $serial->sendMessage(" ");
  $serial->deviceClose();
}

// Wordwrap our text to lines no more than 15 characters long.
// The LCD displays 16 characters at a time, minus a space for our
// placement character.
function segmentString($t) {
  $chunks = wordwrap($t, 15, "\n", true);
  $chunks = explode("\n", $chunks);
  // Alternate each line with '!' and '@'
  for ($i=0; $i<count ($chunks); $i++) {
    if ($i&1) {
      $chunks[$i] = "@".$chunks[$i];
    } else {
      $chunks[$i] = "!".$chunks[$i];
    }
  }
  scrollChunks($chunks);
}

function displayRSS() {
  global $serial;
  global $title;
  echo "Display only: ".$title."\n";
  sleep(3);
  $serial->deviceOpen();
  $serial->sendMessage($title);
  sleep(240);
  $serial->sendMessage("^");
  sleep(3);
  $serial->deviceClose();
}

function pullWXRSS() {
  global $zipcode;
    $yql = "http://query.yahooapis.com/v1/public/yql?q=select%20*%20from%20weather.forecast%20where%20location%3D\"".$zipcode."\"%20and%20u%3D\"c\"&format=json";

  $session = curl_init($yql);
  curl_setopt($session, CURLOPT_RETURNTRANSFER,true);
  $json = curl_exec($session);
  $json_output =  json_decode($json,true);
  global $serial;
  global $title;
  $title = $json_output['query']['results']['channel']['item']['condition']['temp']."c ".$json_output['query']['results']['channel']['item']['condition']['text'];
  echo "Pull and Display: ".$title."\n";
  echo "Waiting a few seconds to display on Arduino...\n\n";
  sleep(5);
  $serial->deviceOpen();
  $serial->sendMessage($title);
  sleep(240);
  $serial->deviceClose();
  sleep(3);
}

// Display current weather from Yahoo! YQL
function displayWX() {
  global $lastTime;
  global $title;

  $currentTime = date('D M j H:i:s Y');
  $currentTime = strtotime($currentTime);

  echo "\n\n\n\nCurrent Time: ".$currentTime."\n";
  echo "Last Time: ".$lastTime."\n";

  $timeDiff = $currentTime - $lastTime;
  echo "Time Difference: ".$timeDiff."\n";

  // 1 hour = 3600
  if ($timeDiff>=3605 || $title == "London UK WX.") {
    echo "It's been an hour. Pulling WX.\n";
    $lastTime = $currentTime;
    pullWXRSS();
  } else {
    echo "An hour has not passed. Displaying old WX.\n";
    displayRSS();
  }
  displayPubTimeline();
}

function displayPubTimeline() {
  $jsonurl = "http://api.twitter.com/1/statuses/public_timeline.json";
  $json = file_get_contents($jsonurl,0,null,null);
  $json_output = json_decode($json,true);
  foreach ($json_output as $tweet) {
    $name = $tweet['user']['screen_name'];
    $text = $tweet['text'];
    echo "\n\n\n".$name."\n";
    echo $text."\n\n";
    global $serial;
    $serial->deviceOpen();
    $serial->sendMessage("Twitter User:");
    sleep(1.5);
    $serial->sendMessage("@".$name);
    echo "@".$name."\n";
    sleep(2);
    $serial->deviceClose();
    if (strlen($text) > 16) {
      segmentString($text);
    } else {
      $serial->deviceOpen();
      $serial->sendMessage($text);
      $serial->deviceClose();
    }
    sleep(5);
  }
  sleep(5);
  displayTopTrends();
}

function displayTopTrends () {
  $jsonurl = "http://api.twitter.com/1/trends/daily.json";

  $json = file_get_contents($jsonurl,0,null,null);
  $json_output = json_decode($json,true);
  $json_output = current($json_output['trends']);

  global $serial;

  $serial->deviceOpen();
  $serial->sendMessage("The top 20");
  sleep(1);
  $serial->sendMessage("@Twitter trends:");
  $serial->deviceClose();
  sleep(3);
  echo "\n\nTwitter Trends\n\n";

  foreach ($json_output as $trend) {
    $trendname = $trend['name'];
    echo $trendname."\n";
    $serial->deviceOpen();
    $serial->sendMessage("^".$trendname);
    $serial->deviceClose();
    sleep(15);
  }
  $serial->deviceOpen();
  $serial->sendMessage("^");
  sleep(1);
  $serial->deviceClose();
  sleep(3);
  displayWX();
}

displayWX();
?>


