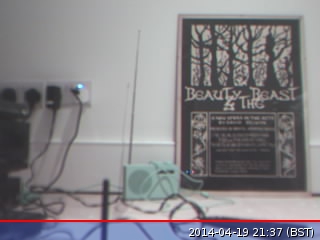
Tweeting photos from PS2 EyeToy on Raspberry Pi


It took some fairly heavy footling and jiggery-pokery, but I finally managed to get my Raspberry Pi to run a Python script which takes a photo on a webcam and tweets the picture – meaning I could set up a tweeting web cam.

I made life hard for myself because the only webcam I had to hand was an old Sony Playstation 2 EyeToy. This used to work with the Raspberry Pi, but recent changes to the Linux kernel used in Raspbian means that, at the time of writing, it doesn’t – you get horrid error messages about ‘bogus Huffman table definitions’. The easy thing to do would be to use a supported webcam, like the Playstation 3 Eyecam, or one favourably listed here: http://elinux.org/RPi_USB_Webcams

I got the PS2 EyeToy working by loading an experimental version of the kernel as outlined here: http://www.raspberrypi.org/forums/viewtopic.php?f=28&t=70437

I backed up all the important files from my Raspberry Pi before doing this. Updating the kernel seemed to break the guvcview webcam viewer, but fswebcam still works, so that’s what I use to capture the image. This means I don’t currently have a way of viewing ‘live’ pictures from the webcam, so focusing it was a tedious process of trial and error improvement. Ideas welcome!

I needed to plug the EyeToy into a powered hub – it didn’t work plugged into my old iMac keyboard.

To get Twitter working on the Raspberry Pi, I more-or-less followed the instructions here: http://www.makeuseof.com/tag/how-to-build-a-raspberry-pi-twitter-bot/ with a few changes. The Twitter web pages they describe have changed slightly, but it’s reasonably easy to follow them.

In short, I installed Twython, registered a Twitter app to get the keys you need, installed fswebcam (sudo apt-get install fswebcam) and wrote some Python code to grab a picture from the EyeToy and tweet it. I couldn’t get the pygame camera modules that they used in the Make Use Of tutorial to work, so I used fswebcam instead to grab a JPEG.

The line
sudo fswebcam -r 320x240 -S 20 webcam.jpg
captures the image. 320×240 is the (tiny!) resolution of the PS2 EyeToy, and the -S 20 bit waits 20 frames before grabbing the image to allow the camera to stablise. Without this I was getting weird frame-sync problems.

I saved a Python script called cam.py (code below) which I made executable by typing
chmod +x cam.py
and I ran it by typing
python cam.py

And here’s the tweet: the photo was taken and tweeted all by the Python script below.

I guess I need to get a better web cam now, and train it on the London skyline. Or endlessly tweet the Pi’s CPU temperature. THAT would be good…

My Python script looked like this:

#!/usr/bin/env python
import sys
import os
from twython import Twython
CONSUMER_KEY = '**YOUR KEY HERE****'
CONSUMER_SECRET = '***YOUR SECRET HERE**'
ACCESS_KEY = '**ACCESS KEY HERE******'
ACCESS_SECRET = '***ACCESS SECRET HERE*****'

os.system('sudo fswebcam -r 320x240 -S 20 webcam.jpg')

api = Twython(CONSUMER_KEY,CONSUMER_SECRET,ACCESS_KEY,ACCESS_SECRET)
photo = open('webcam.jpg','rb')
api.update_status_with_media(media=photo, status='Photo taken & tweeted by PS2 EyeToy on RaspberryPi ')

You could then use cron to schedule the running of this script every hour or whatever you liked. Get it triggered by a button or MakeyMakey. Turn it into a tweeting photo booth for a party. Ideas, ideas…


Update

I’ve tweaked the script a bit now. I added a title to the picture like this:

os.system('sudo fswebcam -r 320x240 -S 20 --title "@blogmywiki gardencam" webcam.jpg')

I also set it to automatically tweet a picture every hour on the hour by typing
sudo crontab -e
and adding this line
0 * * * * python /home/pi/tweet/cam.py

(If you try this you’d need to include the full path to where your script lives – mine is in a folder called ‘tweet’).

Posted in Raspberry Pi | Tagged , , | Leave a comment

Visual MaKey MaKey Scratch piano

I liked the simple piano I used for the Potato Piano, but I wanted something with some visual feedback, so I just made this one. It works just the same, you wire up some vegetables, PlayDoh, stairs, children etc to the arrow and W A S D keys on the MaKey MaKey and off you go, playing tunes by doing the mash potato.

My Scratch piano only has 8 notes on display, and shows you which notes are being played by lighting them up in the appropriate colours (I’m not sure of the value of coloured musical notation, but it looks pretty!)

You can play it on the Scratch web site at http://scratch.mit.edu/projects/20728937/, or download the Scratch 1.4 code by right-clicking here. (I still use Scratch 1.4 because it’s what we have installed in the schools I work in, and it runs on a RaspberryPi – but I will get into Scratch 2, I promise!)

Here I am ‘playing’ the Potato Piano with the old Scratch project:


filmed by the Tillster (8)

Posted in Arduino, computers, ICT, music | Tagged , | 2 Comments

Adding a station and summertime to PiRadio

“Summer’s here! It’s time for MAYONNAISE!”

I think that was how Bill Bryson described a typical British women’s magazine strapline of the 50s or 60s. Summertime also means that my PiRadio is displaying frosty old GMT, so I need to change its timezone to account for British Summer Time.

To do this, I SSH’d in to a command line on the PiRadio and ran

sudo raspi-config

and picked option 4 – ‘Internationalisation Options’ to select London Town.

My good friend Rycharde recommended a Dutch jazz radio station called Sublime, so I wanted to add that too. So again, at the command line I typed

mpc add http://82.201.47.68:80/SublimeFM2

to add a new station. This also meant that I needed to edit my main python code to allow for the extra station:


if key == "UP":
station += 1
if station > 9:
station = 1

and

elif key == "DOWN":
station -=1
if station < 1:
station = 9

(9 rather than 8, as I had 8 stations in my playlist before).

We'll see if Sublime is as good as the mighty Fip...

And they say the living is 'easy' - hah!

Posted in radio, Raspberry Pi | Tagged , , , | Leave a comment

Potato Piano

Inspired by Whack-a-Potato, I decided to make a Potato Piano, using a MaKey MaKey, a laptop and 8 potatoes. This is a pretty simple project: just go to http://scratch.mit.edu/projects/3197340/ and click on the green flag. You don’t even need to install Scratch. Then wire up your 8 potatoes in order to the keys shown on the screen on the MaKey MaKey. And off you go – make a mash-up!

I should warn you that the quality of potato you use is important: you will get a much crisper sound if you use a Jersey Royal than if you use a Sainsbury’s ‘Basics’ potato. Oh, no, hang on, it’s a digital system, it’s on or off – so that’s utter hogwash, like trying saying that it’s worth spending a fortune on a platinum HDMI cable with braid spun from unicorn hair. Or that it matters which direction your speaker cable runs in. Or (for those of you old enough to remember such things) that it makes any difference at all to audio quality which brand of Minidisc you buy.

The only thing that matters is that the spud should contain water. And this is a great way to get your eight a day (it’s bound to be eight by now…)


filmed by Tillster (8)

Posted in Arduino, computers, ICT, music | Tagged , | 1 Comment

Scratch-a-Sketch

I love simple paint programs, like my 2005 effort TillyPaint. Scratch is a great environment for coding such things, and I decided to combine a go at writing a new one with Makey Makey pencil-on-paper buttons to make a kind of Etch-a-Sketch.

First, draw some arrows and buttons for ‘pen up/down’, ‘colour change’, ‘bigger’ and ‘smaller’ in a very soft pencil on some paper. Draw tracks and wire up the arrows to the cursor keys on the Makey Makey. Pen up/down goes to the spacebar, colour change is S, bigger is W and smaller goes to key A. If you don’t have a Makey Makey, you can still use keys on your computer’s keyboard.

The code for Scratch-a-Sketch is here: http://scratch.mit.edu/projects/20658351/ – you can play online in the Flash version if you like, you don’t even need Scratch installed.

Unlike a traditional Etch-a-Sketch, you can lift the pen up to move around without drawing, change colour and pen size, and combine keys such as 2 arrow keys to draw decent diagonal lines.

There are loads of ways you could get children to extend this: sound, a better way of choosing colours – sky’s the limit!


crocodile clip on wedding ring makes great hands-free earth!

Posted in computers, ICT | Tagged , | 3 Comments