Can you do the Kettle Run in less than 12 parsecs?

Here’s another Python game for the BBC MicroBit that’s very easy for pupils to edit and improve.

The idea is that you navigate your ship through a canyon – or cave system or mountains. You can rotate your MicroBit through 90 degrees and fly up & down or stay left and right. Use your imagination.

Use the A and B buttons to move left and right (or up and down), avoiding obstacles as you fly. If you hit anything it’s GAME OVER and you press the reset button on the back to play again.

The aim is to get to your home port in order to put the kettle on for a nice cup of tea.

Complete 1 mission, and you go again – this time the game is faster and the terrain harder to navigate. Complete 5 and you win the game.

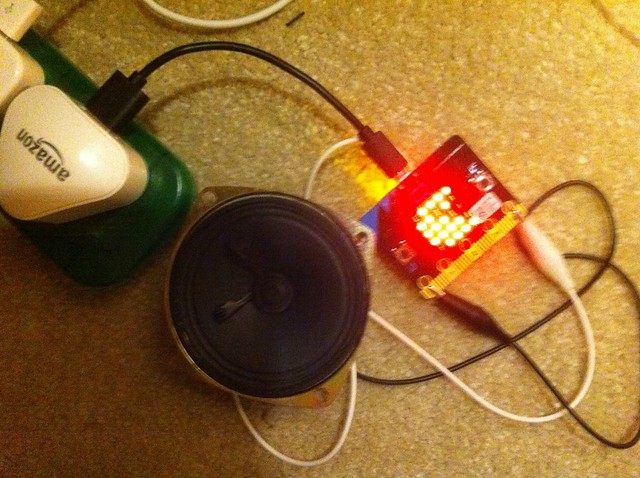
Hook a speaker or headphones up to pins 0 and GND to hear the audio.

Kettle Run 2 is an improved version with random terrain blocks, longer runs on each level – and an exciting cup of tea as a level up reward.

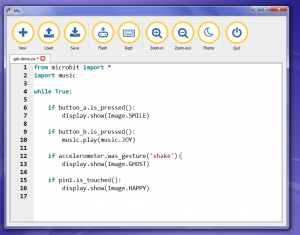
The game was written in the excellent Mu offline Python editor – just install Mu on your Mac, Windows PC or Linux machine (Ubuntu has been tested, and Raspbian I believe), write your code, plug in your MicroBit, click ‘flash’ and it just works! It even scrolls error messages (or ‘debugging messages’ as I prefer to call them) across the MicroBit display. An amazing piece of work by Nicholas Tollervey and others in the Python community.

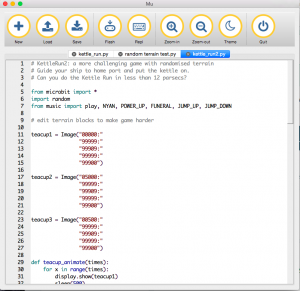
Kettle Run code in Mu

There’s loads of scope for students to make improvements to this game, simple or complex:

  • Add more levels by changing while level < 6: to a higher number.
  • Make the game harder by speeding it up more on each level by making the number bigger in speed -= 20
  • Edit the terrain image to make it bigger or more challenging – the game should play as long as the image lasts.
  • Perhaps add different terrains for different levels.

Here’s the code on Github: https://github.com/blogmywiki/kettle_run

And here’s the original Kettle Run in action:

Posted in Uncategorized | Tagged , , , | Leave a comment

Tilty MicroBit game

I am lucky enough to have 3 teacher BBC MicroBits to play with, and I am exploring using the awesome Mu Python editor – this allows you easily to program the MicroBit in Python totally offline, with absolutely no internet access at all. This means you can still play with your MicroBit come the zombie apocalypse, assuming we still have electricity. (I’ve seen bits of Zombieland, so I know the electricity stays on in these situations.)

Here’s my first attempt at writing a game. It’s really simple but has TWENTY levels (sort of). You tilt your MicroBit to colour in all the pixels. When you fill in all 25, you move on to the next level… but the game gets harder to control as the delay in the loop gets shorter. It’s pretty easy but quite maddening if you get one pixel that you can’t fill in.

Hook up a speaker to pins 0 and GND if you want to hear the sounds.

You could improve the game in lots of ways, for example by having random events to wipe out certain pixels so you have to fill them in again, or by having obstacles you must NOT touch. Tinker, enjoy!

(You can also find the code on GitHub here: https://github.com/blogmywiki/tilty)

# A simple MicroBit game by Giles Booth
# Tilt and colour in all the squares
# If you win level 20, press reset button to play again

from microbit import display, accelerometer, sleep, Image
from music import play, POWER_UP, NYAN

def get_xy():
    yaccel = accelerometer.get_y() * accelerometer_sensitivity
    xaccel = accelerometer.get_x() * accelerometer_sensitivity
    return yaccel, xaccel

def count_lit_pixels():
    pixel_count = 0
    for xx in range (5):
        for yy in range (5):
            if display.get_pixel(xx, yy) != 0:
                pixel_count += 1
    return pixel_count

pause = 100
level = 1
accelerometer_sensitivity=1/300

#set initial position
x, y = 2, 2
yaccel, xaccel = get_xy()
y = max(0, min(4, int(y + yaccel)))
x = max(0, min(4, int(x + xaccel)))

while pause > 0:
    yaccel, xaccel = get_xy()
    newy = max(0, min(4, int(y + yaccel)))
    newx = max(0, min(4, int(x + xaccel)))
    if newy != y or newx != x:
        display.set_pixel(x, y, 1)
        x, y = newx, newy
        display.set_pixel(x, y, 9)
    else:
        display.set_pixel(newx, newy, 9)
    pixels = count_lit_pixels()
    if pixels == 25:
        play(POWER_UP, wait=False)
        level += 1
        pause -= 5
        sleep(200)
        display.show(str(level))
        sleep(1000)
        display.clear()
    sleep(pause)

play(NYAN, wait=False)
display.show('WIN!')
sleep(200)
display.show(Image.HEART)
Posted in computers, education | Tagged , , , | Leave a comment

Simple MicroBit Python demos

BBC MicroBit

Here are two VERY simple bits of code you can copy & paste into Mu to demo the awesomeness of Python on the MicroBit, and it’s easy for pupils to mess about with them and make them their own.

The first uses both buttons, a touch button and a shake sensor to trigger events.

For output it displays images and plays a tune if you connect a speaker to pins 0 and GND. You can use crocodile clip leads like you’d find in a MakeyMakey kit to do this.

I’ve included some other image and tune names in the comments to encourage children to tinker.

Enjoy!

from microbit import *
import music

while True:
    if button_a.is_pressed():
        display.show(Image.PACMAN)
    if button_b.is_pressed():
        music.play(music.NYAN)
    if accelerometer.was_gesture('shake'):
        display.show(Image.GHOST)
    if pin1.is_touched():
        display.show(Image.SURPRISED)

# Connect a speaker to pins 0 and GND to hear the music

# try these images: HEART, MEH, RABBIT, COW, DUCK, SWORD, GIRAFFE
# TARGET, HAPPY, HOUSE, TORTOISE, UMBRELLA, SNAKE, SKULL, BUTTERFLY

# try these musics: ENTERTAINER, PRELUDE, ODE, BIRTHDAY, PYTHON, WEDDING

…and here’s the MicroBit shaky dice program in Python:

from microbit import *
import random

one = Image("00000:"
            "00000:"
            "00900:"
            "00000:"
            "00000")

two = Image("00000:"
            "09000:"
            "00000:"
            "00090:"
            "00000")         

three = Image("90000:"
              "00000:"
              "00900:"
              "00000:"
              "00009")            

four = Image("00000:"
             "09090:"
             "00000:"
             "09090:"
             "00000")

five = Image("00000:"
             "09090:"
             "00900:"
             "09090:"
             "00000")           

six = Image("09090:"
            "00000:"
            "09090:"
            "00000:"
            "09090")

display.scroll('Shake me!')

while True:
    if accelerometer.was_gesture('shake'):
        throw = random.randint(1, 6)
        if throw == 1:
            display.show(one)
        if throw == 2:
            display.show(two)
        if throw == 3:
            display.show(three)
        if throw == 4:
            display.show(four)
        if throw == 5:
            display.show(five)
        if throw == 6:
            display.show(six)
Posted in computers | Tagged , , , | 4 Comments

Now the BBC MicroBit starts to make sense

BBC MicroBit
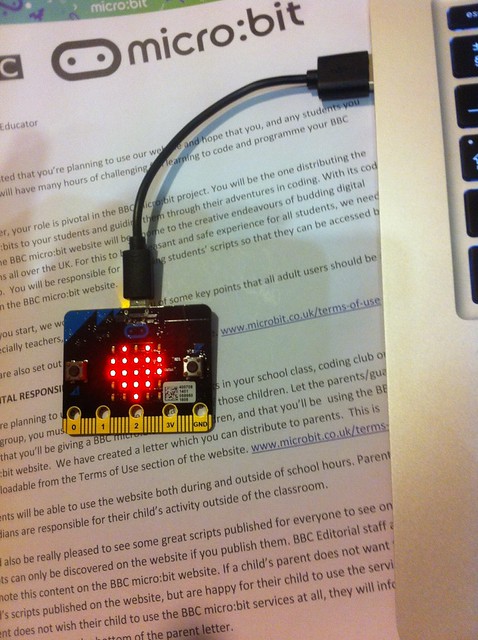
Behold, the world’s shortest USB lead!

Today, after much moaning on my part about delays, I got our school’s 3 teacher BBC MicroBits. And I think I now know how I’m going to use them once we get the children’s boards.

We’ve already done some Python in Year 7, so I am reluctant to start teaching them a different language or paradigm at this point – I feel we’ve moved beyond blocks. I also have to soothe concerns about children working on the public internet, and I dislike the way the current TouchDevelop and block editors rely on internet access and a remote server being online to compile your code. [UPDATE: You can use TouchDevelop and block editors without a login and without internet access, although you will need it to load the compiler in a browser in the first instance. See https://www.microbit.co.uk/offline for details. I am grateful to Miles Berry and Peli de Halleux for clarifying this for me.]

BBC MicroBit

I think Mu answers all of these questions for me. It’s the work of Nicholas Tollervy and others in the Python community – a standalone, cross-platform Python editor and command line tool that… just works!

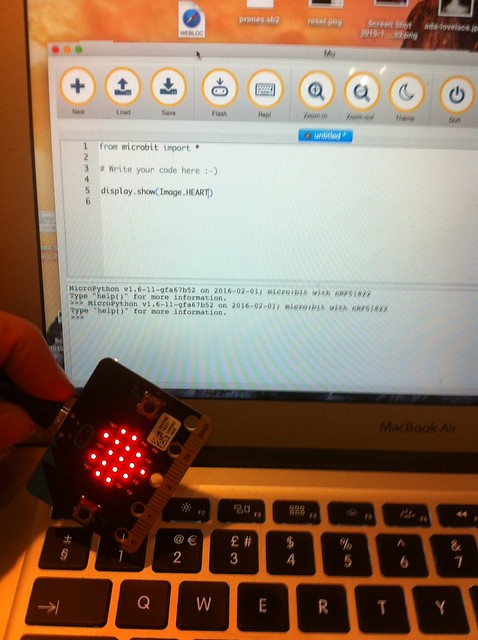
Install Mu Micropython (I used a MacBook), plug in your MicroBit, start typing your Python code, press the Flash button – and the code runs on your MicroBit!

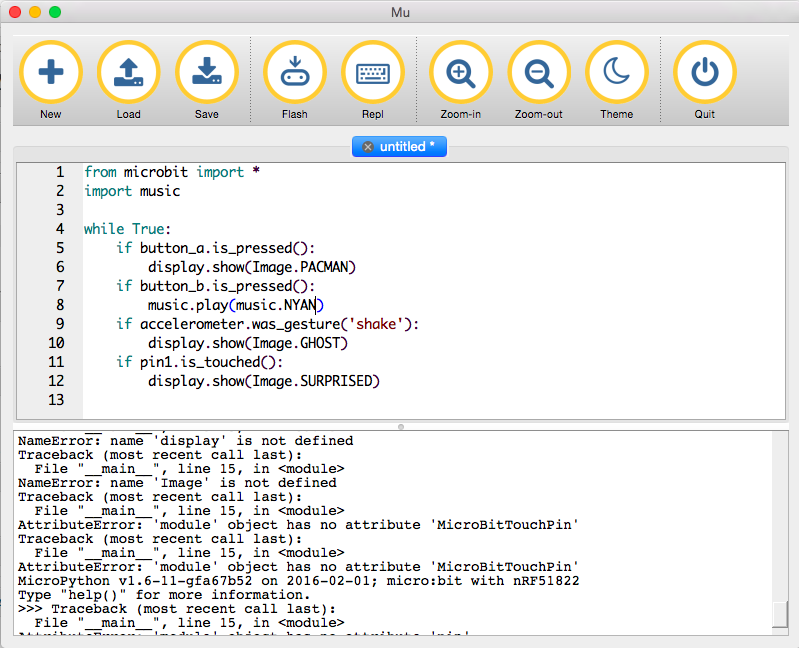
These very few lines of code do some cool things, and show off how the library of built-in images and tunes mean that children can do fun stuff with Python and the MicroBit amazingly quickly.

if button_a.is_pressed():
    display.show(Image.PACMAN)

draws a Pacman if you press the left button. There are LOADS of really fun built-in images to try.

if button_b.is_pressed():
    music.play(music.NYAN)

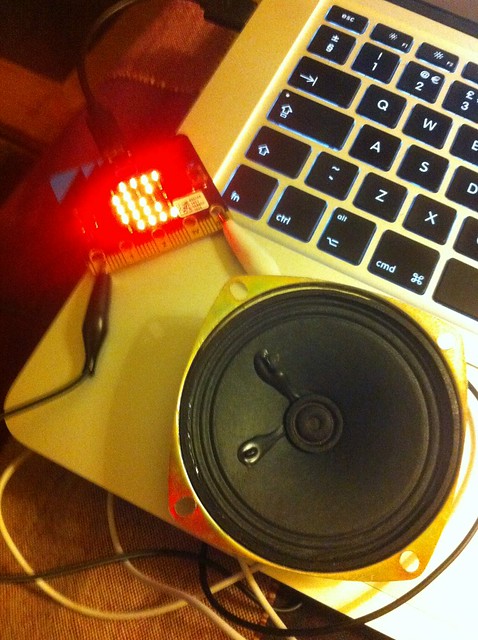
plays Nyan Cat music (many other tunes are available) if you press the right button. I attached a speaker with 2 crocodile clip leads from a MakeyMakey – no soldering required!

BBC MicroBit

if accelerometer.was_gesture('shake'):
    display.show(Image.GHOST)

Shake it and a ghost appears!

if pin1.is_touched():
    display.show(Image.SURPRISED)

Touch pin 1 (in a MakeyMakey way) and a surprised face lights up the screen.

Having forgotten (and now remembered) how really counter-intuitive the navigation is on the official MicroBit TouchDevelop lessons (and having to unlock my Microsoft account for some odd reason), I can honestly say I think using Python with Mu will be simpler than using block coding. It’s totally offline! No logins! No internet safety concerns. And it’s fun!

If you don’t have access to the command line (REPL) – as I currently don’t on my school Windows laptop – you get useful feedback in the form of error messages scrolling across the MicroBit display. Genius!

Mu for Windows - no drivers installed

Mu for Windows - no drivers needed for flashing code

Of course it remains to be seen if it will work on our Windows VDI (virtual desktops) at school, but I think I have seen the future of the MicroBit. And it’s snaky…

You can read the documentation for MicroBit MicroPython here: https://microbit-micropython.readthedocs.org/en/latest/ and download Mu here: https://github.com/ntoll/mu

BBC MicroBit

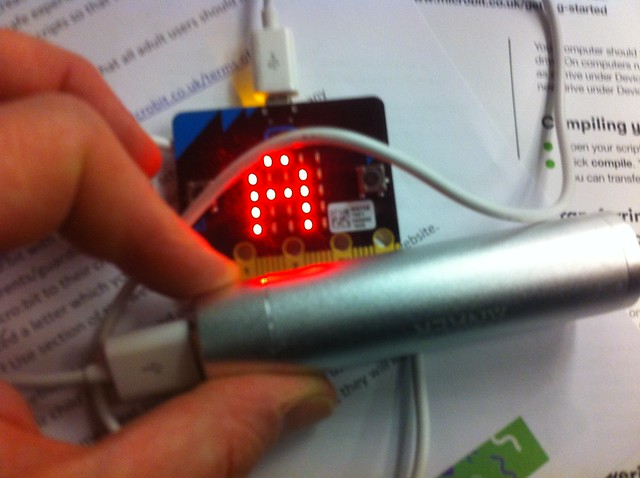
Running MicroBit self-contained off USB battery (above), and Kindle charger (below)

BBC MicroBit

Posted in computers, education | Tagged , , , | 2 Comments

BETT 2016 Review

My first visit to BETT, and although I knew it was large, I wasn’t quite prepared for the sheer scale and sensory overload. I did, however, manage to come away with some very interesting ideas for hardware, software and methods that we can apply, not just in teaching Computing, but in other subject areas as well. The most fruitful areas were:

  • Meeting lovely and incredibly helpful people from the Raspberry Pi Foundation.
  • Talking to a developer of education screen kits for the Raspberry Pi.
  • A talk by Miles Berry, principal lecturer and the subject leader for Computing Education at the University of Roehampton.

There were also a lot of demonstrations of the BBC Microbit device, but as the roll-out of this is already much-delayed and I’ve already done a day’s training on it, I decided to concentrate on software and hardware that is actually available right now, or about to be.

Raspberry Pi Foundation

The Raspberry Pi is a £30 computer that has captured the imagination of many young people, including some Year 6 girls at my school. It encourages exploration of computing through programming in Scratch and Python, especially in connecting computers with devices in the real world: physical switches, lights, temperature sensors etc. It also allows you to manipulate the popular Minecraft game through Python programming.

Carrie Anne Philbin
The inspirational author of Adventures in Raspberry Pi and Education Pioneer at the Raspberry Pi Foundation; she has worked particularly to encourage girls to get involved in computing.

It was a huge thrill to finally meet Carrie Anne, whom I’ve know via social media for some time, and indeed we have adapted each other’s projects. Several years ago she took my Arduino microcontroller-based ‘Little Box of Poems’ and adapted it to work with the Raspberry Pi. She gave me good advice about harnessing the enthusiasm we have in Y6 for programming through school clubs and advised me about good hardware set-ups: we could get a small set of Raspberry Pis and screens, say 3 or 4, for use in coding clubs, which would also allow us to evaluate their potential for wider use in the teaching of Computing without committing to a large spend. She also introduced me to…

Sam Aaron
Research Associate, Raspberry Pi Team, Cambridge University – and author of ‘Sonic Pi’.
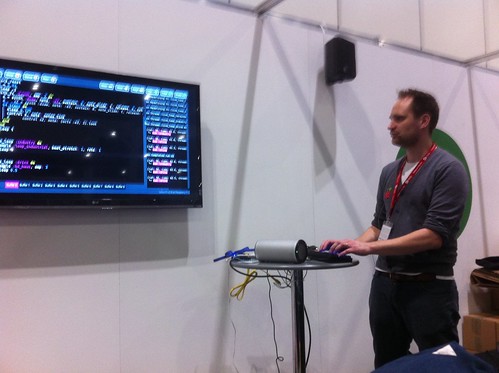
Sam Aaron performing music with live coding Sonic Pi

Talking to Sam and watching his demonstration of Sonic Pi was the stand-out moment at BETT – possibly life-changing! Sonic Pi enables the teaching of Computing though music. With a very few lines of code, children can make music in a staggering range of genres (classical, jazz, many modern genres), and through this learn about sophisticated concepts like iteration and threading. He made a powerful point that teaching looping or sorting, for example, in itself is boring; if you teach looping to repeat melodies or beats, children can instantly see an application in a creative way.

Sonic Pi is totally free, includes built-in tutorials, examples and an excellent bank of sound samples. As well as being bundled with the Raspberry Pi, it is also available for Windows and Mac.

It’s hard to describe how impressive this software is – Sam’s demo (see photo above) had him performing music by editing code live – something he also does in night clubs and music venues. I would love to arrange a demonstration to the music department at my school to explore future cross-curricular music & computing lessons. I’ve subsequently tested it on our Windows virtual desktops and it ran for an hour an a half with many simultaneous loops running – rock solid!

As I parted from Sam I expressed doubts at my ability to teach with SonicPi as “I’m not a musician”. Sam replied “Yet.” Genius!

And here’s some of my SonicPi noodling, based on Sam’s Steve Reich-style loops:

David Honess
Education Resource Engineer at the Raspberry Pi Foundation. Again I’ve known David for a while via social media, and he worked with my eldest son on a BBC School Report project to prototype a Raspberry Pi weather station.

He’s currently working on the ‘Astro-Pi’ project. Tim Peake has two Raspberry Pis on the International Space Station running experiments designed by school children. This uses an extra device plugged into the Raspberry Pi called a ‘SenseHAT’ – I have been experimenting with this device in recent months. It has sensors for things like air pressure, temperature and an accelerometer which can measure gravity.

I talked to him about data handling – all the data that the ‘AstroPis’ are gathering in space will be made available for schools to download. This could make a great data-handling project – importing data into Excel or a Python program, for example to locate the ‘South Atlantic Radiation Anomaly’ by cross-referencing location data with points where the Raspberry Pi was forced to reboot by the strong radiation. We could also do some local environmental data capture, such as air pressure and design experiments around it. David says there is potential also for science teaching with this device – what is pressure? What is gravity?

I also saw the official Raspberry Pi weather station kit, which is being tested in schools at the moment. I was told they may be going on general sale soon – perhaps in time for the next academic year. This is a ‘big data’ project with Oracle where meteorological data is uploaded and shared publicly to build up a big picture. They were able to advise me about ways of making a simple project to measure, for example, temperature and light in the mean time, and there’s great potential for cross-curricular links with DT (build a weather-resistant encloure), physics (electronics) and geography (weather patterns & data).

Pi-top CEED

The RaspberryPi may be cheap, but you still need a screen. They can be plugged into our classroom projectors in our ICT suites, and a cheap adaptor will allow them to work with the screens in our senior school ICT room, but our Junior School lacks free-standing screens. One possible solution, recommended by Raspberry Pi themselves, is the PiTop.

This is a £99 device that includes a screen, Raspberry Pi and power supply – you just add your own keyboard, mouse and wifi dongle. It allows easy access to the pins to attach physical devices and can be stored easily, taking up minimum space. It is future-proof, working with any model of Raspberry Pi, plus other tiny computers and the BBC Microbit. These will be available in April. (They also make a lovely £199 RaspberryPi-based laptop, but I think the £99 screen is better value).

Miles Berry
Principal lecturer and the subject leader for Computing Education at the University of Roehampton. He also led work on the excellent Rising Stars ‘Switched on Computing’ SOW which we are about to start using in KS1 and KS2.

Miles’s talk about ‘Computing – what’s working in schools’ was superb, I could have listened to him talk for another hour (though I doubt his voice would have lasted!). He listed several strands for good practice in the the teaching of Computing, all of which will impact my short-term and long-term planning. In brief:

It’s not about the code – think before you click
Programming / coding is just a means to the end of computational thinking.

It’s easier to read code than to write code.
Give children a sample bit of code and ask them to predict what it will do before running it. Then edit, tinker. It’s easier to edit code that to start from a blank screen

Making things matters
Children learn by creating things to show others rather than just following instructions (which I have been guilty of!) – don’t program children, get them to program computers.

Pair programming is powerful
Many schools did paired work because of lack of computers – but Miles says even if you have enough machines, paired work is good: it’s more like the way software is written in the real world (collaboratively); children spot each other’s mistakes; you get better code.

Debugging helps grow mindsets
Equip children with tools to solve problems when faced with error messages, not giving up. I will now teach discrete lessons just on debugging.

Go for depth not breadth
Keep the main principles of computational thinking in mind. We don’t really need more programming languages – the ones we have like Scratch, Snap! or Python are enough. Concentrate on doing 1 language well, rather than having a smattering of lots.

Nurture curiosity
Give children a better mental model of what a computer is. Teach them how to learn (flipped learning) so they may leave KS2 having taught themselves something really quite hard.

Look for interesting contexts
Get children involved in events like Young Rewired State – solving non-trivial problems in a team.

This is for everyone
Make it inclusive – do not say ‘this is too hard for some’. Get children to think about how they can adapt their projects for the visually-impaired, the deaf. Consider changing the language in Scratch to French, for example (plus it occurs to me there may be cross-curricular language lessons here!)

‘Year 8 is too late’ (for girls). I am lucky in a girls’ school that there is less peer pressure to drop STEM subjects, but even so I need to harness the enthusiasm in Y6 & 7 – my own questionnaires show many girls in Y7 are obsessed with Minecraft, but by Y9 such computer games have become something their younger siblings or brothers do.

Posted in computers, education, Raspberry Pi | Tagged , | Leave a comment