RFID card kit for Raspberry Pi

Two videos (one short, one long) exploring the Monk Makes Clever Card kit for the Raspberry Pi. I really recommend this RFID card kit, it is excellent value and the supplied software is very thoughtfully designed – I made an internet radio that plays different stations when you present different cards in mere minutes!

Here’s a quick demo of the radio:

And here’s an in-depth look at the kit and how I made the radio:

Posted in radio, Raspberry Pi | Tagged , , | 2 Comments

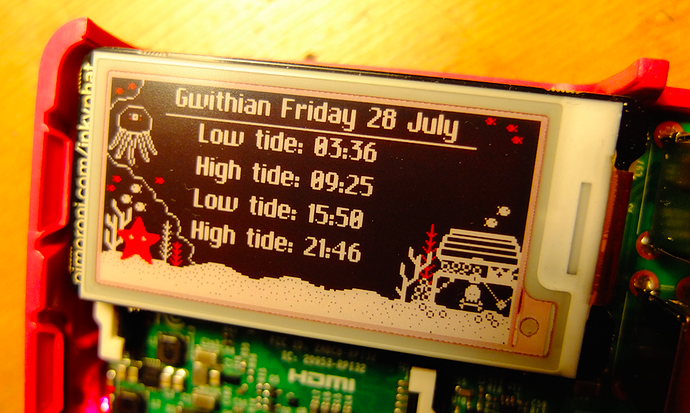
Tide times on Raspberry Pi Inky pHAT display

Now updated with weather info – see end of this blog post!

Someone once said ‘information wants to be free’. Well, yes and no. If you’re looking for publicly-funded academic research papers or live train running information or potentially life-saving data like tide times, then forget it. (Little bit of a rant, there. Sorry.)

After my radio, I fancied making a gizmo to show high and low tide times on my Raspberry Pi’s Inky pHAT e-ink display. This turned out to be way harder than I expected, chiefly because UK tide time data does not seem to be syndicated as an RSS or other accessible data feed. There is a privately-run web site that appears to have an RSS feed, but all the tide times are contained in one XML tag, so it’s not very useful. Magic Seaweed have an API but it requires a key – I have asked for one as they have loads more lovely surf data.

So I decided to find out how to do screen-scraping in Python. I used this very nice guide which uses two Python modules, ‘requests’ (which I already had on my Pi) and ‘Beautiful Soup’ which I installed with
sudo apt-get install python3-bs4

You can get tide times on many different sites, I chose the Met Office almost at random but partly because I want to add weather info. Screen-scraping is, I have to say, a Hideous Kludge. (I think I saw Hideous Kludge at the Bull and Gate once…) If the Met Office reconfigure their site it any way, this program will probably stop working. It could also do with some error handling…

DISCLAIMER: this beta is provided for amusement only!
Do not rely on the tide times presented as code may be buggy.

So here we go – put the background image file (mine is shamelessly modified from the supplied Pimoroni one but you could add one of your own making) and a font of your choice in the same folder as this script, install Beautiful Soup, find your local seaside place geohash code on the Met Office web site and replace mine with it, and off you jolly well go.

If you want to use my retro 68k Mac font (which does look lovely on the Inky pHAT) you can download it here.

You can set cron to run this automatically – I would suggest running it every morning at 5am; the current version of Raspbian allows you to do this easily on the desktop (Raspberry > System Tools > Scheduled tasks). I think this would be a great project to run on a PiZeroW to make a little tide time gizmo for your beach house!

# A program to display tide times on Raspberry Pi with Inky pHAT e-ink display
# by Giles Booth - www.suppertime.co.uk/blogmywiki
# Updated 1 Aug 17 to fix bug when only 3 tides in 24 hr period.

# DISCLAIMER: this beta is provided for amusement only!
# Do not rely on the tide times presented as code may be buggy.
# This screen-scrapes the Met Office web site, may break at any time.
# -------------------------------------------------------------
# I did not need to install 'requests', it was already on Pi.
# I installed Beautiful Soup with 'sudo apt-get install python3-bs4'
# using tutorial at https://www.dataquest.io/blog/web-scraping-tutorial-python/
# Download your own .ttf font eg ChiKareGo.ttf from
# http://www.pentacom.jp/pentacom/bitfontmaker2/gallery/?id=3778
# and place it in same folder as this program.

# To do: add weather, wind direction, custom backdrop, fix 3 tide bug.

import requests
from bs4 import BeautifulSoup
import inkyphat
from PIL import Image, ImageFont

# Fetch Gwithian tide times from Met Office web site
# Find other geohash location codes on the site, eg
# Godrevy, Cornwall gbujv26hb
# Walton-on-Naze u10yuyqrf
# Gt Yarmouth u135pr5sv
page = requests.get("http://www.metoffice.gov.uk/public/weather/tide-times/gbujtpnch")

soup = BeautifulSoup(page.content, 'html.parser')
html = list(soup.children)[2]
body = list(html.children)[3]

# print location name in console - you could print this straight to Inky pHAT
location = soup.find_all('h2')[1].get_text()
print(location)

# print 1st date (today!)
today_date = soup.find_all('h3', class_='dayTitle')[0].get_text()
print(today_date)

# print tide times - needs work as there are not always 4 tides in each 24 hour period
for i in range (4):
    print(soup.find_all('td')[i].get_text(),soup.find_all('span', class_='tideTime')[i].get_text())

# replace with font of your choice
font = ImageFont.truetype("ChiKareGo.ttf", 16)
inkyphat.set_image("emptier-backdrop.png")

title = 'Gwithian ' + today_date
w, h = font.getsize(title)
x = (inkyphat.WIDTH / 2) - (w / 2)
inkyphat.text((x, 0), title, inkyphat.WHITE, font=font)
inkyphat.line((31, 15, 184, 15)) # Horizontal  line

tide_y = 16

for i in range (4):
    tide_line = soup.find_all('td')[i].get_text() + ' tide: ' + soup.find_all('span', class_='tideTime')[i].get_text()
    if not tide_line[0].isdigit():  # filter out spurious lines when only 3 tides in 24 hrs
        inkyphat.text((50, tide_y), tide_line, inkyphat.WHITE, font=font)
        tide_y += 16

inkyphat.show()

Updated version

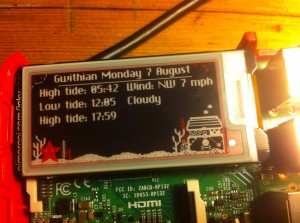
I’ve since tweaked the code (inefficiently I know) to show wind direction, speed and general weather outlook. I’ve also made a new background image which allows for more text:

# A program to display tide times on Raspberry Pi with Inky pHAT e-ink display
# by Giles Booth - www.suppertime.co.uk/blogmywiki

# DISCLAIMER: this beta is provided for amusement only!
# Do not rely on the tide times presented as code may be buggy.
# This screen-scrapes the Met Office web site, may break at any time.
# -------------------------------------------------------------
# I did not need to install 'requests', it was already on Pi.
# I installed Beautiful Soup with 'sudo apt-get install python3-bs4'
# using tutorial at https://www.dataquest.io/blog/web-scraping-tutorial-python/
# Download your own .ttf font eg ChiKareGo.ttf from
# http://www.pentacom.jp/pentacom/bitfontmaker2/gallery/?id=3778
# and place it in same folder as this program.

import requests
from bs4 import BeautifulSoup
import inkyphat
from PIL import Image, ImageFont
import string

# Fetch Gwithian tide times from Met Office web site
# Find other geohash location codes on the site, eg
# Godrevy, Cornwall gbujv26hb
# Walton-on-Naze u10yuyqrf
# Gt Yarmouth u135pr5sv
page = requests.get("http://www.metoffice.gov.uk/public/weather/tide-times/gbujtpnch")

soup = BeautifulSoup(page.content, 'html.parser')
#html = list(soup.children)[2]
#body = list(html.children)[3]

# print location name in console - you could print this straight to Inky pHAT
location = soup.find_all('h2')[1].get_text()
print(location)

# print 1st date (today!)
today_date = soup.find_all('h3', class_='dayTitle')[0].get_text()
print(today_date)

# print tide times
for i in range (4):
    print(soup.find_all('td')[i].get_text(),soup.find_all('span', class_='tideTime')[i].get_text())

# replace with font of your choice
font = ImageFont.truetype("ChiKareGo.ttf", 16)
inkyphat.set_image("even-emptier-backdrop.png")

title = 'Gwithian ' + today_date
w, h = font.getsize(title)
x = (inkyphat.WIDTH / 2) - (w / 2)
inkyphat.text((x, 0), title, inkyphat.WHITE, font=font)
inkyphat.line((31, 15, 184, 15)) # Horizontal  line

tide_y = 16
for i in range (4):
    tide_line = soup.find_all('td')[i].get_text() + ' tide: ' + soup.find_all('span', class_='tideTime')[i].get_text()
    if not tide_line[0].isdigit():  # filter out spurious lines when only 3 tides in 24 hrs
        inkyphat.text((10, tide_y), tide_line, inkyphat.WHITE, font=font)
        tide_y += 16

# find wind speed and direction
wx = soup.find_all('div', class_="tideForecast")[0].get_text()
wxList = wx.splitlines()
windSpeed = wxList[17]
windDirection = wxList[13]
print('Wind',windSpeed,windDirection)
inkyphat.text((110, 16), 'Wind: '+windDirection+' '+windSpeed+' mph', inkyphat.WHITE, font=font)

# Find weather description
weather = soup.find(class_="tideForecast")
forecast_items = weather.find_all(class_="tideWxIcon")
outlook = forecast_items[0]
img = outlook.find("img")
desc = img['alt']
print('Outlook',desc)
inkyphat.text((110, 32), desc, inkyphat.WHITE, font=font)

inkyphat.show()
Posted in Raspberry Pi | Tagged , , , , | 2 Comments

InkyPhat Flotilla radio

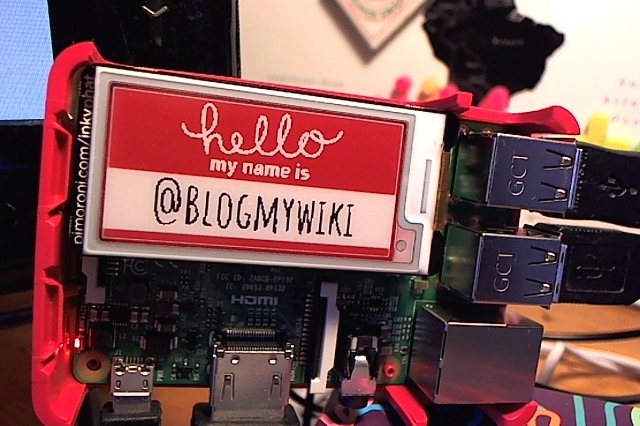
I treated myself to a Pimoroni InkyPhat Raspberry Pi e-ink display – it’s small but good value compared with some other e-ink displays… and it has THREE colours: black, white – and red. It comes with some beautifully-designed examples such as a calendar, a local weather display and a badge-maker. Being an e-ink display, it retains its contents after the power goes and hence you can unplug it from the Pi and wear it!

Obviously the first thing I had to do was make a radio, so I tweaked my Flotilla radio so it only uses the rotary dial for volume and the 4-button touch panel to choose pre-set stations.

The display update is slow, I guess to ensure maximum quality – there’s none of the ghosting of old images I experienced in early e-book readers. It also forces you to listen to a few seconds of each station before changing channel. And I quite like the drama of the thing.

Making the artwork was a bit of a drag – you have to save images as PNG files with a very specific colour palette – 3 colours only and they must be in the right order. I hate GIMP at the best of times but it drove me mad as I kept getting images that looked ok on screen but swapped colours on the InkyPhat. Eventually it all came good.

I’m really looking forward to making more projects with this neat little colourful e-ink display.

Here’s the code – it assumes you have installed Flotilla and InkyPhat and needs Flotilla Touch and Dial modules. You will also need to have installed mpc and mpd and added 4 radio stations as described in my Flotilla radio project.

#!/usr/bin/env python

# simple internet radio with Flotilla and InkyPhat
# Script by Giles Booth x
# www.suppertime.co.uk/blogmywiki
# Always stop flotilla daemon before running Python with Flotilla
# with 'sudo service flotilla stop'

import os
import sys
import flotilla
import inkyphat
from PIL import Image, ImageFont

# Looks for the dock, and all of the modules we need
# attached to the dock so we can talk to them.

dock = flotilla.Client()
print("Client connected...")

while not dock.ready:
    pass

print("Finding modules...")
touch = dock.first(flotilla.Touch)
dial = dock.first(flotilla.Dial)

if touch is None or dial is None:
    print("Some Flotilla modules required were not found...")
    dock.stop()
    sys.exit(1)
else:
    print("Found. Running...")

os.system("mpc load")
dial_val = 0

inkyphat.set_image(Image.open("splash.png"))
inkyphat.show()

# Starts the loop going so it keeps working until we stop it
try:
    while True:

# volume control using dial
        new_dial_val = int(float(dial.data[0])/10.23)
        if new_dial_val != dial_val:
            dial_val = new_dial_val
            os.system("mpc volume " + str(dial_val))

# Looks for a Touch module and listens for an input

        if touch.one:
            os.system("mpc play 1")
            inkyphat.set_image(Image.open("logo-6music.png"))
            inkyphat.show()

        if touch.two:
            os.system("mpc play 2")
            inkyphat.set_image(Image.open("bbc-ws.png"))
            inkyphat.show()

        if touch.three:
            os.system("mpc play 3")
            inkyphat.set_image(Image.open("fip.png"))
            inkyphat.show()

        if touch.four:
            os.system("mpc play 4")
            inkyphat.set_image(Image.open("radio4.png"))
            inkyphat.show()

# This listens for a keyboard interrupt, which is Ctrl+C and can stop the program
except KeyboardInterrupt:
    os.system("mpc stop")
    inkyphat.paste(inkyphat.Image.new('P', (inkyphat.WIDTH, inkyphat.HEIGHT)))
    font = ImageFont.truetype(inkyphat.fonts.FredokaOne, 36)
    print(dir(inkyphat.fonts))
    message = "goodbye"
    w, h = font.getsize(message)
    x = (inkyphat.WIDTH / 2) - (w / 2)
    y = (inkyphat.HEIGHT / 2) - (h / 2)
    inkyphat.text((x, y), message, inkyphat.RED, font)
    inkyphat.show()
    print("Stopping Flotilla...")
    dock.stop()

Here are the image files I made:

Posted in Raspberry Pi | Tagged , , , , , | Leave a comment

Raspberry Pi Freeview PVR and TV streamer

I’ve had a cheap USB SDR stick sitting in my Amazon basket for… about 2 years. I finally got round to buying the thing.

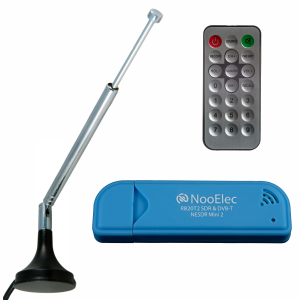
What is an SDR? It’s a Software Defined Radio – a radio tuner that allows you to listen to analogue broadcasts over a wide range of frequencies and – with the right software – watch and record digital TV. As soon as I got my chunky blue stick – a NooElec R820T2 – I plugged in its little antenna and installed the gqrx radio receiving software on my MacBook. Having grown up in a ham radio-filled household, this was quite nostalgic tuning different bands looking for stuff. The USB stick uses a common chipset and works as a normal FM radio tuner with RDS, but pretty soon I had stumbled upon Heathrow Approach and could listen to radio chat from the cabins of planes flying over my house and later I found some OB frequencies used by ITN (nicely idented) and I assume the BBC (at least I think that’s why I was hearing Radio 2 on some VERY strange frequencies!). You can do all sorts of other clever stuff with SDRs like receiving weather maps and plotting aeroplane and boats on maps. VERY annoyingly I can’t find any Mac software for decoding DAB radio, though you can do this on Windows and Linux machines.

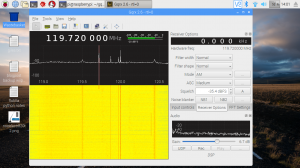
gqrx is available in an experimental version for the Raspberry Pi but I haven’t got it working very well yet – it seems much noisier than it did on the Mac (possibly because I’m in a different room), I had to run it using a -r command line switch to get round a bug where the waveform didn’t show and RDS doesn’t seem to work. Nonetheless on the left here you can see me listening to planes on the Heathrow approach frequency. The ‘waterfall’ is useful for spotting sporadic transmissions on adjacent frequencies.

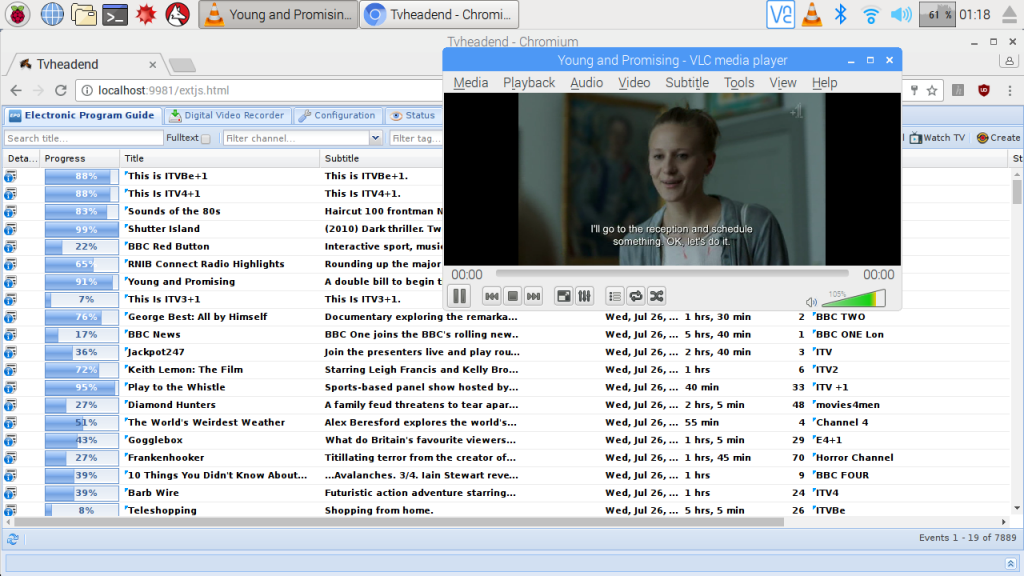
What I did get working was a Freeview TV tuner and server on the Raspberry Pi. I can now watch live TV & radio off air on my Pi (admittedly not full screen) – and possibly even more usefully, the Pi will stream TV to other devices on my home network, so I can watch live TV in a browser or using VLC on my laptop anywhere in the house.

I even managed to schedule a recording on my MacBook which was recorded as a .ts (transmission stream) file on the Pi – this is the format used by PVRs and can be played in VLC (and converted to a more compact, portable format using other apps too.)

How did I get this working? Glad you asked me that. I finished at about 1am and I didn’t take notes. It involved a lot of fiddling in a studio-managerly fashion. Here’s roughly what I did…

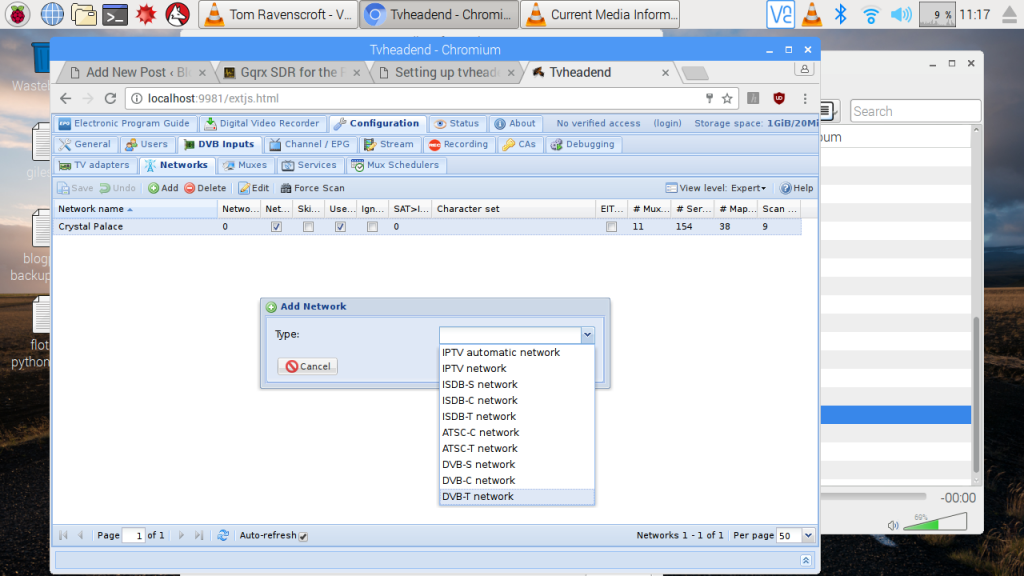
First I installed tvheadend on a RaspberryPi 3. I used this guide – but I had to change quite a lot when it came to configuring it as they set up a satellite TV receiver and I am just using Freeview. For example, I chose DVB-T as my network type:

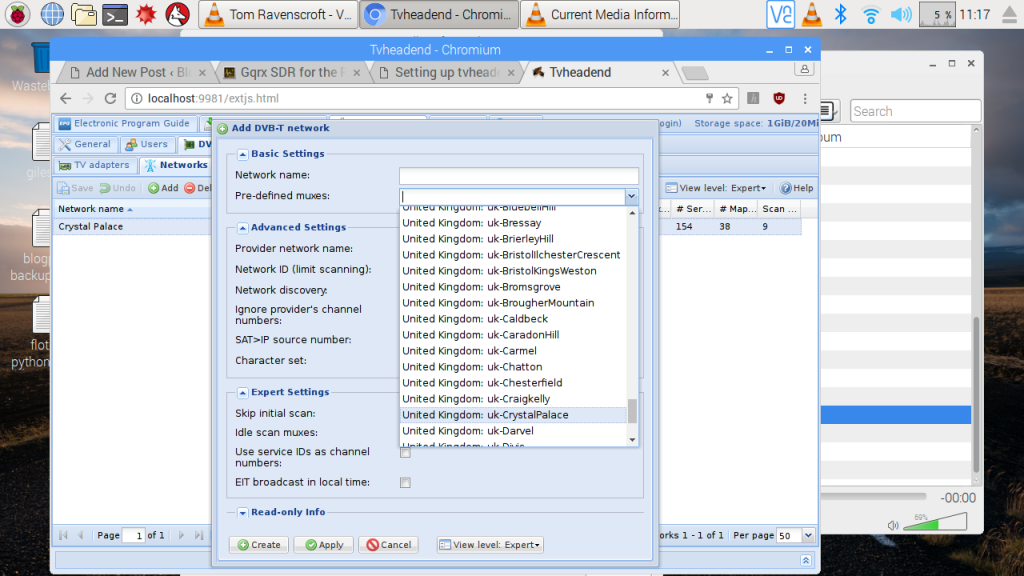
Tvheadend comes pre-populated with a list of digital TV networks all over the world – luckily I live close enough to Crystal Palace to be able to receive Freeview with a damp piece of string for an aerial (as my late dad G3NXU would say). I suspect if you live further from a transmitter you may find the supplied telescopic antenna pretty useless.

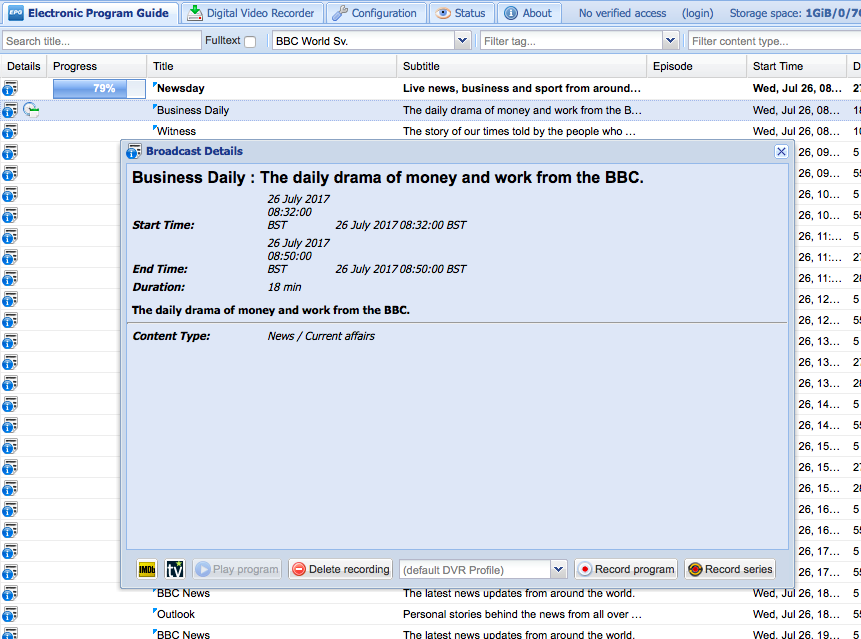
I didn’t have to add any muxes manually as they did in the guide I followed, but I did have to go back to the TV adaptor page and re-enable it before it started scanning muxes and allowed me to then add channels.

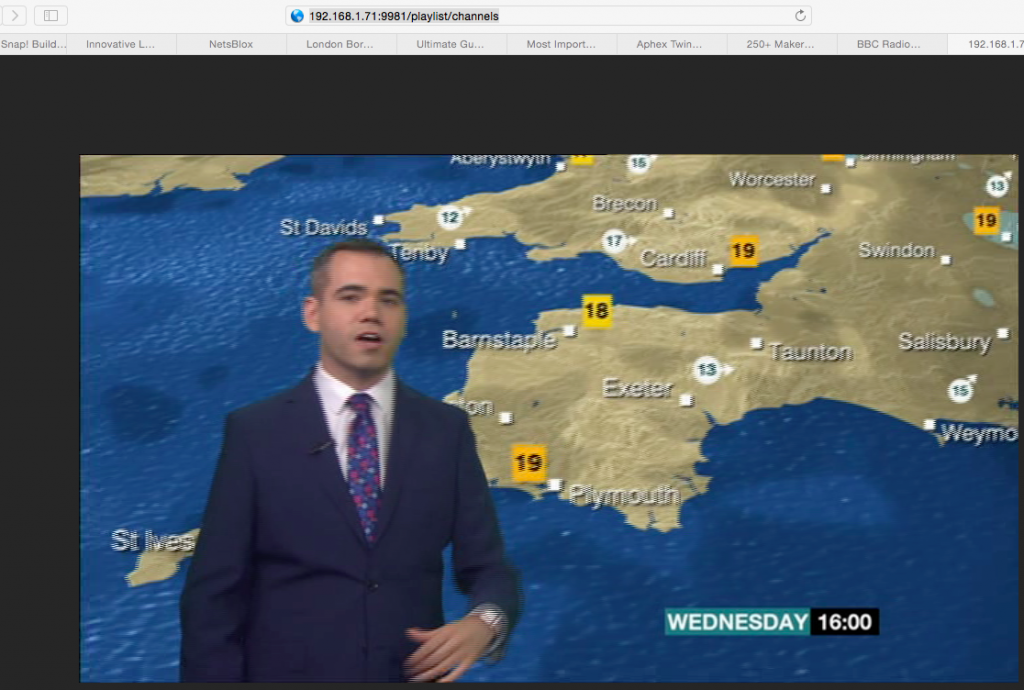
Once I’d added the channels I was a bit stuck. I knew tvheadend is a server so on my MacBook I pointed a web browser at the IP address of the Pi on my home network using http://IPADDRESSOFPI:9981/playlist/channels - and straight away BBC1 started playing on the MacBook!

I subsequently found you can view the EPG by browsing to http://localhost:9981/ on the Pi, schedule recordings, and even watch live TV in a browser window.

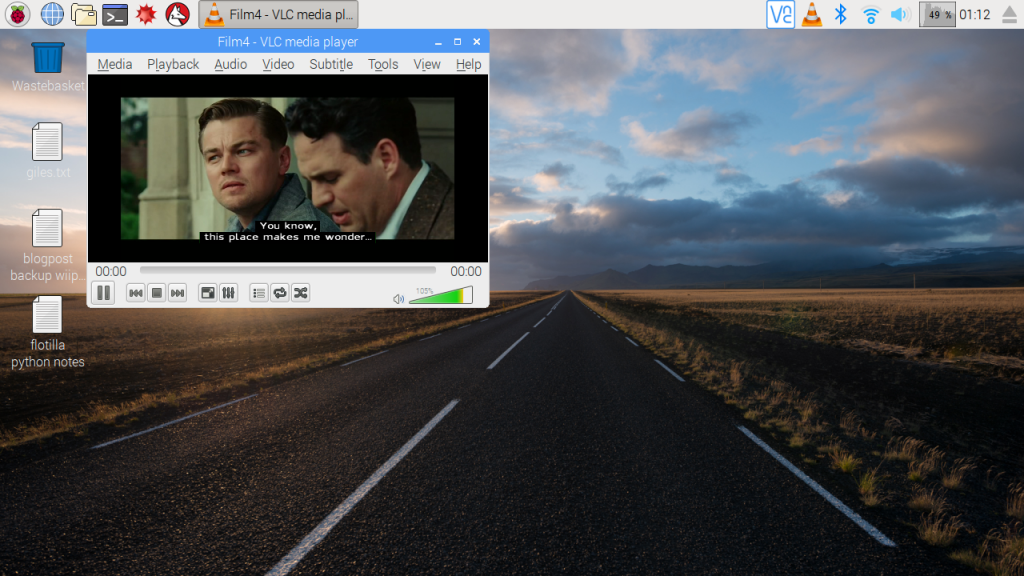
I found it more useful to use VLC, however. On the Pi just install and use VLC to open a network stream and use http://localhost:9981/playlist/channels as the URL – on another machine on your LAN use http://IPADDRESSOFPI:9981/playlist/channels.

VLC allows you to de-interlace video (improves the appearance of movement), switch audio soundtracks (for example to hear audio description) and turn subtitles on and off. On the Pi itself it couldn’t render video full screen at the same time as decoding and streaming, but clients on the LAN like my MacBook could. The largest I got the picture to play reliably on the Pi was a bit bigger than quarter size, but smaller than half size. (These cheap USB SDR sticks don’t decode HDTV by the way).

I think the NooElec stick provides a great deal of fun for £15 – £20 – there may be better ones you can buy now however. It’s also VERY chunky and blocks all but 1 USB port on the Pi3! I love the idea that such a cheap device opens up a world of radio and data reception, giving me access to TV channels that can’t easily be streamed online as well as schedule recordings and play live TV on laptops and mobile devices anywhere in the house. It could also bring TV and radio to situations without internet access. And there must be some exciting possibilitiesfor all that EPG data – a bot that tweets automatically when a certain program is about to start?

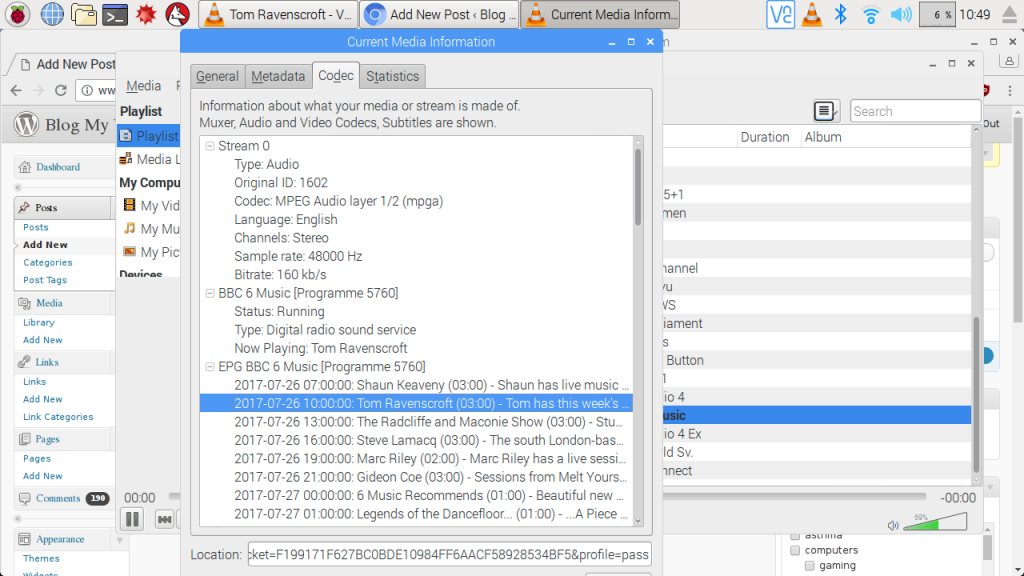
As I type this on the same Raspberry Pi I am listening to BBC 6music off Freeview on the same device – not how the processor is being thrashed… ;)

Posted in BBC, computers, radio, Raspberry Pi, Raspbian, TV | Tagged , , , , , , , , | Leave a comment

Flotilla-controlled Raspberry Pi internet radio

As you may know, I love making different internet radios with Raspberry Pis! This week I’ve been rediscovering the Pimoroni Flotilla modular physical computing devices which I backed on Kickstarter a few years ago, and as my first Python project with Flotilla it made sense to… make a radio with lovely controls.

Here’s what I used:

  • A Raspberry Pi 3 with updated Jesse Raspbian installed and an internet connection
  • A TV as a display and audio output (you can use powered speakers or headphones just as easily for the audio output).
  • A Pimoroni Flotilla Dock, Touch buttons, Slider, 8×8 Matrix display and rotary Dial – though you could do a bare bones version with just the Touch buttons.

First up I had to install mpc and mpd which I use to play radio streams:

sudo apt-get install mpc mpd

I had lot of problems on this new Pi with mpc & mpd hanging when I changed channels a few times – something I’d not experienced previously making Raspberry Pi radios with older versions of Raspbian. Here’s how to fix this: first open the mpd config file with nano like this:
sudo nano /etc/mpd.conf

Then edit these lines to remove some # signs (uncomment) and change the mixer_type from hardware to software so it looks like this:

audio_output {
type "alsa"
name "My ALSA Device"
device "hw:0,0" # optional
mixer_type "software" # optional
mixer_device "default" # optional
mixer_control "PCM" # optional
mixer_index "0" # optional
}

Now add some radio station URLs using the mpc add command. I added Radio 1, BBC World Service News, FIP and Radio 4. For example to add FIP I typed
mpc add http://chai5she.cdn.dvmr.fr/fip-midfi.mp3

You can find BBC radio URLs on my big list here.

You need 4 stations only as you only have 4 buttons for presets. They get added in order but you can check your list of presets by typing
mpc playlist

And you can change the order using the move command, for example to move station 4 to preset 2 just type:
mpc move 4 2

Then I wrote some Python code to talk to the Flotilla modules and play radio stations. Once I’d got mpc working properly the hardest thing was getting numbers on the Matrix display. I am very grateful to veryalien for their help on the Pimoroni forum getting this to work.

I made the radio graphic by sketching it out on graph paper and converting each row to binary (bottom row first!) then hexadecimal and added it to the list that contains the font for digits 1-4 as pinched from the Pimoroni javascript code for Rockpool.

Before running any Python code with Flotilla you have to stop the Flotilla daemon from running on the Pi by typing the following command:
sudo service flotillad stop

Then plug in your Flotilla modules and run the Python code below. You should see a little radio icon appear on the Matrix display to let you know it’s working. The slider adjusts the display brightness, the rotary Dial adjusts the volume, the Matrix display shows a number 1-4 to let you know which preset is selected (though you could easily have scrolling text with the station name – see the Pimoroni forum for details). Ctrl-c on the keyboard will stop the radio, clear the display and exit the script.

Happy listening!

#!/usr/bin/env python

# simple internet radio
# Script by Giles Booth x
# adapted from motor control script by Tanya Fish
# www.suppertime.co.uk/blogmywiki
# stop flotilla daemon before running Python with Flotilla

import os
import sys
import flotilla

# radio logo and font for digits 1-4
digits = [
    [0xff,0x81,0xad,0x81,0xff,0x02,0x04,0x08],
    [0x00,0xfc,0x30,0x30,0x30,0x30,0x70,0x30],
    [0x00,0xfc,0xcc,0x60,0x38,0x0c,0xcc,0x78],
    [0x00,0x78,0xcc,0x0c,0x38,0x0c,0xcc,0x78],
    [0x00,0x1e,0x0c,0xfe,0xcc,0x6c,0x3c,0x1c]
    ]

# Looks for the dock, and all of the modules we need
# attached to the dock so we can talk to them.

dock = flotilla.Client()
print("Client connected...")

while not dock.ready:
    pass

print("Finding modules...")
touch = dock.first(flotilla.Touch)
matrix = dock.first(flotilla.Matrix)
dial = dock.first(flotilla.Dial)
slider = dock.first(flotilla.Slider)

if touch is None or matrix is None or dial is None or slider is None:
    print("Some modules required were not found...")
    dock.stop()
    sys.exit(1)
else:
    print("Found. Running...")

os.system("mpc load")
dial_val = 0

# set initial brightness and radio logo
brightness = max(int((slider.position/1023.0)*100.0),1)
matrix.clear()
matrix.set_brightness(brightness)
for row in range(0, 8):
    for col in range(0, 8):
        if digits[0][row] & (1 << col):
            matrix.set_pixel(col, 7-row, 1)
matrix.update()

# Starts the loop going so it keeps working until we stop it
try:
    while True:

        new_brightness = max(int((slider.position/1023.0)*100.0),1)
        if new_brightness != brightness:
            brightness = new_brightness
            matrix.set_brightness(brightness)
            matrix.update()

# volume control using dial
        new_dial_val = int(float(dial.data[0])/10.23)
        if new_dial_val != dial_val:
            dial_val = new_dial_val
            os.system("mpc volume " + str(dial_val))

# Looks for a Touch module and listens for an input

        if touch.one:
            os.system("mpc play 1")
            matrix.clear()
            for row in range(0, 8):
                for col in range(0, 8):
                    if digits[1][row] & (1 << col):
                        matrix.set_pixel(col, 7-row, 1)
            matrix.update()

        if touch.two:
            os.system("mpc play 2")
            matrix.clear()
            for row in range(0, 8):
                for col in range(0, 8):
                    if digits[2][row] & (1 << col):
                        matrix.set_pixel(col, 7-row, 1)
            matrix.update()

        if touch.three:
            os.system("mpc play 3")
            matrix.clear()
            for row in range(0, 8):
                for col in range(0, 8):
                    if digits[3][row] & (1 << col):
                        matrix.set_pixel(col, 7-row, 1)
            matrix.update()

        if touch.four:
            os.system("mpc play 4")
            matrix.clear()
            for row in range(0, 8):
                for col in range(0, 8):
                    if digits[4][row] & (1 << col):
                        matrix.set_pixel(col, 7-row, 1)
            matrix.update()

# This listens for a keyboard interrupt, which is Ctrl+C and can stop the program
except KeyboardInterrupt:
    os.system("mpc stop")
    matrix.clear()
    matrix.update()
    print("Stopping Flotilla...")
    dock.stop()
Posted in radio, Raspberry Pi, Raspbian | Tagged , , , | Leave a comment