More adventures in thermal printing

I’ve been rediscovering my old Sparkfun serial thermal till roll printer, the one I used for my Little Box of Poems, a connected IoT printer, printing from the BBC micro:bit and other projects. These printers are great fun and can also be bought from Adafruit and Pimoroni.

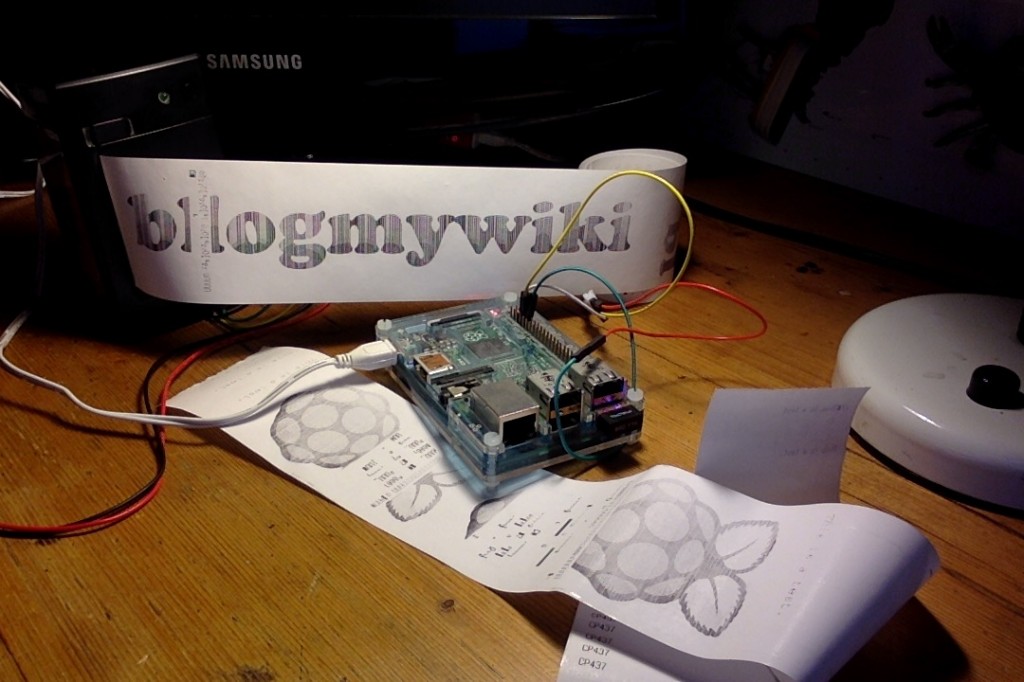
Using an old Raspberry Pi 2 (serial thermal printers don’t work very well with Raspberry Pi 3s) I made a networked CUPS printer that… sort of worked:

I used this Adafruit tutorial and could print artwork or photos from any computer on the home network. Printouts were rather faint, however – possibly because the power supply for my printer doesn’t have enough oomph (though it is 5V, 2A which should be enough). I also get corruption when I try to print long graphics, and I’m not sure why.

Next then used this Python program to print text and graphics directly from the Pi. This worked much better as it allowed me to increase the heating interval and heating time – this results in slower, but much darker, prints. It will only print graphics in black and white with no dithering at all, unlike the CUPS printer. In this example the top logo is printed from my MacBook using the CUPS driver, the one below printed directly on the Pi using Python:

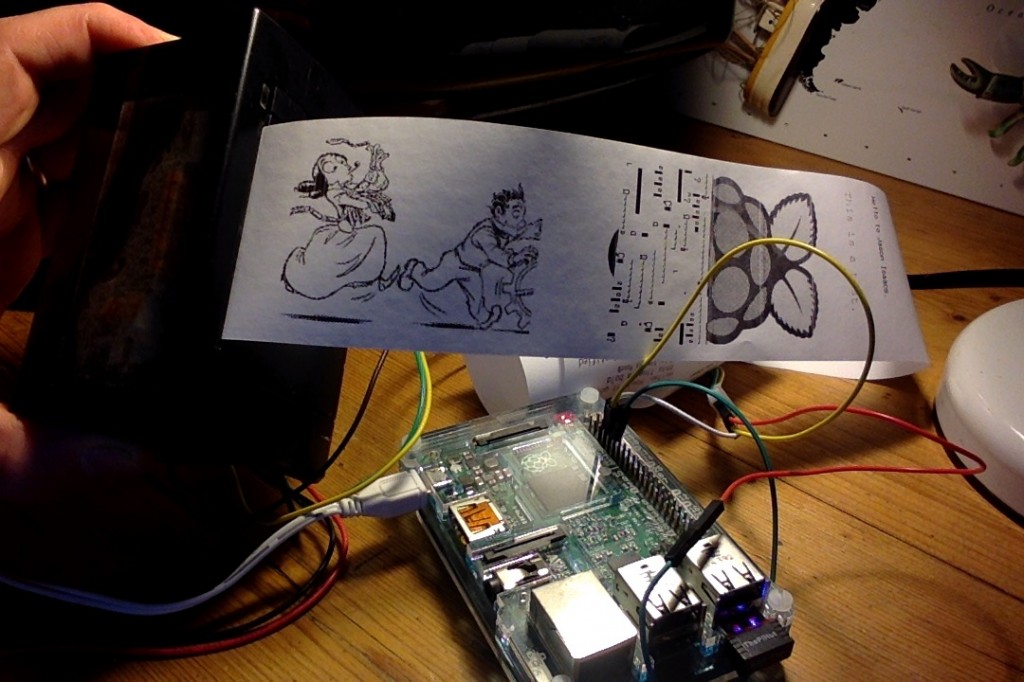
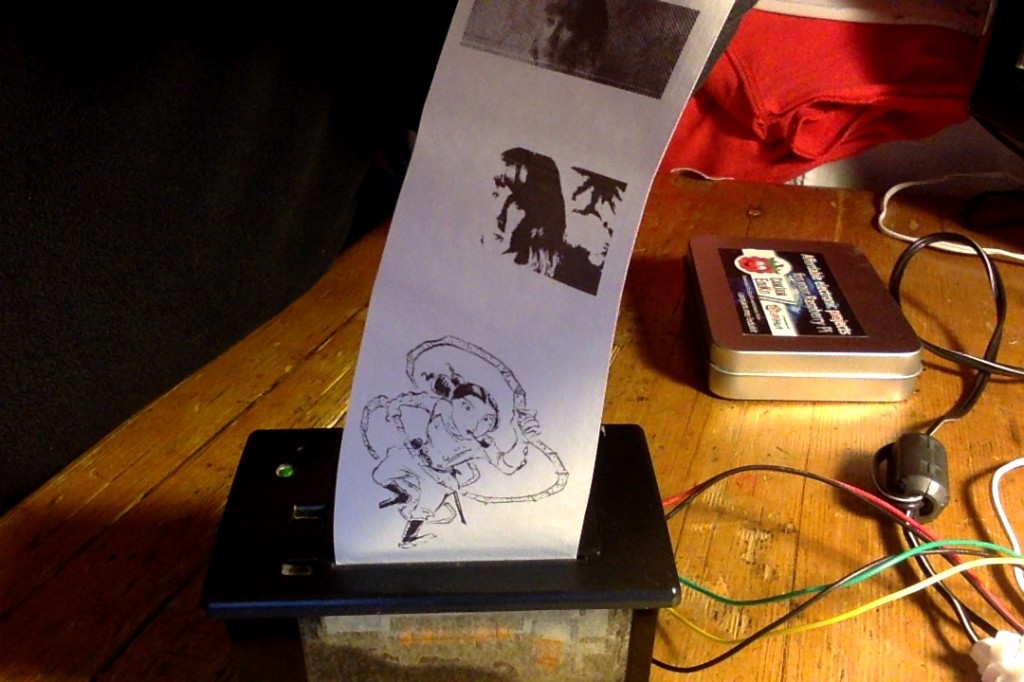
Here you can see a photo printed using CUPS (dithered) and then using the Python luopio script (no dithering, just black and white). Plus a bonus Ada Lovelace cartoon:

I did find that if I printed something using the Python script (increasing the heating time) this seemed to stick and the CUPS networked printouts were clearer – although still, infuriatingly, corrupted.

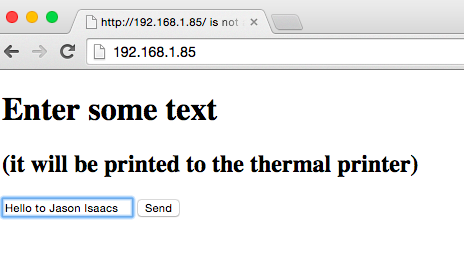
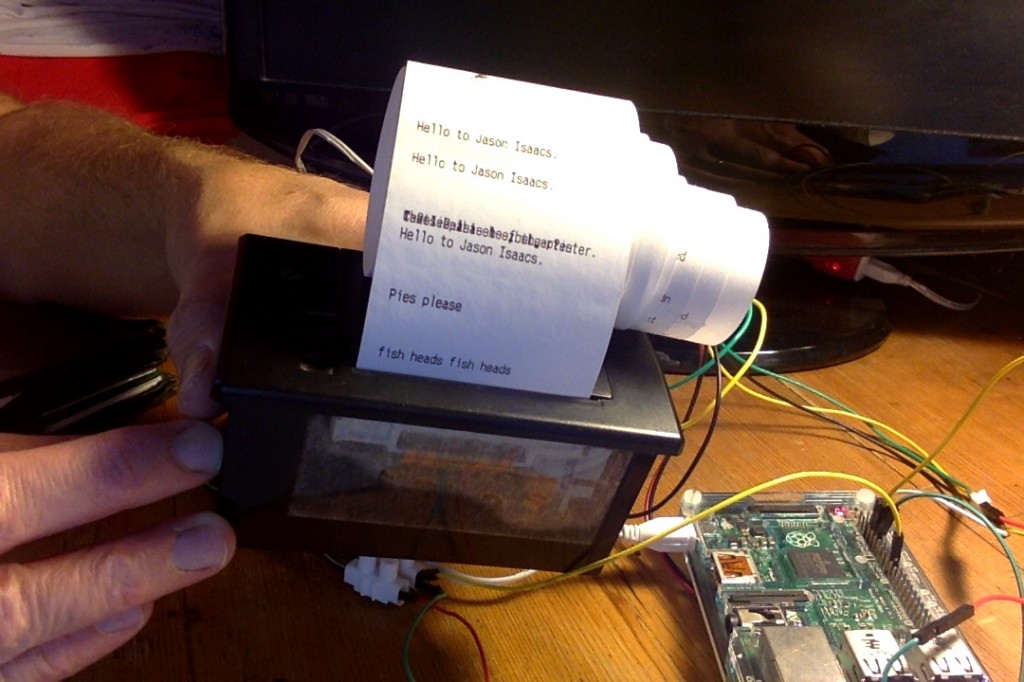
I was then rummaging round the web looking for ideas when I stumbled upon @techcoed’s post about sending messages to a pipsta thermal printer from a web page. This seemed like a neat idea so I half-followed his guide and then mashed his code up with the luopio serial printer library. (The pipsta uses USB and is a different kind of printer entirely). And I got it to work! I can run a Python script on the Pi, go to the Pi’s IP address in a web browser on any phone, laptop etc on my home network, type in a message and it prints out on the thermal printer:

Here’s how I did it… (link to files at the end of this post).

I did not install flask as it was already on my Pi – see the pipsta instructions if you need to do this. The printer was already connected to the Pi’s serial output as per previous blogposts.

First I tweaked Dan’s HTML a bit (I couldn’t see a button!) and saved it in a file called print-form.html in a new folder called ‘templates’ (lower case ‘t’) that I made in the /home/pi/ folder.

I then made a new Python file called flask-print.py and saved it in the /home/pi directory. This was a mashup of Dan’s code and the serial Python printer code. Having made sure I knew the IP address of the Pi on my local network, I ran the Python script from the command line with sudo python flask-print.py

Then I pointed my laptop web browser to my Pi’s IP address, typed words in the form, pressed ‘send’ and the message appeared on my printer!

You can download a .zip file containing both the Python script and the HTML file by clicking on this link. Let me know if you use this and if you have any ideas for it.


Posted in computers, Raspbian | Tagged , , , , | Leave a comment

Coastal webcam with weather and tide data

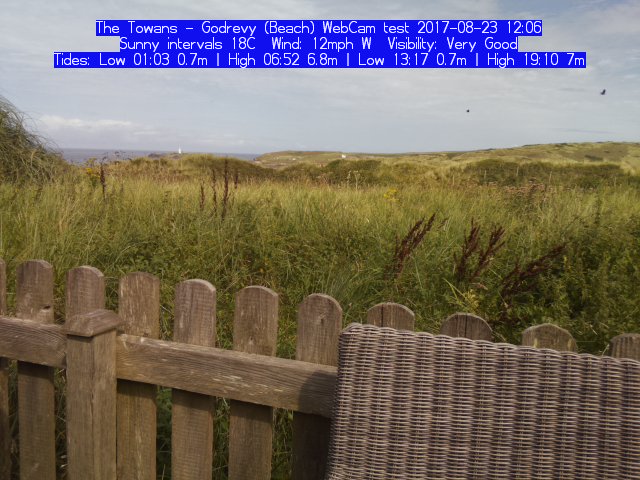
Following on from my Raspberry Pi e-Ink display tide time project, I’ve made a web cam that will tweet photos overlaid with weather and tide information for any UK coastal place. It uses the official Raspberry Pi camera module.

Like the InkypHAT project, this uses Beautiful Soup to screen-scrape the UK Met Office web site, but a more general web page that has much more weather data, such as visibility, wind speeds and so on. Where my e-Ink project was designed to run once day, early in the morning, this can run hourly and should always give the current weather information.

You can tweak this code to work on pretty much any UK coastal place – all you need is the geohash code for your location, which you can find by browsing the Met Office web site and taking the final part of the URL: For example, Godrevy in Cornwall is gbujsuykk because the weather page is found at http://www.metoffice.gov.uk/public/weather/forecast/gbujsuykk.

Here’s what you need:

  • A Raspberry Pi computer with internet access (wifi or ethernet) and a recent version of Raspbian.
  • A Raspberry Pi camera module.
  • Some power.
  • A suitable seaside location with a nice view .
  • Optional: a weatherproof container for the Pi and camera to aid location.

First, install Beautiful Soup on the Raspberry Pi:
sudo apt-get install python3-bs4
This is a Python library that makes extracting data from other web sites much easier than it would otherwise be.

Next you may need to install the picamera library. This is a Python library that makes using the official camera module easier. You probably already have it, but check the installation page if you are not sure.

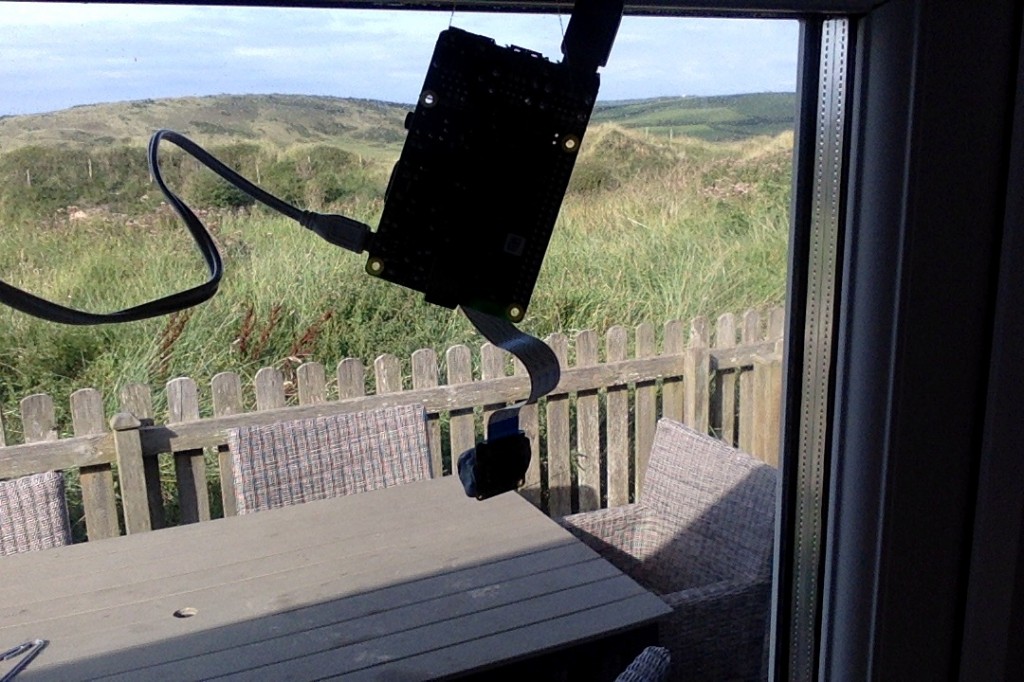
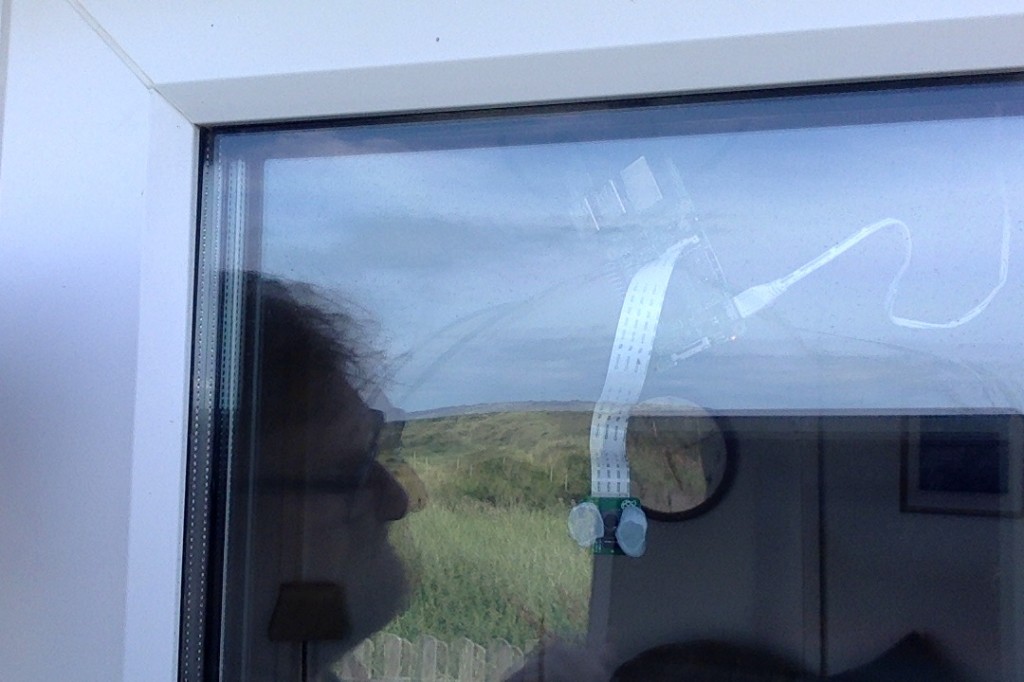
A weatherproof outdoor enclosure would be a good idea – lacking that on holiday I improvised in a Heath Robinson fashion with some cotton and blutak which lasted a few days, until someone opened the patio door and the whole thing rather fell apart:
Finally, if you want to tweet your photos you will need a Twitter account that has been verified with a phone number to get your Twitter API keys. You’ll also need to install the twython library. I recommend following the excellent instructions on the Raspberry Pi education web site: Getting Started with the Twitter API.

I learned a bit about the picamera and twython libraries in our Picademy photo booth project, and this builds on my learning there.

You can customise the code below with different locations and screen resolutions. When you run it, it will show a preview image for about 5 seconds and I suggest commenting out the line
twitter.update_status_with_media(status=message, media=photo)
when you are testing it to avoid spamming Twitter. Note that the preview image is only visible on the Pi’s HDMI output – you cannot see it over VNC*, as the camera module sends data straight to the Pi’s graphics chip. It also doesn’t save the photos. Each one is called webcam.jpg and is overwritten when a new one is taken, though if you do keep them you can make a time-lapse sequence (click on image below for animated GIF loop – look carefully and you can see the tide come in and go out):

* UPDATE – I’m a bit late to this, but you can see Raspberry Pi camera previews over VNC – see this official post on using a free RealVNC login to view remotely things like camera module previews and Minecraft that write straight to the graphics chip. I’ve tried this now and it works! Look for the section headed ‘PLAYING MINECRAFT AND OTHER DIRECTLY RENDERED APPS REMOTELY’.
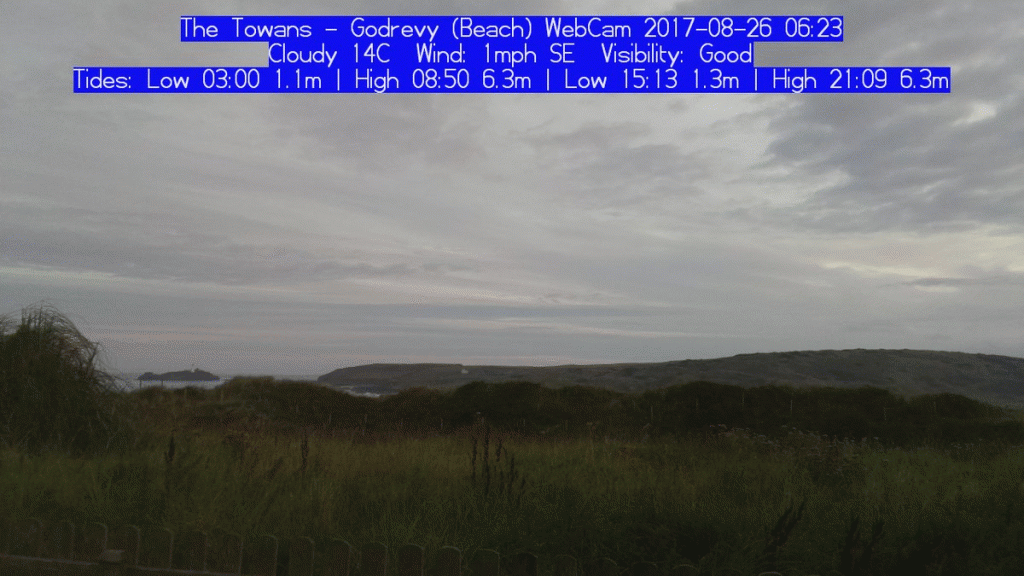
You could do something clever to change exposure times or ISO settings at different times of day or depending on the weather – I haven’t tested this at night yet, but I suspect you won’t see much!

To automate the process I recommend using crontab – you can easily configure this using the Raspbian PIXEL desktop, just go to System Tools and Scheduled Tasks, for example to run every hour:

Here’s the Python code. I’m finding my way with Beautiful Soup and it may be very inefficient. Also I must give a disclaimer that the code may break at any time if the Met Office change their web site and no accuracy is offered for the tide time information – always cross-reference with another source if going out on the coast.

#!/usr/bin/python
# -*- coding: utf-8 -*-

# written by Giles Booth
# http://www.suppertime.co.uk/blogmywiki
# a coastal web cam using official Raspberry Pi camera
# based on my Picademy photobooth without buttons or filters
# and my InkyPHAT tide time project

from picamera import PiCamera
import picamera
from time import sleep
import datetime as dt
from twython import Twython
import requests
from bs4 import BeautifulSoup
import string

from auth import (
    consumer_key,
    consumer_secret,
    access_token,
    access_token_secret
)

twitter = Twython(
    consumer_key,
    consumer_secret,
    access_token,
    access_token_secret
)

def strip_non_ascii(string):
    ''' Returns the string without non ASCII characters'''
    stripped = (c for c in string if 0 < ord(c) < 127)
    return ''.join(stripped)

# Visibility (E = Excellent, VG = Very Good, G = Good, M = Moderate, P = Poor, VP = Very Poor)
visibilityDict = {'E': 'Excellent', 'VG': 'Very Good', 'G': 'Good', 'M': 'Moderate', 'P': 'Poor', 'VP': 'Very Poor'}

# Fetch weather & tides page from Met Office web site
# Find other geohash location codes on the site, eg
# Godrevy, Cornwall gbujsuykk
# Walton-on-Naze u10yuyqrf
# Gt Yarmouth u135pr5sv
page = requests.get("http://www.metoffice.gov.uk/public/weather/forecast/gbujsuykk")
soup = BeautifulSoup(page.content, 'html.parser')

# extract full location name
location = soup.find_all('h1', class_='offScreen')[0].get_text()
location = location.strip()
print(location)

#extract temperature
nowTemp = soup.find_all('i', class_='icon icon-animated')[0].get_text()
nowTemp = strip_non_ascii(nowTemp) + 'C' # picam cannot overlay degree signs
nowTemp = nowTemp.strip() # remove trailing and following spaces
print(nowTemp)

# extract outlook
weatherRow = soup.find('tr', class_='weatherWX')
weatherDescs = weatherRow.find_all('td')
weatherNow = weatherDescs[0].get('title', '')
print(weatherNow)

# extract wind info
windRow = soup.find('tr', class_='weatherWind wxContent')
windDescs = windRow.find_all('i', class_="icon")
windSpeed = windDescs[0].get_text()
windDirection = windDescs[0].get('data-value2', '')
windSpeed = windSpeed.strip() # remove spaces
windDirection = windDirection.strip() # remove spaces
print(windSpeed,windDirection)

# extract visibility
visibilityRow = soup.find('tr', class_='weatherVisibility wxContent')
visibilityDescs = visibilityRow.find_all('td')
visibility = visibilityDescs[0].get_text()
visibility = visibility.strip()
visibility = visibilityDict[visibility]
print(visibility)

# extract tide times
tideTimeDiv = soup.find('div', class_='tideTimes')
tideTimes = tideTimeDiv.find_all('tbody')
todayTideTimes = tideTimes[0]
tideList = todayTideTimes.find_all('td')
tides = 'Tides: '
tagCount = 0
for tag in tideList:
    tides = tides + tag.get_text()
    if tagCount == 2: # put metres & separator after every 3rd tag (height)
        tides = tides + 'm | '
    else:
        tides = tides + ' '
    tagCount += 1
    if tagCount > 2:
        tagCount = 0
tides = tides[:-3] # kludge to remove unwanted seperator at end
print(tides)

# set up camera
camera = PiCamera()
camera.rotation = 180 # my camera is upside down!
camera.resolution = (640, 480)
camera.start_preview(alpha=200)
sleep(5) # a delay of at least 2 seconds is needed for camera to warm up, auto exposure etc

start = dt.datetime.now()
camera.annotate_text_size = 16
camera.annotate_background = picamera.Color('blue')
camera.annotate_text = str(location + " WebCam test " + dt.datetime.now().strftime('%Y-%m-%d %H:%M') + '\n' + weatherNow + ' ' + nowTemp + '  Wind: ' + windSpeed + 'mph ' + windDirection + '  Visibility: ' + visibility + '\n' + tides)

camera.capture("/home/pi/webcam.jpg")
photo = open('/home/pi/webcam.jpg', 'rb')
message = "Automated " + location + " coastal webcam test " + dt.datetime.now().strftime('%H:%M')
# comment out next line to stop twitter spam while testing
twitter.update_status_with_media(status=message, media=photo)

camera.stop_preview()
camera.close()
Posted in Raspberry Pi | Tagged , , , , , , | Leave a comment

More adventures in software-defined radio

multitasking – tide times and flight data!

At the risk of being accused of ‘clickbait’ again, here’s an update on what I’ve been doing with my USB software-defined radio stick. Yes I know this is nothing new, yes I know thousands of people have done this stuff before, it’s just new to me and some folk may find it mildly interesting.

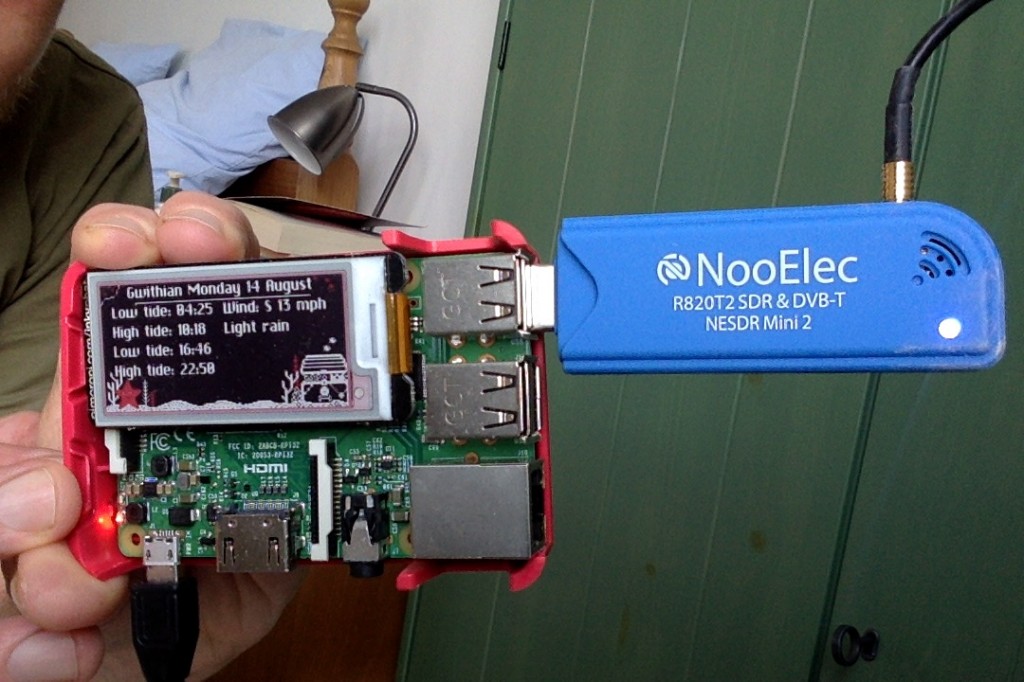
You may recall that I was pleased to discover that this £19 stick would allow me to listen to VHF and UHF radio on a Raspberry Pi and also watch Freeview TV off air and stream it round my house.

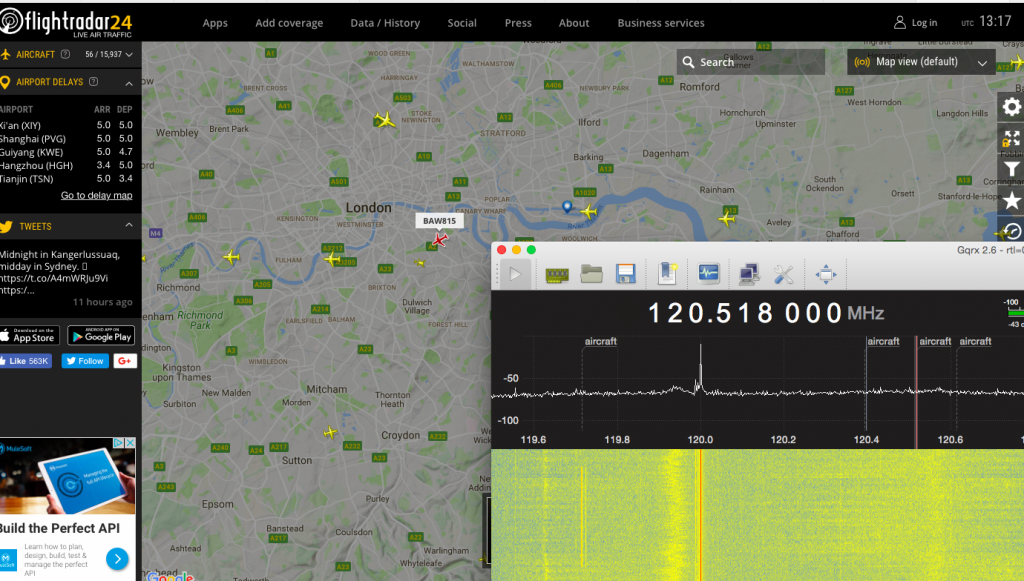
I’ve been playing with it a bit more, first on my MacBook Air. We are unfortunate enough to live on a flight path in to London Heathrow Airport, but I managed to make the most of this by having FlightRadar24 open in one window and having the radio receiving software GQRX open in another tuned to 120.395 MHz. This means I can hear the pilots taking, take a guess from their accent which airline they work for, find the plane on screen – and as we are lucky enough to have a panoramic view over London from the south, spot the plane out of my window.

This proved a very nice way of spending an hour or two.

I then found it’s very easy to use a Raspberry Pi and a SDR stick to send data to FlightRadar24. Most planes transmit special signals at 1090 MHz called ADS-B – this is how FlightRadar24 works, collecting data from people on the ground with Raspberry Pis and using dedicated kit suppled by them.

You can download a special Raspbian image or just install it at the command line – instructions are here. Your latitude, longitude (to 4 decimal places) and altitude in feet are needed – you could use your phone’s GPS or a web site to work these out. And yes, I know you can use any old computer for this, Windows, Mac or Linux box. But a Raspberry Pi is cheaper and you may well have one lying around not doing much.

The other benefit of this is that after about 12 hours of sending data to FlightRadar24, you get a free business account worth $500 a year, which gives you an ad-free view of live data and oodles more information about individual flights and weather.

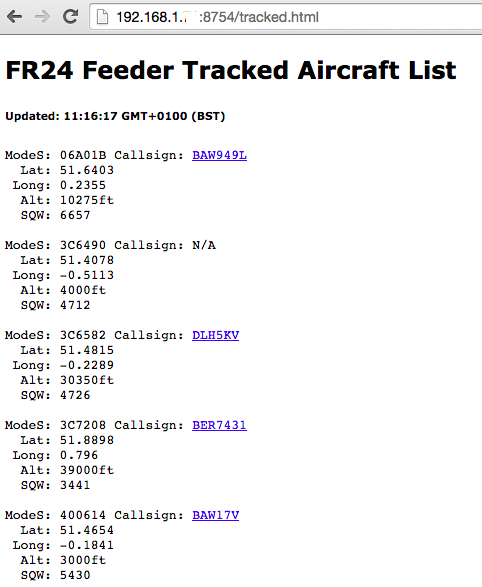
You can monitor which planes your Pi can currently see on a web page using your Pi’s local IP address:

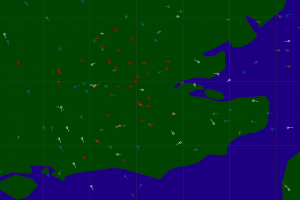
Click on a callsign and it takes you to the regular map view so you can see where the plane is now. You can also see thes planes on a map using the newly-unlocked radar view on the FlightRadar24 web site. Planes my Pi was tracking can be seen in red:

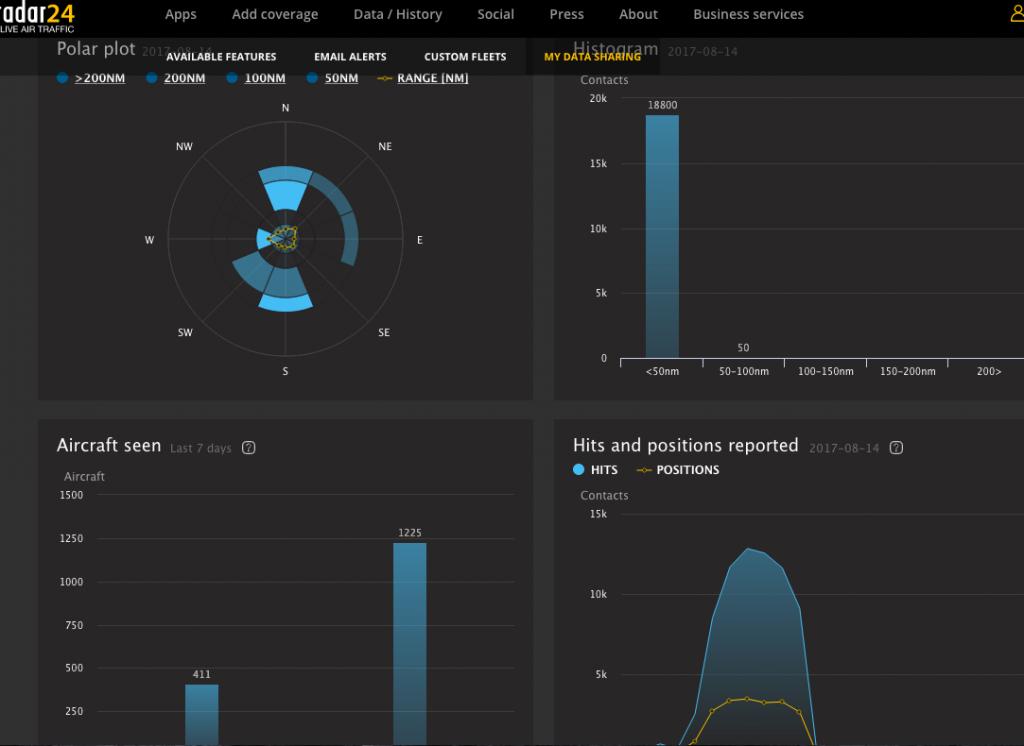
And there’s a nice stats page on the web site that shows how many planes your computer has spotted today, with polar diagrams showing their directions and distance. So far the furthest spot has been 58 nautical miles, that’s just using the supplied rather pathetic telescopic antenna in the loft bedroom. With a proper aerial (some can be made simply out of copper wire or tin cans – loads of guides are available online) you can pull in signals from hundreds of miles away.

If you don’t want to go down the FlightRadar24 route, you can use a Pi and a USB SDR dongle to capture data and plot it on your own map – see this guide for more details.

Now the only problem is that I can’t listen to the pilots’ radio whilst its gathering ADS-B data… so I will have to buy another SDR stick :)

Posted in Uncategorized | Tagged , , , , , , | Leave a comment

Microbit-controlled radio / MP3 player

Here’s a quick project showing the power of David Whale’s bitio Python library. This gives Python on a Raspberry Pi, Mac or Windows PC access to the physical sensors on the BBC micro:bit. You can control a program on your computer using the buttons, touch and accelerometer sensors on the micro:bit, and use the micro:bit’s display too.

My default position with any bit of tech is: can I make a radio with it? And here the answer was yes I can, and in only about 10 minutes too!

This program allows me to change stations up and down using the A and B buttons on the micro:bit, increase the volume by titling to the right, lower the volume by tilting to the left and you can exit the program by touching the GND and 0 pins on the micro:bit. It could just as easily work as an mp3 player, it doesn’t have to play internet radio streams. The micro:bit displays the playlist number on the screen.

If you fancy trying this out, here’s what you need:

  • A computer such as a Raspberry Pi with Python installed.
  • Also the computer needs an audio player installing and configuring with some radio station URLs or mp3 files. I use mpc/mpd on the Raspberry Pi – see below.
  • Download bitio on the computer.
  • A BBC micro:bit and USB lead.
  • Some way of hearing the audio, through a TV or headphones or powered speakers plugged into the computer.

First install mpc and mpd which I use on the Raspberry Pi to play radio streams or mp3 files:

sudo apt-get install mpc mpd

(On a Mac you could use the afplay command or VLC on any computer to do the same thing).

If you’ve not used mpc before, open the mpd config file with nano like this:
sudo nano /etc/mpd.conf

Then edit these lines to remove some # signs (uncomment) and change the mixer_type from hardware to software so it looks like this:

audio_output {
type "alsa"
name "My ALSA Device"
device "hw:0,0" # optional
mixer_type "software" # optional
mixer_device "default" # optional
mixer_control "PCM" # optional
mixer_index "0" # optional
}

Now add some radio station URLs using the mpc add command. I added BBC 6music, BBC World Service News, FIP and Radio 4. For example to add FIP I typed
mpc add http://chai5she.cdn.dvmr.fr/fip-midfi.mp3

(NB: as of Feb 2020 Fip is at http://icecast.radiofrance.fr/fip-midfi.mp3)

You can find BBC radio URLs on my big list here.

You can add audio files instead of radio stations if you like, to make an MP3 player.

I added just 4 stations but you can add more or fewer, just tweak the if stationNumber < and > lines accordingly. They get added in order but you can check your playlist of stations or MP3 files by typing
mpc playlist

And you can change the order using the move command, for example to move station 4 to preset 2 just type:
mpc move 4 2

I then downloaded the bitio files as a ZIP, extracted them and put the Python program below in the same folder as the examples and ran it using IDLE - you could also run it from the command line. It will display 'radio rocks!' on the micro:bit display and then start playing station number 1. Use the A and B buttons to change channel, tilt left and right to control volume, touch pin 0 to exit the program.

The first time you use a micro:bit with bitio you need to drag a special .HEX file to the micro:bit and follow some steps to locate the device - this just involves unplugging and replugging it, and then it remembers your device while you are using it.

If you use this or have ideas for improving it, please let me know!

# micro:bit-controlled radio by Giles Booth @blogmywiki
# Requires bitio https://github.com/whaleygeek/bitio
# Also requires mpc/mpd installing and some audio files or URLs adding

import microbit
import time
import os

stationNumber = 1

running = True

microbit.display.scroll("radio rocks!")
os.system("mpc play 1")
microbit.display.show("1")

while running:
    x = microbit.accelerometer.get_x()

    if x < -300:
        print("left - volume down")
        os.system("mpc volume -10")
    elif x > 300:
        os.system("mpc volume +10")
        print("right - volume up")

    if microbit.button_a.was_pressed():
        print("Button A pressed - station down")
        stationNumber -= 1
        if stationNumber <1:
            stationNumber = 4
        os.system("mpc play "+str(stationNumber))
        microbit.display.show(str(stationNumber))     

    if microbit.button_b.was_pressed():
        print("Button B pressed - station up")
        stationNumber += 1
        if stationNumber >4:
            stationNumber = 1
        os.system("mpc play "+str(stationNumber))
        # you could use 'mpc next' if you don't know how many tracks/URLs are loaded
        microbit.display.show(str(stationNumber))

    if microbit.pin0.is_touched():
        print("Pin 0 touched")
        microbit.display.scroll("bye")
        running = False

    time.sleep(0.5)

os.system("mpc stop")
Posted in Raspberry Pi | Tagged , , , | 7 Comments

PyPlay for Raspberry Pi

Ages ago I made a simple Python program that would play audio files out one at a time on a Mac. What’s the big deal with that? Don’t lots of programs do that? Well, I don’t think so, at least not on a Mac. The key concept here is playing a file from a list – and then stopping. In radio (or the theatre I guess) this is almost always what you want to do, not automatically play the next track.

So PyPlay was born. It was written in Python 2 and used Apple’s afplay command so it didn’t need any other software or modules installing – you download the file, chuck it in a folder with some audio files and run it in the terminal by typing in python pyPlay.py – If there isn’t already a standard format M3U playlist file in the folder, it makes one for you (in an arbitrary order).

You play files by typing in its number in the list and pressing enter. It gives you an out-time for the track, but the display is not updated with the time or the time remaining – you have to keep your eye on another clock such as the one on your computer. You can tweak the
Raspberry Pi desktop clock to show seconds by right-clicking on it > Digital Clock Settings > change Clock Format to %X

You can have two consoles open at the same time so you can segue tracks by playing a second one while the first is just ending. So you can DJ using a Raspberry Pi, some sound files and a bit of code!

This new Raspberry Pi version is a bit more polished than the Mac version as it adds support for .OGG files and fixes a few bugs. It still sticks to the original principle of not requiring any modules installing you shouldn’t find on a normal Raspbian install. You should launch it in Python 2 from the Terminal command line. It uses omxplayer instead of afplay to play the audio and allows some additional controls. While a track is playing you can use the keyboard to:

- Change the volume using + and – keys
- Pause a track with the space bar (this renders the out time meaningless, however)
- Skip around inside a track using arrow keys. Left & right seek back and forward 30 seconds, up and down by 600 seconds. You can also speed up and slow down the audio with 1 and 2 but I wouldn’t recommend it! These also render the displayed out time meaningless.

There’s lots still to do with this – it is inspired by the widely-used BBC audio playout Windows program CoolPlay (for which I designed the splash screen) but provides none of that program’s useful features like showing the progress of a track, allowing you to hop around a playlist and, indeed, build and re-order playlists. I may work on these but these features require me to delve into either curses programming or creating a proper GUI. It would, of course, be trivial to add some GPIO to control it from physical buttons or even fader starts on a mixing desk.

Anyway here’s the code. I hope it may be useful for someone making a dirt cheap radio station, DJ setup or for school dramas or assemblies! (I tried uploading it to Github, but Github is being… a git.)

#!/usr/local/bin/python

# 5 Aug 17 version
# Modified to run on Raspberry Pi using omxplayer instead of afplay
# Found bug - cannot cope with brackets in file names - FIXED!
# - cannot cope with ampersands either! - FIXED
# - make titles longer - FIXED
# - add support for .OGG audio files - FIXED

# If using GUI change clock display to show seconds with %X format.

# PyPlay radio playout script by Giles Booth @blogmwiki
# Written in Python2. Should not require any other modules to be installed.
# Requires audio files in same directory as this script.
# Original version ran on Mac using afplay.

# V 4.1 has horrible kludge to cope with multiple backslashes in array
# Version 4 fixes bugs replacing escaped spaces in display names and
# copes with filenames with apostrophes.
# Version 3 fixes bug playing files with spaces in file names
# makes an M3U file from audio files in directory if no playlist.m3u file found
# also fixes a bug with out time when crossing hour.

import os
import os.path
import time
import subprocess
import re
import datetime

playlist = ""

# \033[7m is code for inverse video
# \033[0m is normal video
# \033[31m is red video

# function to display tracks, durations, playing status & out time
def showTracks():
    os.system('clear')
    t = str(datetime.datetime.now().time())
    t = t[0:8]
    print '\033[37;44mWelcome to PyPlay!     \t\t\tUpdated ',t,'\033[0m'
    print ''
    print '\033[0;30;47m  # File name                           Length  Status  Out time \033[0m'
    for z in range(len(trackList)):
        highlightOn = ""
        highlightOff = ""
        if "PLAYING" in trackList[z][4]:
            highlightOn = "\033[31;103m"
            highlightOff = "\033[0m"
        print highlightOn, leadingSpace(str(z+1)), trackList[z][1], "\t", timeLeadingSpace(trackList[z][3]), "\t", trackList[z][4], highlightOff
    print '\033[97;42m    KEYS:    q stop | - + vol | space pause | arrows seek        \033[0m'

# returns duration of track in seconds
def getTrackLength(thing):
    bumf = ""
    bumfList = []
    trackLength = ""
    snog = trackArray[thing]
    foo = "omxplayer -i " + snog

    try:
        bumf = subprocess.check_output(foo, shell=True, stderr=subprocess.STDOUT)
    except Exception, e:
        bumf = str(e.output) # horrible kludge to get round exceptions but capture text
    bumfList = bumf.split('\n')

    for line in bumfList:
#        print line # debug line
        if line.startswith('  Duration'):
            line_mins = int(line[15:17])
            line_secs = int(line[18:20])
            trackSecs = line_secs + (line_mins*60)

    return trackSecs

# returns string with out time in HH:MM:SS format
def getEndTime(tk):
    tkDuration = trackList[tk-1][2]
    timeNow = str(datetime.datetime.now().time())
    timeHour = timeNow[0:2]
    timeMin = timeNow[3:5]
    timeSec = timeNow[6:8]
    tH = int(timeHour)
    tM = int(timeMin)
    tS = int(timeSec)
    tkS = tkDuration % 60
    tkM = (tkDuration - tkS) / 60
    endSec = int(round(tS+tkS, 0))
    endMin = int(tM + tkM)
    endHour = int(tH)
    if endSec > 59:
        endMin += 1
        endSec = endSec % 60
    if endMin > 59:
        endHour += 1
        endMin = endMin % 60
    endHourString = leadingZero(str(endHour))
    endMinString = leadingZero(str(endMin))
    endSecString = leadingZero(str(endSec))
    endTime = endHourString + ":" + endMinString + ":" + endSecString
    return str(endTime)

# adds a leading 0 to single character strings
def leadingZero(n):
    if len(n) == 1:
            n = '0' + n
    return n

# adds a leading space to single character strings
def leadingSpace(n):
    if len(n) == 1:
            n = ' ' + n
    return n

# adds a leading space to times shorter than 10 minutes
def timeLeadingSpace(n):
    if len(n) == 4:
            n = ' ' + n
    return n

# makes strings a fixed length
def colform(txt, width):
    if len(txt) > width:
        txt = txt[:width]
    elif len(txt) < width:
        txt = txt + (" " * (width - len(txt)))
    return txt

# returns the track length in a string M:SS format
def displayDuration(s):
    disTime = int(s)
    sec = disTime % 60
    m = (disTime - sec)/60
    secString = leadingZero(str(sec))
    t = str(m) + ":" + secString
    return t

# sets playing status for all tracks to empty string
def clearStatus():
    for y in range(len(trackList)):
        trackList[y][4] = ''

# Trying omxplayer on Raspberry Pi
def playTrack(track):
    song = trackArray[track-1]
    trackString = "omxplayer " + song + " > /dev/null"  # stop omxplayer output appearing on screen whilst playing
    os.system(trackString)

# if no playlist.m3u file found, make one from audio files found in directory
# edit audioFileTypes list to add more file types as needed (but don't add 'aif' because reasons)
if not os.path.exists('playlist.m3u'):
    audioFileTypes = ['.mp3','.MP3','.wav','.WAV','.m4a','.M4A','.aiff','.AIFF','.ogg','.OGG']
    os.system('clear')
    print "No playlist.m3u file found so I am making you one with these files:"
    print
    dirList = os.listdir(".")
    newDir = []
    for x in range(len(dirList)):
        for q in audioFileTypes:
            if q in dirList[x]:
                print(dirList[x])
                newDir.append(dirList[x])
    fo = open("playlist.m3u", "w")
    fo.write("#EXTM3U\n\n")
    for item in newDir:
#        print item
        fo.write("%s\n" % item)
    fo.close()
    time.sleep(2)

#open the playlist file and read its contents into a list
playlist = open('playlist.m3u')
trackArray = playlist.readlines()

# clean up the track list array of metadata and \n characters
# iterate over list in reverse order as deleting items from list as we go
for i in range(len(trackArray)-1,-1,-1):
    if trackArray[i].startswith('\n') or trackArray[i].startswith('#'):
        trackArray.pop(i)
    repl = {" ": "\ ", "\'": "\\'","&": "\&","(": "\(",")": "\)"} # define desired replacements here
    # use these three lines to do the replacement
    repl = dict((re.escape(k), v) for k, v in repl.iteritems())
    pattern = re.compile("|".join(repl.keys()))
    newArrayName = pattern.sub(lambda m: repl[re.escape(m.group(0))], trackArray[i])
    trackArray[i] = newArrayName
    temp = trackArray[i].strip()
    trackArray[i] = temp

# horrible kludge to strip out multiple backslashes
for i in range(len(trackArray)-1,-1,-1):
    repl = {"\\\\\\": "\\"} # define desired replacements here
    # use these three lines to do the replacement
    repl = dict((re.escape(k), v) for k, v in repl.iteritems())
    pattern = re.compile("|".join(repl.keys()))
    newArrayName = pattern.sub(lambda m: repl[re.escape(m.group(0))], trackArray[i])
    trackArray[i] = newArrayName

# read tracks into array to hold track info in format:
# filename - display name - duration as float - display duration - track status
print '\nScanning audio files to calculate durations:'
trackList = []
for a in range(len(trackArray)):
    rep = {"\ ": " ", "\\'": "\'", "\&": "&","\(": "(","\)": ")"} # define desired replacements here
    # use these three lines to do the replacement
    rep = dict((re.escape(k), v) for k, v in rep.iteritems())
    pattern = re.compile("|".join(rep.keys()))
    newName = pattern.sub(lambda m: rep[re.escape(m.group(0))], trackArray[a])
    print a+1,newName
    thisTrackLength = getTrackLength(a)
    trackList.append([trackArray[a],colform(newName,30),thisTrackLength,displayDuration(thisTrackLength),"status"])

# the main program loop
while True:
    clearStatus()
    showTracks()
    trackNo = raw_input('\nWhich track # would you like to play? q to quit ')
    if trackNo == 'q':
        break
    elif trackNo == "":
        print 'You must enter a track number or q to quit'
        time.sleep(2)
    elif trackNo.isalpha():
        print 'Must be a number'
        time.sleep(2)
    elif int(trackNo) <1 or int(trackNo) > len(trackArray):
        print 'Not a valid track number'
        time.sleep(2)
    else:
        eT = getEndTime(int(trackNo))
        trackList[int(trackNo)-1][4] = 'PLAYING ' + eT
        showTracks()
        playTrack(int(trackNo))
Posted in radio, Raspberry Pi | Tagged , , , , | Leave a comment