Monk Makes Sensor Board for Microbit with Mu plotter

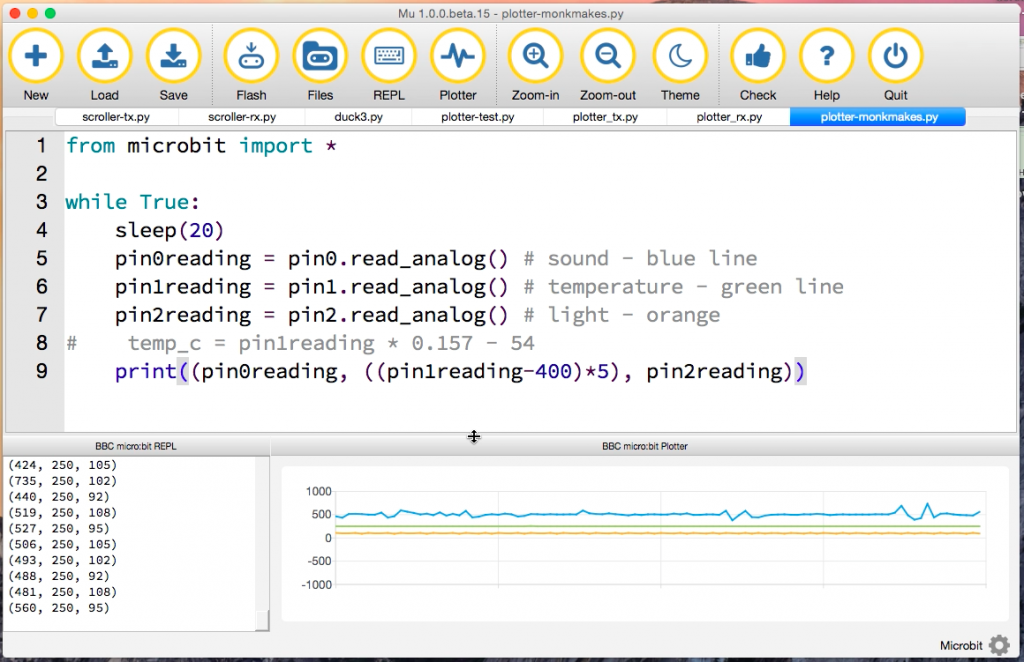
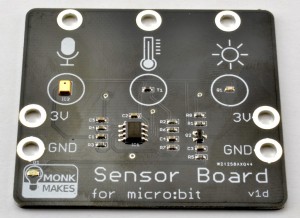
The Mu Python editor’s new plotter function continues to delight me. I connected a Monk Makes Sensor Board to a micro:bit and wrote a few lines of Python to see whether I could get some live data readings from its three sensors: sound, heat and light. And by golly, it works!

Here’s the Python program I used. I opened the REPL and plotter in Mu and then flashed this code onto a micro:bit with the sound, temperature and light sensors attached to pins 0, 1 and 2 respectively:

from microbit import *

while True:
    sleep(20)
    pin0reading = pin0.read_analog() # sound - blue line
    pin1reading = pin1.read_analog() # temperature - green line
    pin2reading = pin2.read_analog() # light - orange line
    print((pin0reading, ((pin1reading-400)*5), pin2reading))

I messed around with the temperature reading a bit to get it to scale, you could probably do a better job. The video below shows the board in action with live-plotting. It’s only (at the time of writing) £7.20 from CPC, a real bargain for three sensors in one easy-to-use board.

You can download the beta version of Mu 1.0 for your OS of choice using the links at the foot of this Github page.

Posted in computers, microbit | Tagged , , | 2 Comments

Plotting live microbit sensor data in Mu

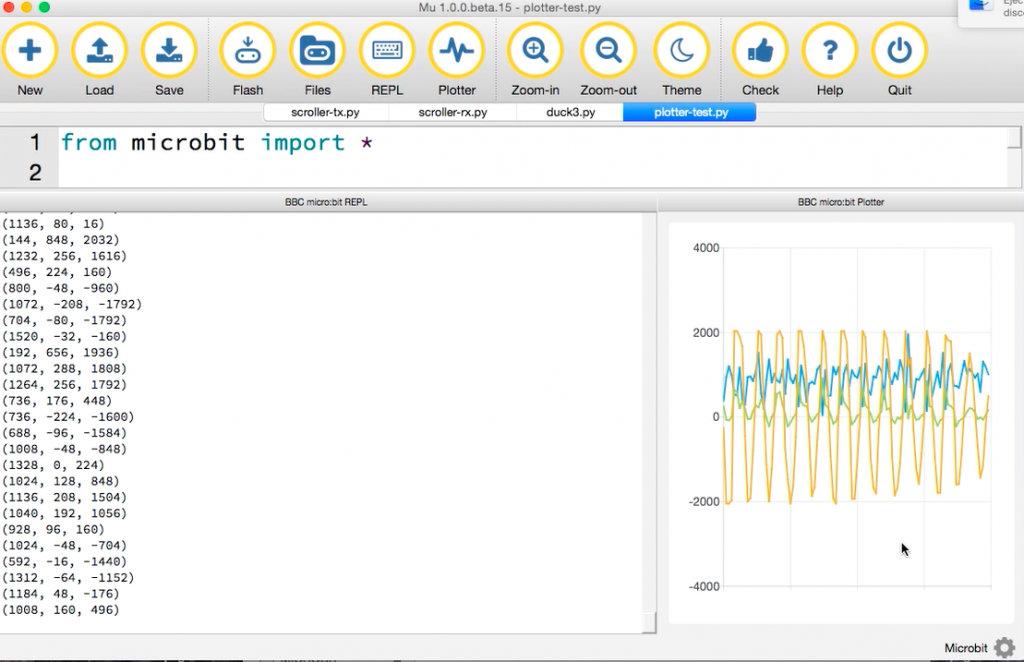
I very much enjoyed watching the video of Nicholas Tollervey’s visit to Adafruit recently, it’s well worth a look. One of the highlights for me was a new feature (currently in beta versions of Mu 1.0) that allows live plotting of numerical data printed to the REPL (command line) by Python code on the microbit.

Apparently the live plotting idea came from Adafruit’s founder Limor Fried, and it is amazing. With just 4 lines of Python you can get live sensor reading – the accelerometer is the obvious place to start – from a microbit and display them in graph form just with a few clicks. No extra Python libraries needed, just 4 lines of code. It’s quick and easy enough to be deliverable even in a short school lesson.

I decided this would be even neater if you could untether a microbit, so here’s a project where I send accelerometer data as a string wirelessly from one microbit to another plugged into a computer running Mu. It could be great for physics experiments.

I put this code on a transmitting microbit, and attached a battery pack to it with a rubber band. You can thrown this microbit around the room, attach it to a vehicle/rocket/dog:

from microbit import *
import radio
radio.on()

while True:
    sleep(20)
    radio.send(str(accelerometer.get_values()))

I then pressed the REPL button, flashed this program to a microbit that remains tethered to the computer and clicked on the plotter button to see live accelerometer data being received from the battery-operated microbit:

from microbit import *
import radio
radio.on()

while True:
    message = radio.receive()
    sleep(20)
    print(message)

You can see a demonstration of this in my exciting YouTube video below:

You can find instructions for installing Mu on the Adafruit web site (I used the Linux ones for my old Mac as it has an old version of OS X) or you can download the latest versions of Mu from Github by following the appropriate download links at the foot of this page.

Other plotter ideas

Since tweeting about this project, Paul Knighton has been very busy. He has connected a pulse sensor to a micro:bit and is working on code to make a heart-rate monitor! He’s also connected a sound-level detector, but I love the pulse idea – so many possible cross-curricular links here:

Update – Nov 2020

Since I wrote this blog post a lot has changed – Microsoft MakeCode now supports data logging, have a look at this project on the Micro:bit Educational Foundation website.

And this write-up of Python data logging with Mu includes a video I made on the subject:

Posted in computers, microbit | Tagged , , | 3 Comments

Raspberry Pi Cartwall

piCartWall

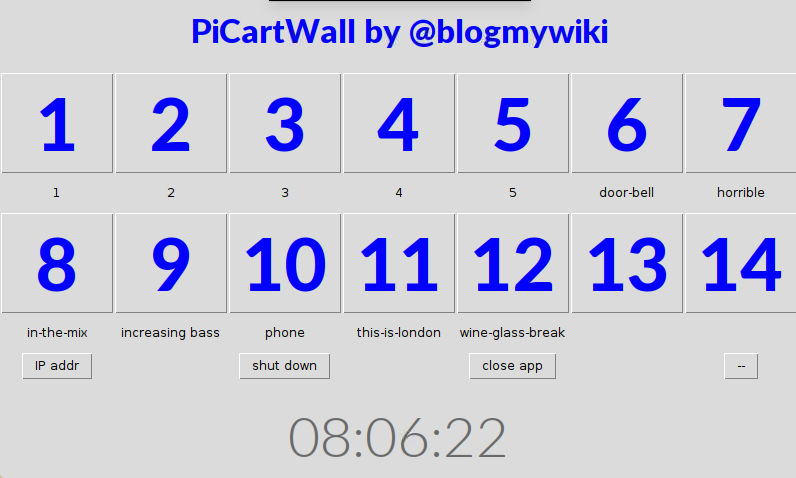
A Raspberry Pi radio / theatre cartwall to play jingles or sound FX instantly using a touch screen.

What it does

Cartwalls are used in radio studios to play in jingles at the touch of a button. This is designed to do the same on a bog-standard Raspberry Pi connected to a touch screen. It does not require ANY other software or libraries to be installed, all you need is a Raspberry Pi with Raspbian installed, some WAV files in your Pi’s defualt Music folder – and a touch screen for full effect. It could be used in student, hospital or community radio or for playing sound effects in a play.

How to set it up

It’s very easy to set up. First download picartwall.py from my Github page.

Place some WAV files in /home/pi/Music/ on your Raspberry Pi, up to 14. Any other files, including MP3s, will be ignored. Run picartwall.py and it will assign a button to the first 14 WAV files it finds in alphanumeric order. The layout is optimised for a 800 x 480 pixel display like the Pimoroni HyperPixel. If you want to use a bigger display you could rejig the code. It only supports WAV files because I wanted it to work on a Raspberry Pi out of the box with no internet access required and no need to install any new Python libraries or other audio players. It uses the aplay command as this seems to work much faster than omxplayer which does support MP3 files but has an unacceptable lag between pressing the button and sound coming out.

How to use it

Press a button. Noise comes out. It uses the default audio output which you can select in the normal way. You could use a USB DAC for better sound quality. There are buttons:

  • One shows the Raspberry Pi’s IP address, which could be useful if you’re trying to manage it remotely by SSH or VNC.
  • Another button shuts the whole system down pretty immediately – you’d probably want to disable this in a broadcast environment!
  • The next button just closes the app so you can get to the normal PIXEL desktop.
  • There is a spare button that I haven’t found a use for yet. Perhaps I should add some volume control buttons. I did think about GTS (pips) or 1kHz tone but these would require additional audio files.

To do

  • The clock is a cut-and-shunt job from another project and it stops when audio plays. It should be integrated / threaded somehow.
  • Better indication of when audio is playing e.g. button goes red. This has defeated me thus far.
  • Some indication of duration / play progress / out-time. All a bit hard.
  • Meaningful wordy button labels… from file name? User-configurable?


Why ‘cart’?

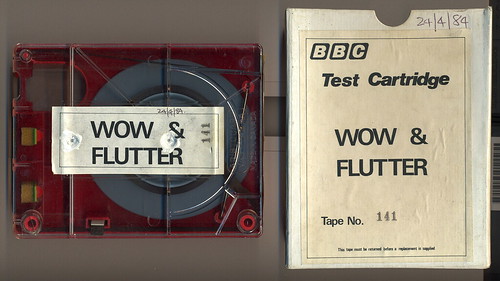
Jingles, stings, sig tunes – and even news clips – used to be played on the radio from pleasingly big chunky plastic cartridges (like the 8-track car stereo cartridges of the 1970s) containing loops of magnetic tape. I still occasionally have nightmares about trying to spool long carts back to the beginning having fired one off by accident.

wow and flutter

Have we got a video?

Posted in computers, hardware, radio, Raspberry Pi | Tagged , , , | 5 Comments

The Little Box of Witter

I’ve made a Little Box of Poems with an Arduino, Raspberry Pi and even BBC micro:bit, now I want to make a Little Box of Witter: a gadget that will play the latest episode of my favourite radio programme, Wittertainment (aka BBC Radio 5Live’s Kermode and Mayo Film Review).

I’m still trying to decide if it should have physical buttons, either wired using GPIO pins or even a MakeyMakey. Should it have a display, and if so what kind? A Pimoroni HyperPixel or InkyPhat? Or an LCD shield with physical buttons like the Displayotron3000?

Anyway, while I ponder these things, here is a VERY simple shell script which, I think, downloads the latest episode of the podcast to your Raspberry Pi and plays it. You can control the player using the keyboard when the terminal has focus. It’s a cut-down version of Raphael’s elegantly simple podcast downloader. It requires nothing else to be installed and should work on any Raspberry Pi. You could, I suppose, modify this to download and play other podcasts, but you’d need to find the URL for its RSS feed.

Save this on your Pi as wittertainment.sh and make it executable with
chmod +x wittertainment.sh
Then run it by typing
./wittertainment.sh
from the same folder in the terminal.

Tinkety-tonk, old fruits and Hello to Jason Isaacs!

#!/bin/bash
# a shell script to download and play the latest
# episode of Wittertainment, the 5Live film programme.
# @blogmywiki based this on http://blog.rphl.io/raspberry-pi-podcast-downloader/
# Make this file executable with chmod +x wittertainment.sh
# Run with ./wittertainment.sh
# While it is playing and terminal has focus you can use the following keys:
# p / space - pause
# up / down arrows - skip forward/back 10 minutes
# left / right arrows - skip forward/back 30 seconds
# q - quit player, +/- increase/decrease volume

# path to folder where the podcast will be downloaded
SAVE_DIR=/home/pi/Downloads/

# address of Wittertainment podcast RSS feed - you could, I suppose, change this.
url="https://podcasts.files.bbci.co.uk/b00lvdrj.rss"

# Check if new podcast is availiable and download them to local pi storage
str=$(wget -P $SAVE_DIR -q -O- $url | grep -o ']*url="[^"]*' | grep -o '[^"]*$' | head -n 1)
str=${str##*/}

# Replace url encoding spaces with real ones
str=${str//%20/ }
if [[ "$listStr" != *"$str"* ]]
then
	# File isnt in dropbox yet, so download
	wget -P $SAVE_DIR -q -O- $url | grep -o ']*url="[^"]*' | grep -o '[^"]*$' | head -n 1 | xargs wget -c -P $SAVE_DIR > /dev/null
fi

echo "Hello to Jason Isaacs."
omxplayer $str
Posted in BBC, cinema, computers, radio, Raspberry Pi | Tagged , , , , | Leave a comment

Simple KS2 microbit radio activities

My KS2 (upper Junior school) after-school Code Club have been split into 3 groups up until now. Some have been hacking Minecraft on one of our three Raspberry Pis, three sets of children have been exploring the Makey Makey with PlayDoh and tin foil, lately making pianos you can dance on. And the last group I have left to explore our three (yes only three!) BBC microbits. (USB mass storage devices have only just been unblocked on our school computers, I couldn’t see the point in getting any more until that was sorted).

Next week I think I will get them ALL on the microbit (I will bring in my personal hoard) and get them exploring Python and the wonderful radio features of the microbit. I’ve found before that it’s the radio that really captures children’s imaginations.

You can view my handout here or use the code below. All of this is very much based on the work of the genius Nicholas Tollervey – @ntoll on twitter.

1. Wireless microbit: the teleporting duck

You will need at least 2 microbits for this activity, an battery packs would be nice but not essential. Use the Mu editor or this web site: https://python.microbit.org/ to put these Python programs on your microbits.

Press button A to teleport a duck to another microbit:

from microbit import display, button_a, Image
import radio
radio.on()
while True:
    message = radio.receive()
    if message:
        display.show(Image.DUCK)
    if button_a.was_pressed():
        display.clear()
        radio.send("duck")

-> Can you send different pictures? Try HEART, RABBIT, COW, PACMAN

-> What happens if you have more than 2 microbits running this code?

-> Could you send a different picture by pressing button B? Hint:

from microbit import display, button_a, button_b, Image
import radio
radio.on()
while True:
    message = radio.receive()
    if message == "duck":
        display.show(Image.DUCK)
    if message == "cow":
        display.show(Image.COW)
    if button_a.was_pressed():
        display.clear()
        radio.send("duck")
    if button_b.was_pressed():
        display.clear()
        radio.send("cow")

2. Add channels
We can make sure the duck is sent to the right address using radio channel numbers. Agree on a channel number between 0 and 50 with your partner and make sure no other group has the same number.
Add this line after import radio and before radio.on():

radio.config(channel=10)

Flash the new Python program to both your microbits and see what happens.

3. Chuck a duck
This version of the program allows you to send a duck by shaking your microbit. Make sure you flash the same code on to your partner’s microbit and that you have matching channel numbers that don’t clash with another group’s.

from microbit import display, Image, accelerometer
import radio
radio.config(channel=10)  # choose channel number
radio.on()
while True:
    message = radio.receive()
    if message == "duck":
        display.show(Image.DUCK)
    if accelerometer.was_gesture("shake"):
        display.clear()
        radio.send("duck")

-> What is the range of the microbit radio transmission?

-> Can you play a ‘hot potato’ game where the person left holding the duck after 1 minute loses?

-> Could you use the radio features of the microbit to do other things?
Posted in education, ICT | Tagged , , , | Leave a comment