What you’ll learn
- That computer keyboards aren’t just switches – they need power to make them work
- They comprise a matrix of buttons connected in rows and columns
- Computers don’t read your keypresses directly – the keyboard contains a circuit board that does that
- The keyboard sends keypresses to the computer as a stream of serial data – in effect numbers
- Old-fashioned PS/2 keyboards send a code when you press a key and another when you release it
- PS/2 keyboards aren’t, strictly speaking, just input devices. They also receive data from computers, for example to light the CAPS LOCK light output
Background
This is a testament to the power of ignorance. If you don’t know you can’t do something, sometimes you end up being able to do it.
For years I’ve wanted to connect a normal computer keyboard to a BBC micro:bit to make radio messaging and cryptography easier to use. I’ve seen, and indeed made myself, similar things on an Arduino, using libraries designed to read the subtle data coming from a PS/2 keyboard, frighteningly complex libraries in C++ that unpack every transition of every pulse of every bit of digital data.
Well, that’s not how I roll.
Previously I connected a thermal printer straight to a micro:bit and threw some serial data at it, and it worked first time, printing my message.
I never expected my home-made key-pad matrix, coded in utter ignorance, to work. But it did. First time.
Sometimes it’s helpful not to be fettered by knowledge and precedent, though not, I hasten to add, if you’re flying a plane, performing surgery or indeed running a country.
So I decided to take that approach to my micro:bit PS/2 keyboard problem.
What is a PS/2 keyboard anyway?
PS/2 keyboards are the old-fashioned type that came before USB – they often have round plugs, usually encased in purple plastic. (PS/2 mice tended to have green plugs.) They’re not especially easy to buy, at least not new, but people often throw them out, as we’ll see…
They’re just a matrix of buttons attached to a small controller running at 5 volts that turns key presses into serial data. Ok, the protocol is pretty horrible… an 11-bit word sent at anything between 10 and 16.7 kHz and comprising:
- 1 start bit (always 0)
- 8 data bits (least significant bit first)
- 1 parity bit (odd parity)
- 1 stop bit (always 1)
So I decided to ignore all that. I was walking the dog one day and found a PS/2 keyboard dumped at the side of the road, helpfully with the plug already cut off, and the plug also by the side of the road.
This was a sign.
The investigation begins
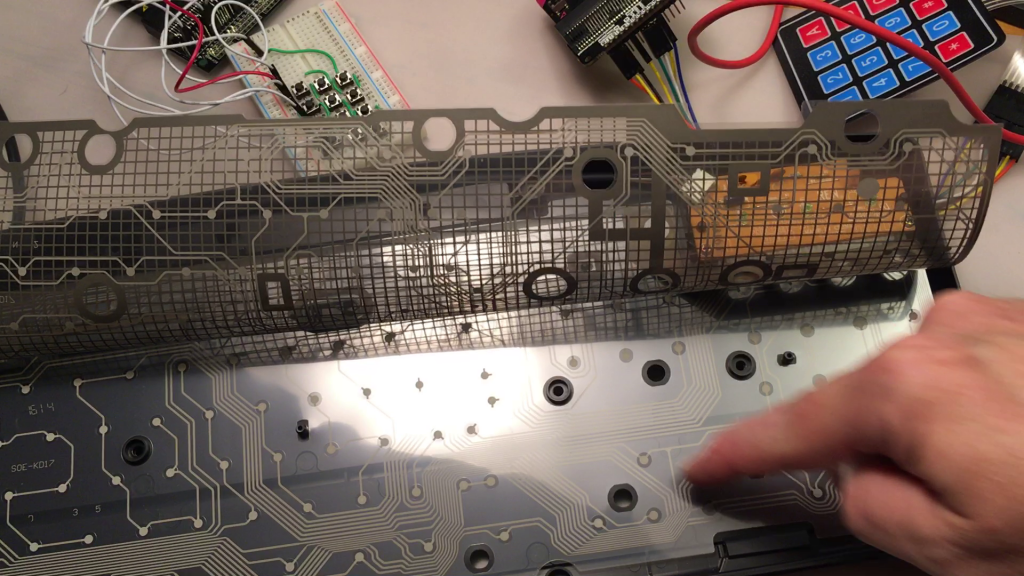
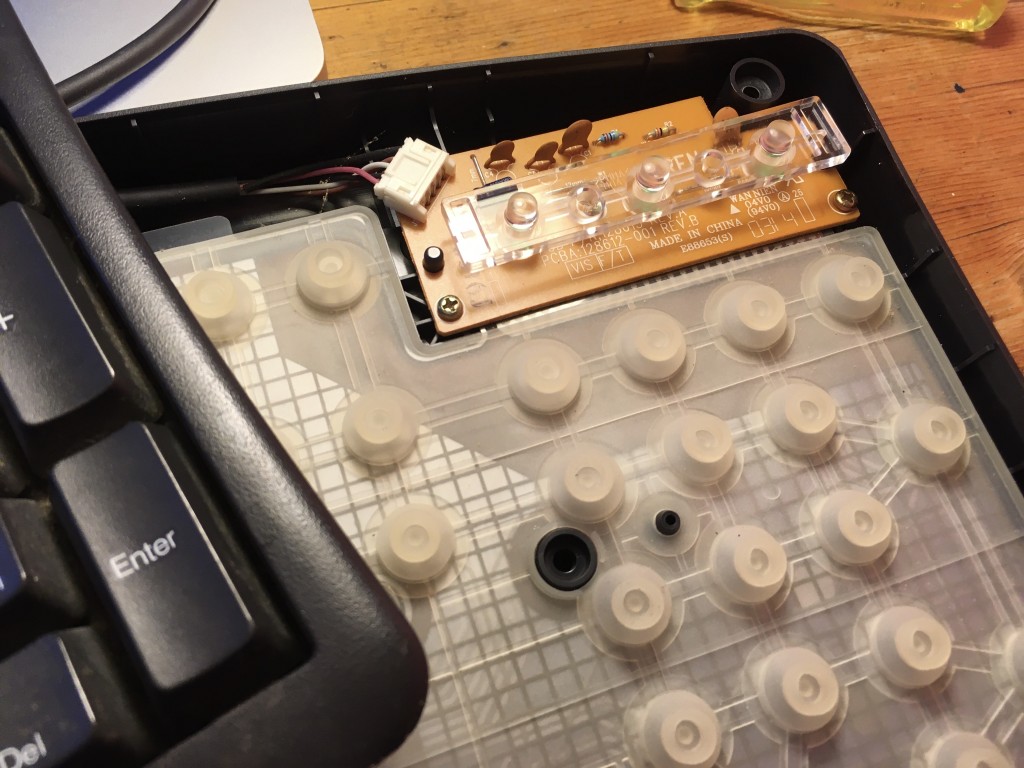
I took it home and opened it up. You can see in the picture above how the keys comprise two layers of plastic film that are pressed together to complete a circuit. The keys are arranged in a matrix, a grid of rows and columns.
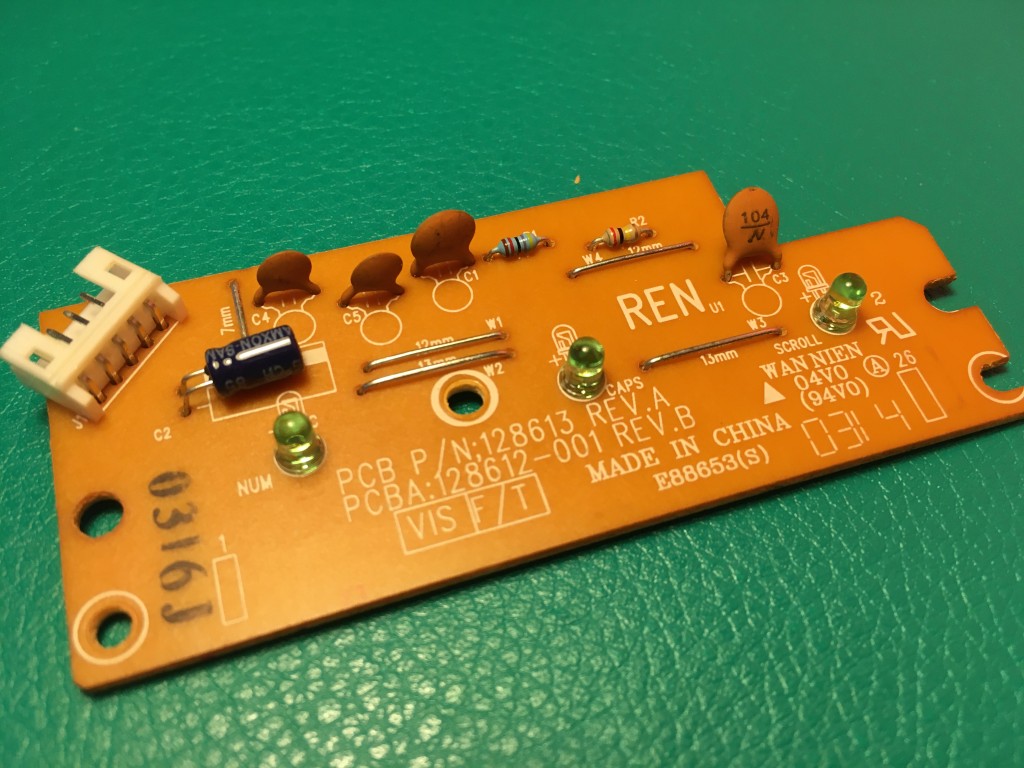
In the corner you can see the controller printed circuit board that contains the caps, num and scroll lock LEDs as well as the electronics that convert keypresses into a kind of serial data sent down the cable to the PC.
I hoped the controller PCB would helpfully show me what each coloured cable did. (There’s no standard for PS/2 cable colours).
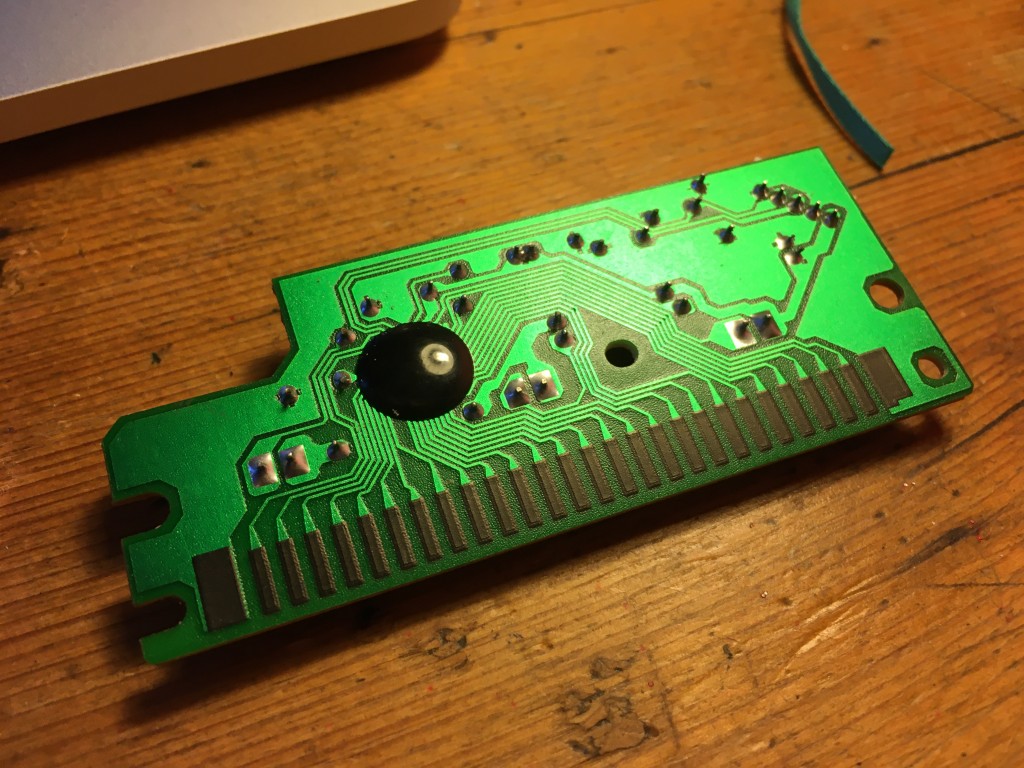
A few capacitors, LEDs, and an integrated circuit hidden under a blob on the back, and some labels, but alas nothing to identify the purpose of each wire going out to the plug. Even knowing the manufacturer and model number was no use either. Luckily, I still had the severed plug, so I was able to figure out that for this particular Dell keyboard:
Pink = 5v
Black = GND
White = Data
Brown = clock
5v. Hmm, the micro:bit supplies only 3v. Ignoring that, I connected the black wire to micro:bit GND pin and the pink to the micro:bit 3v pin. The LEDs lit up to show the keyboard was doing its power-on-self-test. The NUM LOCK light even lit (but not caps lock, I discovered that’s done in software by PCs, which send a signal back to the keyboard!)
So you can power a PS/2 keyboard off a micro:bit 3v supply – useful! No external power supply needed.
Now, what if I just ignore the clock wire, and pretend that the PS/2 keyboard is just sending serial data? We can read serial data on a micro:bit, I just need to know the Baud rate (the speed at which the data is being sent). That 10 to 16.7 kHz range sounds a bit scary, I tried a few different numbers and found that using 10,000 Baud I managed to get some sensible looking data from this program, with pin 1 connected to the white keyboard data wire and GND connected to the black keyboard ground wire, flashed onto a micro:bit using the online editor.
import micropython
# to enable disabling of accidental keyboard interrupt
from microbit import *

uart.init(baudrate=10000, bits=8, parity=None, stop=1, tx=None, rx=pin1)

micropython.kbd_intr(-1)
# disable accidental keyboard interrupt

while True:
    if uart.any():
        data = bytearray(1)
        uart.readinto(data, 1)
        display.scroll(data[0])
Pressing the letter Q, for example consistently produced 139, 248, 139.
Pressing A produced 142, 248, 142.
I knew from my reading (see, you do need a bit of knowledge) that PS/2 keyboards send a code when you press a key, then send a release code when you let go. So 139, 248, 139 really means ‘Q pressed’ ‘released Q’.
So all I needed to do was sniff the code for every key I was interested in and create a dictionary to look up the codes and turn them into letters. I’ve only bothered with the alphabet, numbers and some very basic punctuation so far, but I have implemented my own caps lock and backspace. (The caps lock light doesn’t come on, but one day…)
Key codes for other keyboards will probably vary, so use the sniffer program to make your own list if needed. You may also need to use a different Baud rate, but 10,000 worked for me with this Dell.
Secret radio message communicator project
Let’s put this new-found ignorance to use by building a super secret agent communicator! No-one will see you lurking in the bushes with a micro:bit and mahoosive Dell PS/2 keyboard you pulled from the trash!
Put this program on the receiving micro:bit:
from microbit import *
import radio
radio.config(group=23)
radio.on()
storedMessage = ''

while True:
    message = radio.receive()
    if message:
        display.scroll(message)
        storedMessage = message
    if button_a.was_pressed():
        display.scroll(storedMessage)
For the transmitter, use the code below. Remember you’ll need to attach pin 1 on the micro:bit to your keyboard’s data wire – mine was white but yours may not be. Also connect your micro:bit 3v pin to the keyboard’s power wire (pink in my case) and micro:bit GND pin to keyboard Ground (black on this Dell).
Type your message quite slowly. Letters will flash on the micro:bit display. The Caps Lock key toggles upper and lower case, but the shift key does nothing. If you make a mistake press backspace and it will delete the last character of your message.
Press button A on the micro:bit to review your message, and press button B to transmit it over radio. This also deletes the message because a good spy covers their tracks, right?
Sometimes it needs a reset when you power it up, so if it’s not working first time, press the reset button on the back of the micro:bit and see if that sorts it.
If you make something with this, please let me know and I’d be thrilled if you could credit me, this blog or my YouTube channel.
Enjoy!
import micropython # to enable disabling of accidental keyboard interrupt
from microbit import *
import radio
radio.config(group=23)

uart.init(baudrate=10000, bits=8, parity=None, stop=1, tx=None, rx=pin1)
micropython.kbd_intr(-1) # disable accidental keyboard interrupt if ctrl-C character received on serial input
dataList = []
delay = 250
capsLock = True
message = ''

keyCodes = {
  139: 'Q', 207: 'W', 210: 'E', 215: 'R', 150: 'T', 219: 'Y', 222: 'U', 161: 'I', 226: 'O', 231: 'P',
  142: 'A', 205: 'S', 145: 'D', 213: 'F', 154: 'G', 217: 'H', 157: 'J', 224: 'K', 224: 'K', 229: 'L',
  140: 'Z', 208: 'X', 209: 'C', 148: 'V', 152: 'B', 153: 'N', 220: 'M', 225: ',', 165: '.', 149: '_', 164: '?',
  138: '1', 206: '2', 146: '3', 147: '4', 214: '5', 218: '6', 159: '7', 158: '8', 162: '9', 163: '0'
}

while True:
    if uart.any():
        data = bytearray(1)
        uart.readinto(data, 1)
        dataList.append(data[0])
        if len(dataList) == 3:
            if dataList[0] in keyCodes:
                if capsLock:
                    letter = keyCodes[dataList[0]]
                else:
                    letter = keyCodes[dataList[0]].lower()
                display.show(letter)
                message = message + letter
            elif dataList[0] == 172: # toggle caps lock
                capsLock = not capsLock
                if capsLock:
                    display.show(Image.ARROW_N)
                else:
                    display.show(Image.ARROW_S)
            elif dataList[0] == 242: # backspace
                display.show(Image.ARROW_W)
                message = message[:-1]
            dataList = []
            sleep(delay)
    if button_a.was_pressed():
        display.scroll(message)
    if button_b.was_pressed():
        radio.on() # I'm in love with Massachusetts
        radio.send(message)
        radio.off()
        display.scroll('TX')
        message = ''
    display.clear()
You may also be interested in my post on making a your own key matrix using push buttons and a breadboard: http://www.suppertime.co.uk/blogmywiki/2020/08/microbit-computing-fundamentals/
Code can also be found here: https://github.com/blogmywiki/microbit-ps2-keyboard


Wow, As someone who has wrriten software for keyboard to communicate with PC’s in the past (205+ years ago) I know just how complex the full interface is.
To light the LED’s you are going to have to emulate the full protocol as the Keyboard “Clocks” in data from the host when the host signals it wants to send.
not sure if Python on the microbit will be fast enough for that though, I am tempted to try it on a Pi though (I have already written an AVR keyboard interface for fun)
Good luck
a w blokach jak zrobić
Hi there – it may be possible to do this with the Advanced > Serial blocks in MakeCode but I’ve not had time to try this yet.
Hey there! I’ve copied the code into the MakeCode section, but it doesn’t work. It has 55 problems.
Hi Benjamin – it’s not a MakeCode or MakeCode Python program, it’s a MicroPython program, so you’ll need to use Mu, or one of the online official micro:bit Python editors like https://python.microbit.org/v/beta
best wishes