IMPORTANT UPDATE – July 2015: BBC Radio addresses have changed – see here for more info. And Fip has moved to http://audio.scdn.arkena.com/11016/fip-midfi128.mp3
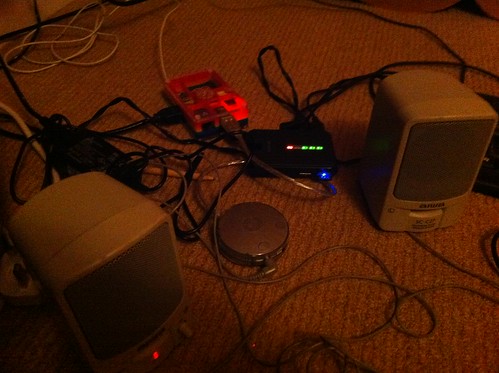
Continuing the theme of making something useful out of unloved gadgets lying round the house, today I started to build some sort of audio device from another unused Raspberry Pi and an ancient Griffin iMic – this was a silver hockey-puck shaped USB audio IO device that I bought donkeys years ago for my Bondi Blue iMac. I also found some old powered PC speakers that had been in the loft, and a random old power supply.
I’m not sure if I’m eventually going to make an internet radio or something to stream audio from some networked storage yet – the first step was to get some sound out.
It’s a good idea to use a USB audio device for music on the Pi, as the onboard audio jack is not good quality.
I started by following the advice here: http://computers.tutsplus.com/articles/using-a-usb-audio-device-with-a-raspberry-pi–mac-55876
In short, I copied a WAV file onto my Pi’s desktop, and rebooted the Pi up with the Griffin iMic plugged into the top USB socket (I tried it in a powered USB hub and it didn’t work). I then edited an audio config file by typing
sudo nano /etc/modprobe.d/alsa-base.conf
at the command line, and commenting out the line
options snd-usb-audio index=-2
by putting a hash sign at the front:
# options snd-usb-audio index=-2
and saving it by pressing ctrl-x and y to over-write the file.
I plugged my PC speakers into the mains, plugged the jack into the iMic’s audio out socket, then rebooted the Pi, navigated to the desktop at the command line and typed
aplay TheDaysWeMade.wav
and sweet music came forth! Didn’t even need to hunt for any drivers. (I do love the Paper Aeroplanes, but I need to get some more music on here soon!)
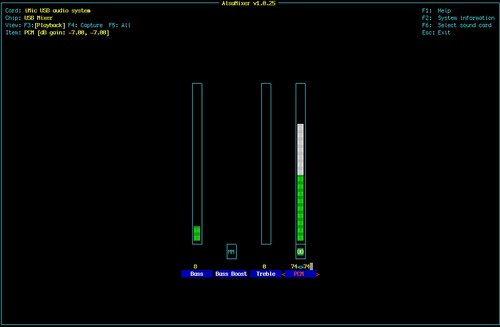
You can even turn the volume up at the command line by typing alsamixer
Next steps – playing MP3 files, internet radio (I’ve asked Santa for a PiFace display control gizmo – could be the start of a beautiful but of gadget making!), who knows?
I just made a quick and dirty command line internet radio that plays BBC Radio 6music and Radio 4 by installing mpd and mpc:
sudo apt-get install mpc mpd
and then adding the BBC 6music like this:
mpc add http://bbcmedia.ic.llnwd.net/stream/bbcmedia_intl_lc_6music_p?s=1365376386&e=1365390786&h=de40a9915206c4402c73e3766dc3fec0
adding BBC Radio 4 by typing
mpc add http://bbcmedia.ic.llnwd.net/stream/bbcmedia_intl_lc_radio4_p?s=1365376126&e=1365390526&h=ed9a0642b30c422b07fbcd8683c52335
and then typing
mpc play 1
for 6music (the first one I added), mpc play 2 plays Radio 4. There are more BBC radio stations listed here.
Plenty more to do – get it to run at boot, controls, displays, a pretty box – but amazing how quickly you can turn a pile of rubbish into something useful like an internet radio.
UPDATE
I’ve since written up a very simple Raspberry Pi internet radio here, and started working on a fancier one with an LCD display and buttons for volume and station changing.


Pingback: Internet radio project using a #RaspberryPi made out of discarded tech | Raspberry PiPod
Thanks for the writeup: I had previously made my own Raspberry Pi internet radio station tuner thingy as well. But being new to linux I really had a hard time figuring out what media player to use. I settled on MPlayer, but it seemed like a lot more effort than was needed. Your direction to use mpd & mcp (and alsamixer) was most appreciated: I’m streaming some stuff right now ;)
FYI, I use a MakeyMakey as my input device, it worked pretty well ;) If you have interest, you can see my results here : http://www.akeric.com/blog/?p=2043
Not trying to promote it on your blog, I just figured you may find it interesting too ;)
Superb – I assume you’re working on a banana-controlled radio? And if not, why not? (Raspberries may go mushy too quickly).