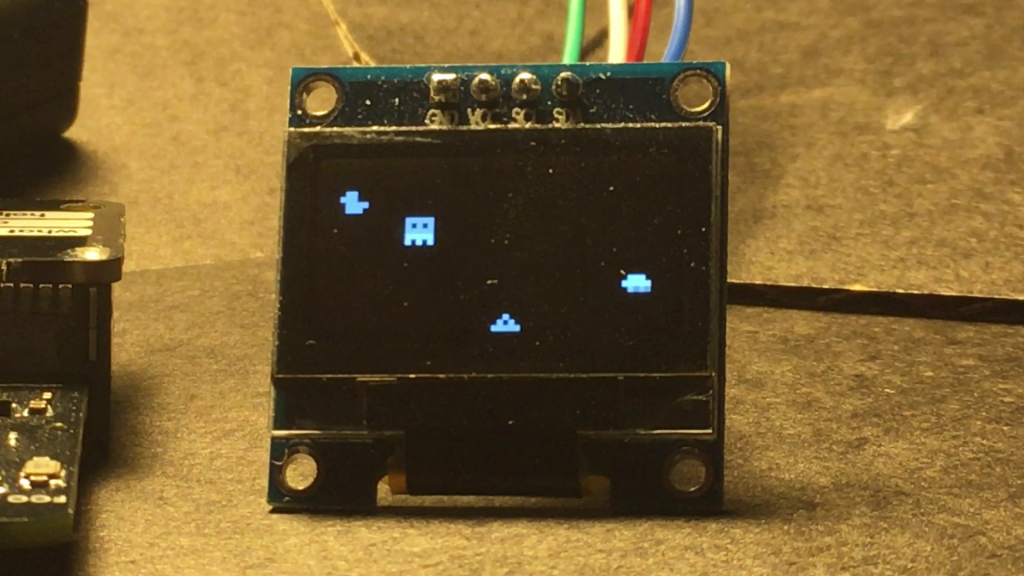
I’ve managed to get a simple game working on my micro:bit OLED display, and I ditched the breadboard at the same time, meaning that it should be possible to build this into a small case. I may even add some external buttons and perhaps some sound?
Here’s what I used:
- A micro:bit
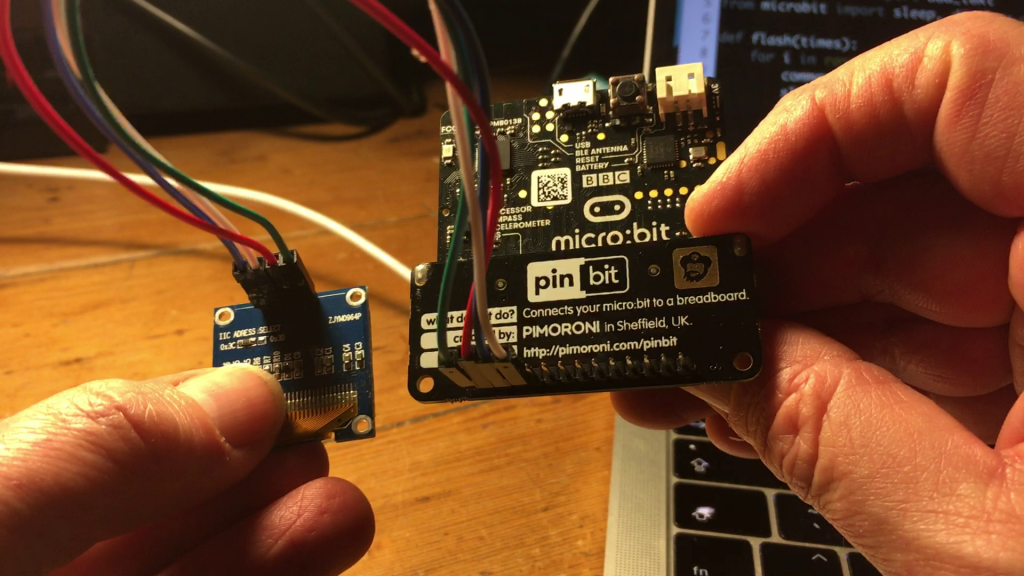
- A Pimoroni pin:bit edge connector (the Adafruit DragonTail would work equally well, with the Kitronik one you have to solder extra pins to get to the i2c interface pins).
- 4 female to female jumper wires
- A cheap 0.96″ SSD1306 OLED display
- The online Python editor for micro:bit
- Some of these Python libraries: https://github.com/fizban99/microbit_ssd1306 – ssd1306, _stamp, _img and _text
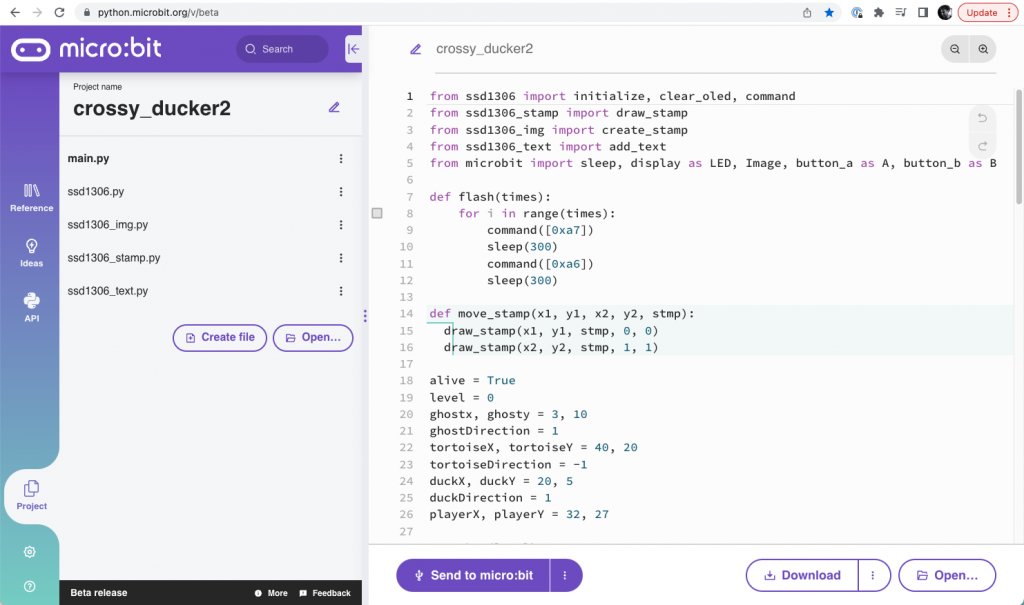
I added the extra Python modules using the new micro:bit Python editor’s feature to add extra files to your projects. It supports WebUSB, so using a recent version of Chrome you can flash Python projects straight onto your micro:bit without having to drag and drop HEX files.
Connecting the OLED is easy, especially if you have the well-labelled pin:bit – connect micro:bit 3v to VCC on the display, GND to GND, micro:bit pin 19 SCL (serial clock) to the display’s SCL pin and micro:bit pin 20 (SDA / serial data) to the SDA pin on the display.
The program works by creating ‘stamps’ – like crude sprites – for 3 hazards (a duck, a ghost and a tortoise), all using graphics from the micro:bit’s own built-in 5×5 icons. This is a neat touch that avoids having to create your own bitmap graphics.
You move left and right using A and B buttons, and press A+B together to move forward – you can’t move backwards! When you reach the top you level up, complete 10 levels to win.
There was no function I could find in the Python modules to invert the screen, which is possible if you know what control codes to send, so I added the flash() function which will flash the screen any number of times by making the screen negative then positive quickly in succession. I use this effect when you level up, win or lose.
The levels don’t get harder – it’s running as fast as it can, so I can’t speed it up. To make it more challenging I might add more hazards or slow the player down in some way. Adding sound would also be a logical next step, along with building into a small case, perhaps with some external buttons.
My main Python game program is here, and you can download the whole project HEX file here.
from ssd1306 import initialize, clear_oled, command
from ssd1306_stamp import draw_stamp
from ssd1306_img import create_stamp
from ssd1306_text import add_text
from microbit import sleep, display as LED, Image, button_a as A, button_b as B

def flash(times):
    for i in range(times):
        command([0xa7])
        sleep(300)
        command([0xa6])
        sleep(300)

def move_stamp(x1, y1, x2, y2, stmp):
  draw_stamp(x1, y1, stmp, 0, 0)
  draw_stamp(x2, y2, stmp, 1, 1)

alive = True
level = 0
ghostx, ghosty = 3, 10
ghostDirection = 1
tortoiseX, tortoiseY = 40, 20
tortoiseDirection = -1
duckX, duckY = 20, 5
duckDirection = 1
playerX, playerY = 32, 27

LED.show(level)
initialize()
clear_oled()
ghost = create_stamp(Image.GHOST)
tortoise = create_stamp(Image.TORTOISE)
duck = create_stamp(Image.DUCK)
player = create_stamp(Image.TRIANGLE)
draw_stamp(ghostx, ghosty, ghost, 1)
draw_stamp(tortoiseX, tortoiseY, tortoise, 1)
draw_stamp(duckX, duckY, duck, 1)
draw_stamp(playerX, playerY, player, 1)

while alive:
    oldGhostX = ghostx
    ghostx += ghostDirection
    if ghostx > 58:
        ghostDirection = -1
    if ghostx < 3:
        ghostDirection = 1
    move_stamp(oldGhostX, ghosty, ghostx, ghosty, ghost)

    oldTortoiseX = tortoiseX
    tortoiseX += tortoiseDirection
    if tortoiseX > 58:
        tortoiseDirection = -1
    if tortoiseX < 3:
        tortoiseDirection = 1
    move_stamp(oldTortoiseX, tortoiseY, tortoiseX, tortoiseY, tortoise)

    oldDuckX = duckX
    duckX += duckDirection
    if duckX > 58:
        duckDirection = -1
    if duckX < 3:
        duckDirection = 1
    move_stamp(oldDuckX, duckY, duckX, duckY, duck)

    oldPlayerX = playerX
    playerX = playerX - 1 if (A.is_pressed() and playerX > 0) else playerX
    playerX = playerX + 1 if (B.is_pressed() and playerX < 58) else playerX
    oldPlayerY = playerY
    playerY = playerY - 1 if (A.is_pressed() and B.is_pressed() and playerY > 0) else playerY

    if oldPlayerX != playerX or oldPlayerY != playerY:
        move_stamp(oldPlayerX, oldPlayerY, playerX, playerY, player)

# have we reached the top?
    if playerY == 1:
        level = level + 1
        LED.show(level)
        flash(1)
        draw_stamp(playerX, playerY, player, 0)
        playerX, playerY = 32, 27
        draw_stamp(playerX, playerY, player, 1)

# have we won?
    if level == 10:
        alive = False

# have we hit anything?
    if ghostx-3 <= playerX <= ghostx+3 and ghosty-3 <= playerY <= ghosty+3 \
    or tortoiseX-3 <= playerX <= tortoiseX+3 and tortoiseY-3 <= playerY <= tortoiseY+3 \
    or duckX-3 <= playerX <= duckX+3 and duckY-3 <= playerY <= duckY+3:
        alive = False

if level == 10:
    LED.show(Image.HAPPY)
    clear_oled()
    add_text(3, 1, 'You win!')
    flash(5)
else:
    LED.show(Image.SKULL)
    clear_oled()
    add_text(2, 1, 'Game over!')
    flash(5)
Beta Python editor update
Why not try the new micro:bit Python editor (in Beta as at 22 June 2022) with this code and see how you like it? Download the HEX file from further up this page and drag and drop it onto the editor to load all the files:


Hi, I followed your tutorial and got the game to work. I tried to make it more complicated by making the ghost move faster.
The result was a trailing ghost :
https://www.youtube.com/watch?v=T3bnkqbmJaM&feature=emb_title#
http://blogs.brighton.ac.uk/ccdigifab/2020/03/15/embedded-programming-mircobit-oled-game/
Is this what you were referring to when you mention “it’s running as fast as it can”?
Thanks – Christy
Hi Christy – that’s awesome! I don’t know why your ghost is, er, ghosting, but I am going to have a play with your code. It would be cool if we could create some more little micro:bit games for OLED displays, they’re relatively inexpensive and very easy to connect if you have a breakout board.
best wishes
Giles
This is fantastic. I’m teaching middle school students how to use the microbit, and I’d love to do this with them, but I can’t figure out how to get the libraries from GitHub to the Micro:Bit Python editor and/or onto the Micro:Bit. I just get an error message flashing when I try to copy your code to the python editor and flash the Micro:Bit. Any advice?
Hi Don – glad you like this and I’m delighted you’re teaching with the micro:bit!
It’s been a while since I played with the OLED display so let me try and remember!
What is the error message you’re getting?
I’m guessing the problem is caused by missing libraries, so here are a few things to try:
First download and flash the whole crossy_ducker2.hex file if you haven’t done so already in order to check the hardware.
Next, you can drag that HEX file into the online Python editor at https://python.microbit.org/ and view it that way. Then click on the load/save icon and you should see listed under ‘project files’ 5 Python files, the main program and 4 library files that contain various drivers for the display:
crossy_ducker2 (main.py)
ssd1306.py
ssd1306_stamp.py
ssd1306_img.py
ssd1306_text.py
Hope that helps! Let me know how you get on.