PLEASE NOTE THIS POST IS NOW OUT-OF-DATE. The Go Free Range printer is now at http://exciting.io/printer/ – I’ve not updated my Raspberry Pi code because my own thermal printer is broken, and will only spew out lines saying ‘CP437′ – if anyone knows of any possible fix, I’d be very grateful.
I love the idea of the Berg Little Printer, but it’s expensive: a self-contained box that lets you rip & read internetty stuff such as weather, messages, diary events, travel news, whatever anyone can think of. I already have a thermal printer I used for my Little Box of Poems, so I decided to make an open source GoFreeRange internet printer instead. The GoFreeRange printer normally uses an Arduino, but as I have the wrong kind of Arduino, I wanted to use a Raspberry Pi instead.
You can read more about little thermal internet printers in this Wired article from 2012.
Here’s roughly how I did it (more details to follow):
- I made a fresh Raspberry Pi SD card using the normal default Raspbian Wheezy disk image: http://www.raspberrypi.org/downloads
- I got the Raspberry Pi on t’internet using a wifi dongle, setting it up using the GUI wifi tool on the desktop, and enabled SSH using the raspi-config tool so I could log into it from a computer with no keyboard or mouse connected to the Pi. I also used the raspi-config tool to expand the disk image to fill the SD card and update the system software. I did not get the Pi to boot into the graphical environment at startup, as I was going to be running it ‘headless’.
- I powered up my thermal printer and connected it to the Raspberry Pi in the same way I did with The Little Box of Poems. I put the Raspberry Pi and printer in an old washing tablet box.
- I followed Andrew Nicolaou’s instructions: https://github.com/andrewn/raspi-printer#readme - I changed the baud rate in cmdline.txt – this causes the Raspberry Pi to send its Linux boot messages to the printer as well as the video output. It’s a bit verbose – I got a yard of nerdy gubbins spewing out of my printer, but it worked. (You can disable this if you like, see below).
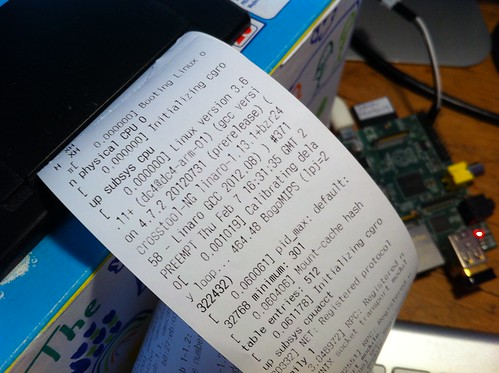
- Then, following Andrew’s instructions, I installed the python-serial library. I was a bit thrown about the bit where he says to save a file with your unique printer ID. I didn’t have one, and I didn’t know how to get one. It seemed like a bit of a catch-22, so eventually I just ran his printer.py script anyway.
- I then went to this page on my desktop computer and made a note of the printer URL: http://printer.gofreerange.com/my-printer – somehow the file with my unique printer ID seemed to get made in the process. I did a test print – it worked!
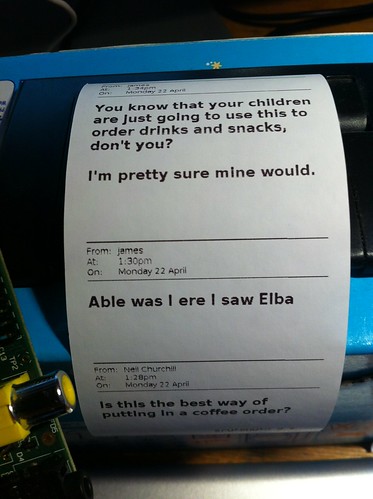
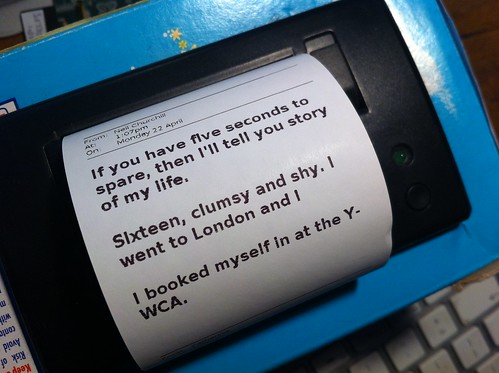
- Then, having saved my printer URL in a notepad, I signed up for Printer Mail – http://printer-mail.herokuapp.com/. This means people can send messages to my printer by filling in a simple form on a web page. Brilliant!
I had a couple of kernel panics – the Pi rebooted itself without warning. Not sure why, need to investigate. I’d like to make the boot-up text a bit less verbose too.
As I’m running the printer script manually, I need to follow Andrew’s instructions on getting it to run automatically when you boot the Pi up, and get all the gubbins in a self-contained box.
People sending my printer messages from anywhere they can get on the internet all over the world is pretty damn cool, but other possible uses include waking up to a daily printed weather report and printing paper bookmarks customised for the book you’re reading. Or print out anything you star in Google Reader. What’s that you say? Oh well, you get the idea.
The Raspberry Pi version of the GoFreeRange printer doesn’t have a button – it just prints anything that’s sent it. I have a big red shiny button in my printer box that’s going spare, but I quite like the idea that no human intervention is required, it just squirts out… stuff.
I’ve been away from my printer all day, working a late shift. Quite excited to see what might be on it when I get home…
What’s next?! Excited… very excited.
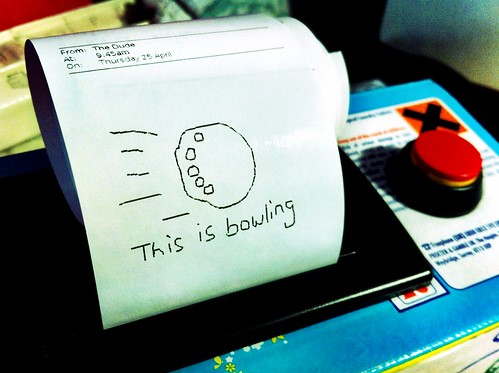
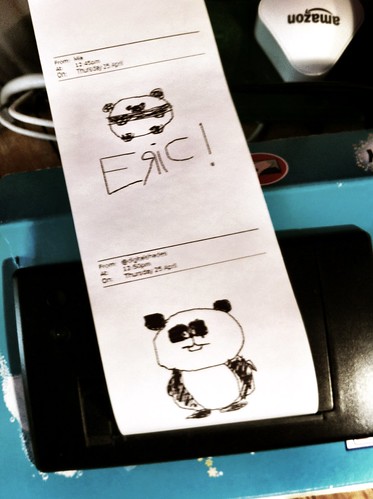
I also signed up for the Printer Paint app – so you can draw me a picture on your computer and send it to my little printer. I love pictures appearing on my printer – send me one! http://printer-paint.herokuapp.com/send/blogmywiki
Addendum:
I’ve now disabled serial port login on the Pi, to see if that helps with stability – following the instructions here: http://www.hobbytronics.co.uk/raspberry-pi-serial-port. I did this when I made the Little Box of Poems, and it seems like a good idea. You just comment out the last line of /etc/inittab, the one that reads
T0:23:respawn:/sbin/getty -L ttyAMA0 115200 vt100
by putting a # (hash) at the start of the line. There are also instructions there on how to stop the printer spewing out all the Linux boot-up info when you turn the Pi on.
Post-script to the addendum
I had trouble getting the Python script to run at startup. This is quite important, because I want my little printer to just start working – and stay working – when I plug it in. I don’t want to have to log in by SSH to start the script running.
I couldn’t get the update-rc.d method to work, so instead I edited /etc/rc.local by typing
sudo nano /etc/rc.local
and adding the line
sudo python /home/pi/raspi-printer/printer.py
to it. This seems to work.

Great Idea, will try it, too
Thanks for writing about your experience! We’re looking forward to seeing what you do next with the printer. Have you got any plans to write any content services?
Thanks James. I would love to write some content services, my head is buzzing a bit with possibilities at the moment. This is all very new to me, my coding isn’t very strong but I know a bit of PHP and Javascript. I also started playing with http://www.ifttt.com for the first time last night, I’d like to see if that can help me glue things together.
I would personally suggest Zapier over Ifftt – it seems to offer a few extra integrations.
My Arduino Ethernet has blown up that I bought directly from GFR, so I’ll probably invest in a replacement RPi that will be more stable. A shame really, after spending nearly $150.
Thanks, I’ll check out Zapier. A Raspberry Pi might seem like overkill for this project (it has HDMI video!), but I already had two Pis, and I think an Arduino plus ethernet board might have been more expensive.
Pingback: Making a GoFreeRange printer with a Raspberry Pi « adafruit industries blog
I,m in pc architecture and I need a simple raspberry pi project for the final and i wanted to turn my raspberry into a transmitter to print to my cannon mx 880 from my laptop ,but have know idea how to begin. Please help.
I,m a beginner so please take this in conncideration. Please
I’m afraid I can’t help with that – the little thermal printer I use is connected directly by serial pins, nothing like a USB printer on a network.
So my Pi just arrived!
Am I right in saying that I just need to connect the GND and RX pins from the printer to the Pi, and nothing more?
Would be awesome to get LEDs or something.
Thanks mate.
It really is simple to connect an Adafruit-type thermal printer to a Pi – I’ve done it slightly different ways depending on the application. The simplest way was for my Little Box of Poems: http://www.suppertime.co.uk/blogmywiki/2012/12/pi-poems/ – you just need to be really careful not to connect any pins back to the RX pin on the printer, as the Pi runs at 5v and may fry your printer.
Awesome guide! Thanks for doing the write-up! I’ve had the thermal printer staring me in the face for ages now, and after finding this, I now have it up and running and a few ideas as to how to make it do awesome things. I also had trouble with the update-rc.d method of setting up the printer as a daemon. Linux isn’t my forte, but I would be curious to know why this didn’t work. But thank you so much for putting in that little bit about how you got it to load on boot!
-dan
Hello! I can’t get the printer to work with my Raspberry Pi B+ using your instructions. Simply does not print, and giving no error messages. Do you have to make some special configuration for the B+?
Hi Lars – I’m afraid my code is out of date. The way the back-end of the GoFreeRange printer works has changed – the URL is different. Sadly because my own thermal printer has broken (it just prints out ‘CP437′ and nothing else) I haven’t updated the code. Have a look at http://exciting.io/printer/ for more recent info, or try the Google Group for the printer.
Thanks for your help! Seems like the hype is over though. No one on the whole interwebs is trying to make this work with the B+.
But I’m still having fun with the test print page!
Hi,
Don’t know if it’s helpful but if you still have the ‘CP437′ error… I had a similar problem, and found that it was that the printer wasn’t getting enough power.
j
Many thanks – my printer sprang back to life recently, so that may well explain it. Very grateful to you.